6 Steps to Enhance Your Audio with a Dolby API and Postman Monitors
While recently planning my mother’s birthday celebration, I was listening to a recording of birthday messages I wanted to give her as a gift. I realized the audio clip had a lot of background noise, and I would need to enhance the sound quality if I wanted to present it at the party. So, while simultaneously planning the big event, I turned to automation for an efficient solution: I delegated the audio enhancement to an API and used the Postman monitor to notify me upon completion.
Instead of wishing or waiting for better sound quality, follow these steps to make your own recordings clearer.
Step 1: Explore APIs
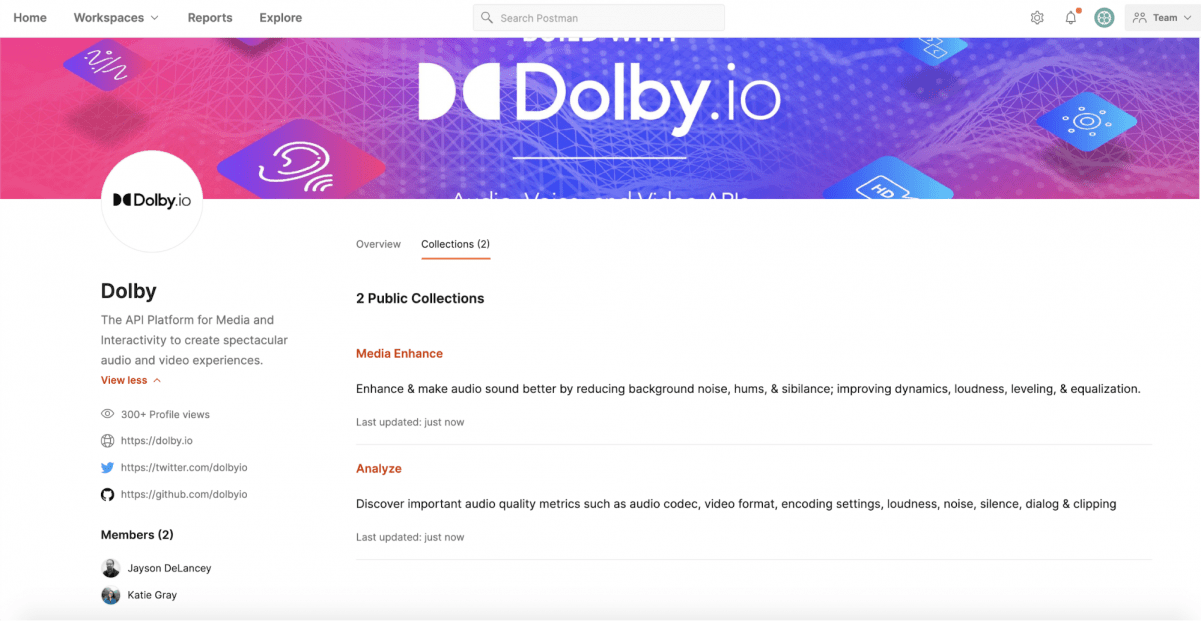
First, we need to look for APIs that can enhance audio. There is no better way to find the APIs we need than to look for them at the Postman Public API Network, which has a lot of Postman Collections and public workspaces that can help. Searching the network will reveal that the Dolby team has collections to analyze audio content and enhance the audio quality of our track:
Step 2: Fork collection
Click on Fork to fork the Media Enhance v1.1 collection from the Dolby.io public workspace.
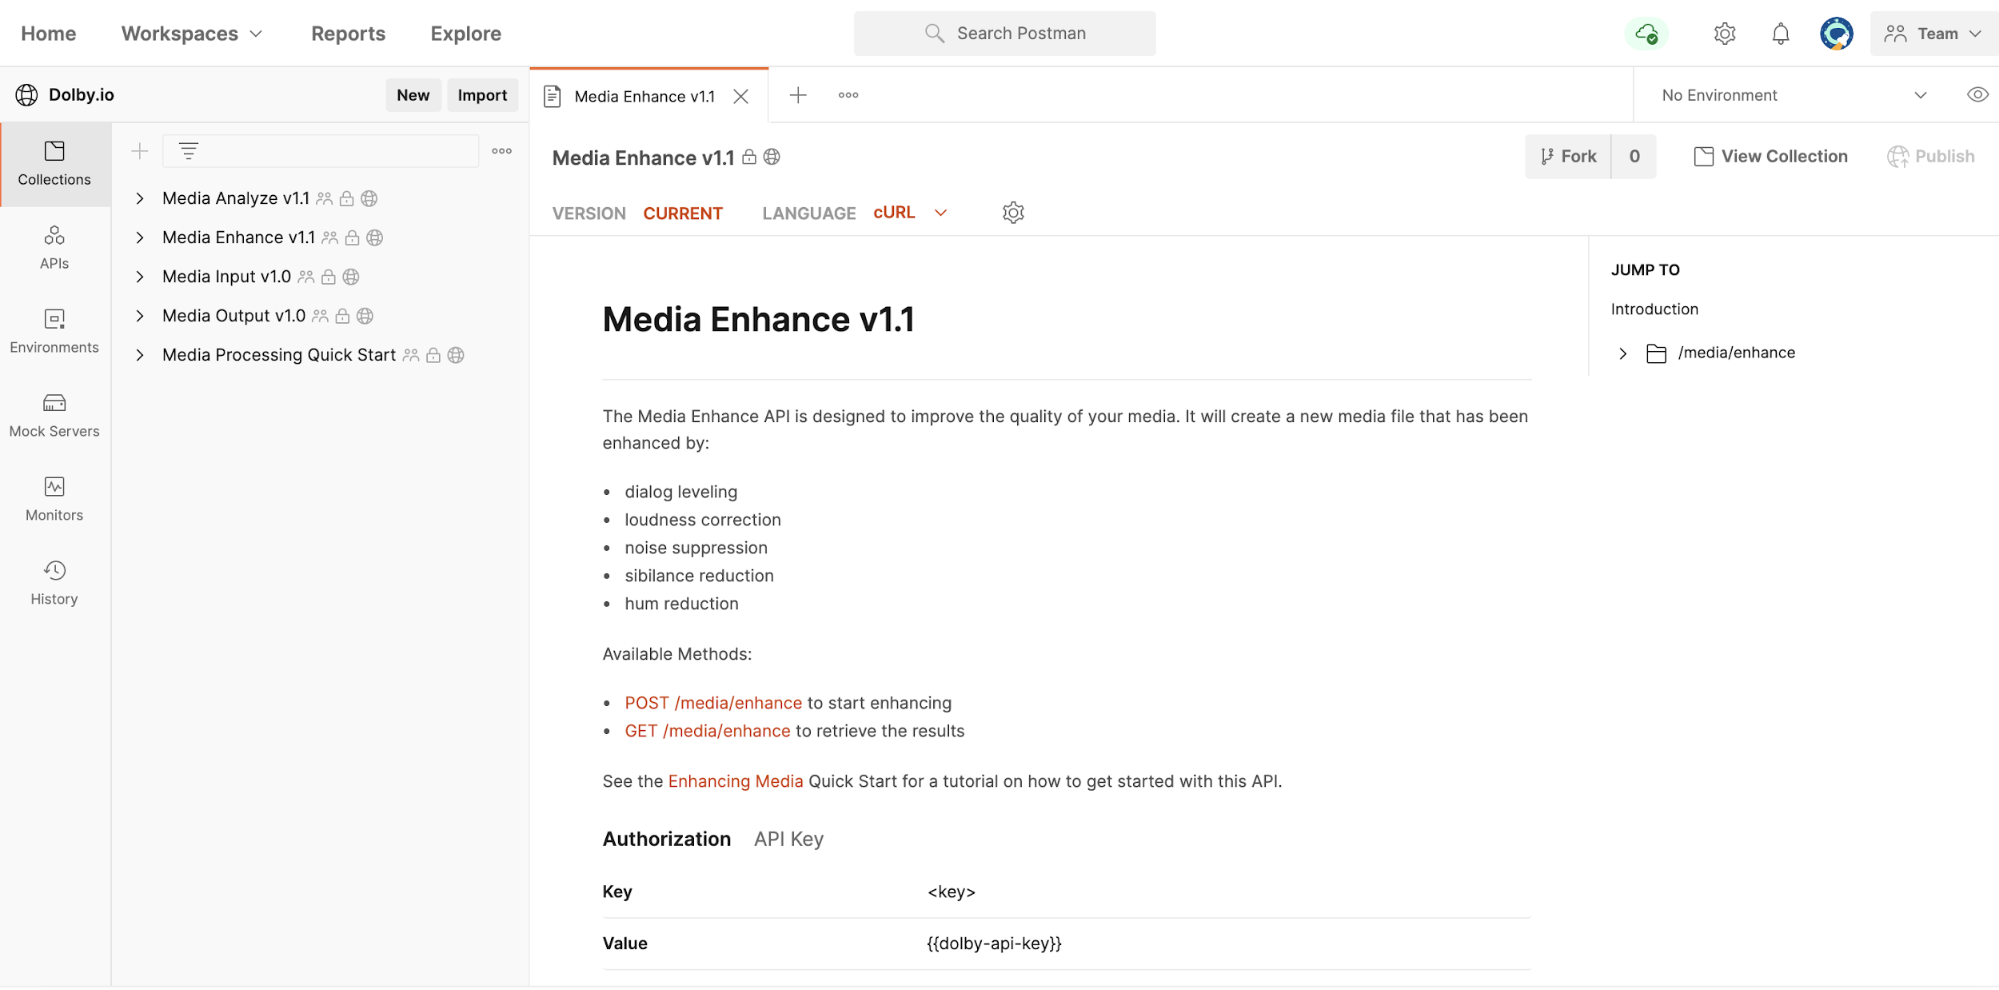
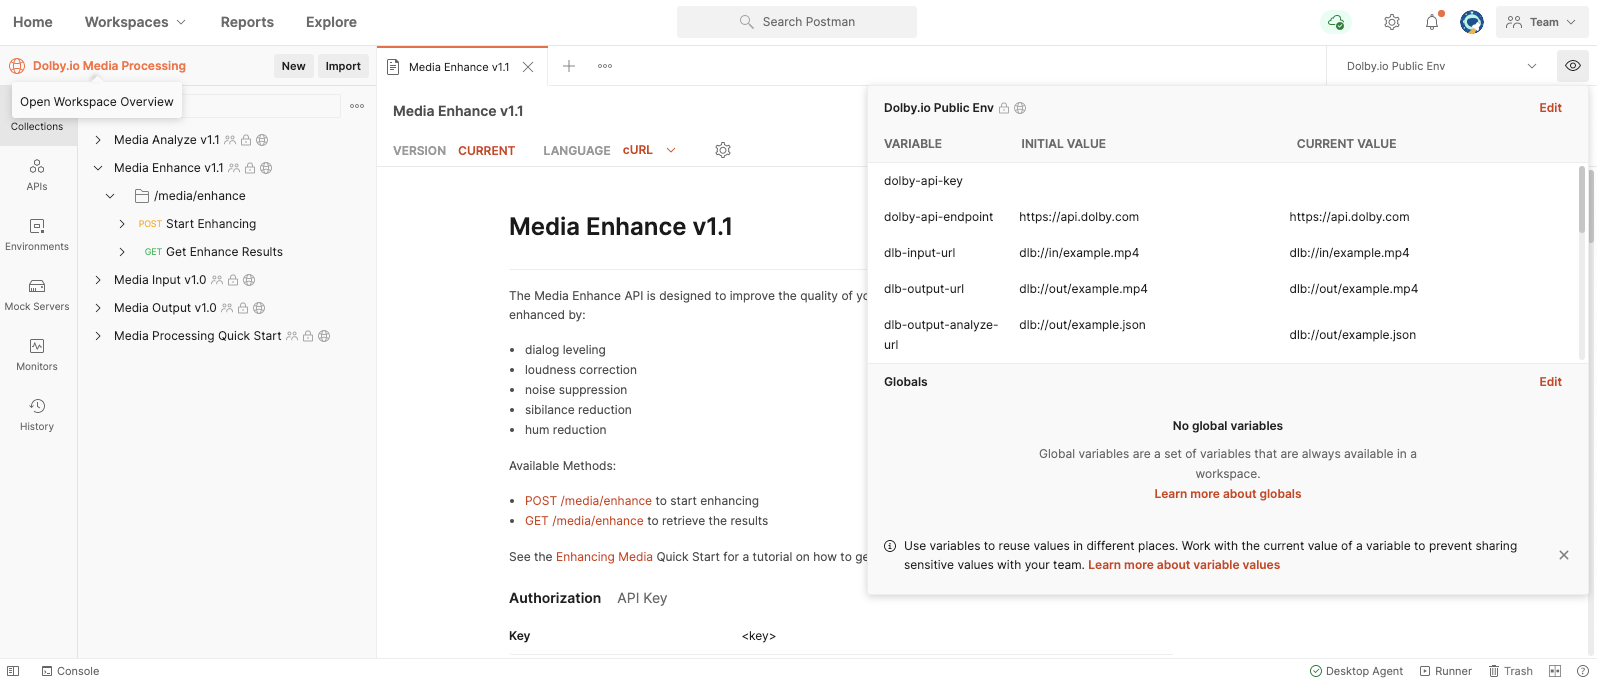
The collection uses variables that are defined in the Dolby.io Public Env environment. We can export the environment and import it into the workspace where we choose to fork the collection:

Step 3: Obtain API key
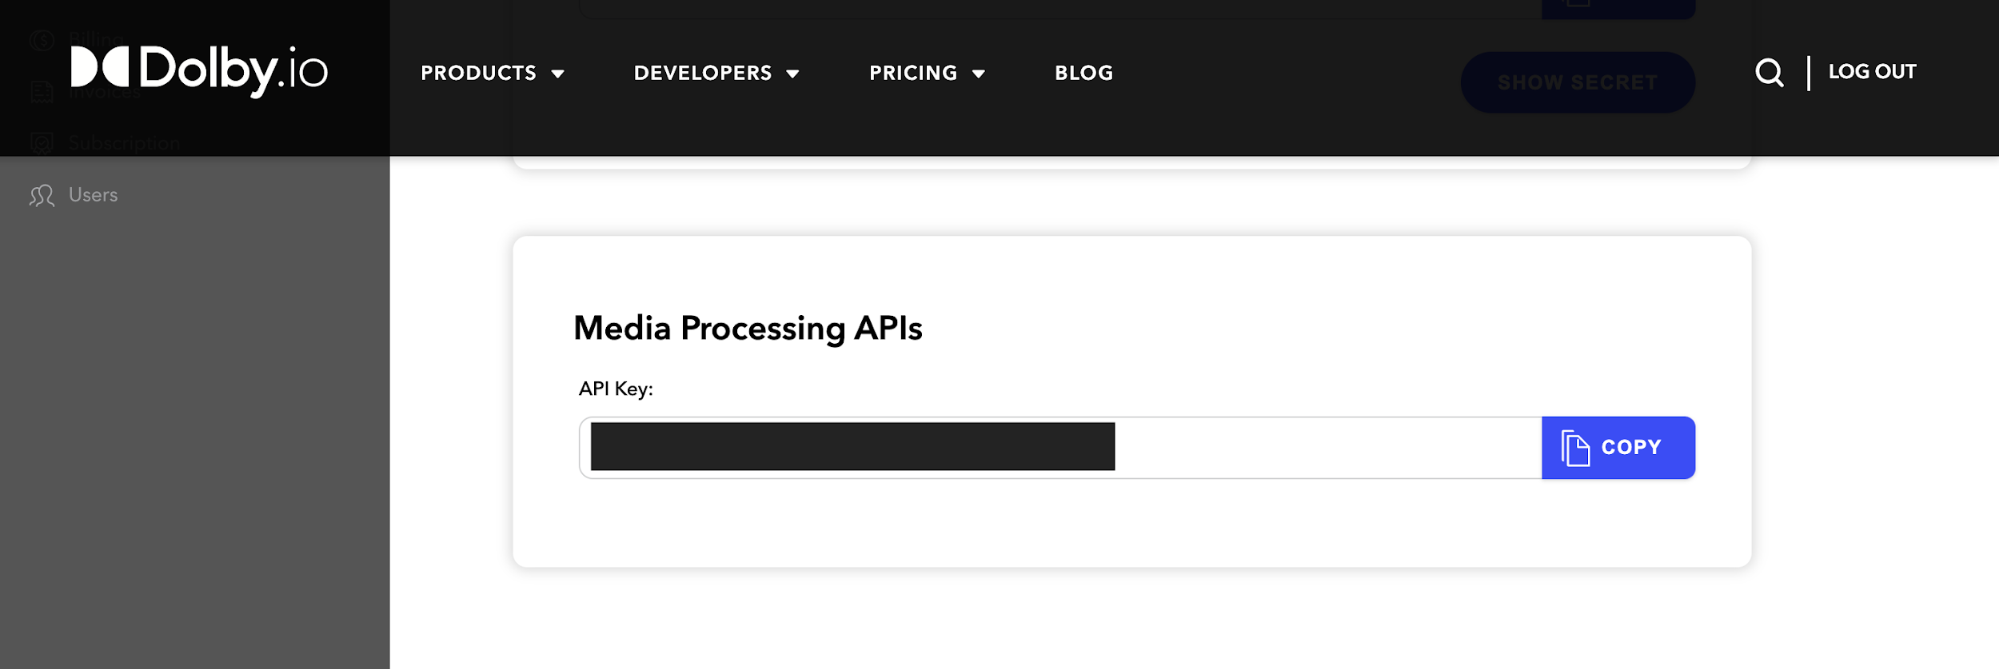
Before we can use the Dolby collection we must obtain an API key by signing up via the Dolby developer portal. Log in to your account and create an app. Under API keys, copy over the Media Processing APIs key:
Click on the eye icon to view environment variables, then paste the API key you copied into the CURRENT VALUE for dolby-api-key.
Note: CURRENT VALUE will not sync the key to the Postman servers. This is important so that the key is secret when the collection is shared.
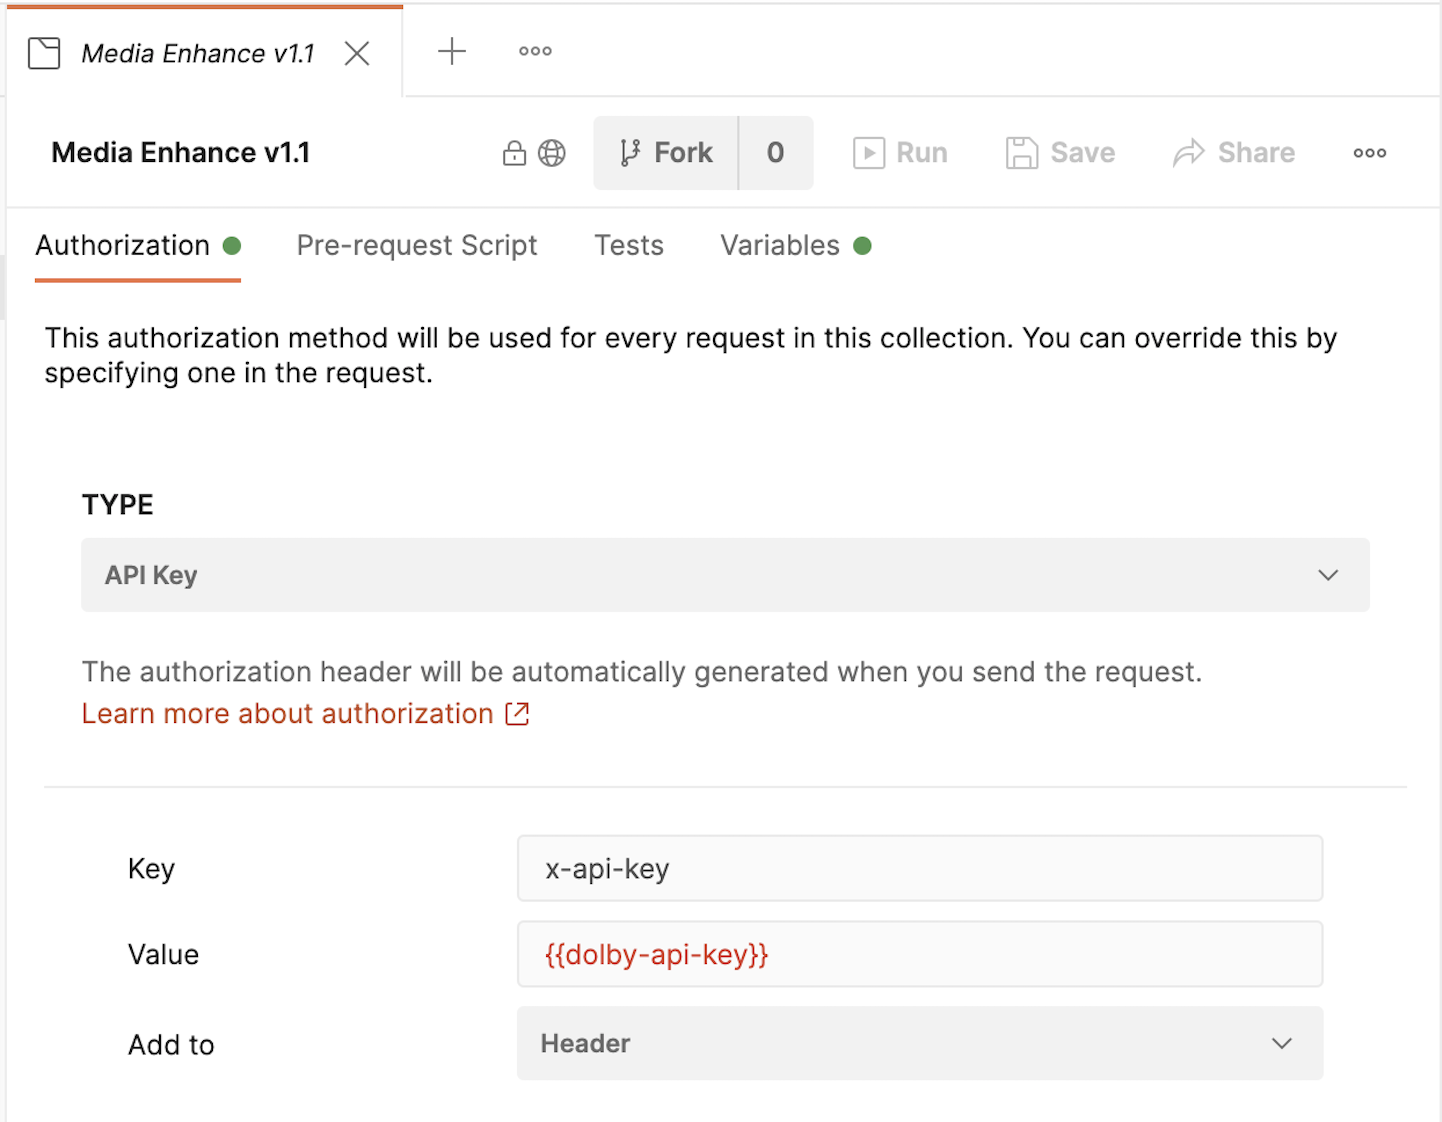
Click on Edit Collection, and under Authorization select type as an API key. Let’s use the environment variable we just set. Make sure you save changes.
Step 4: Start enhancing
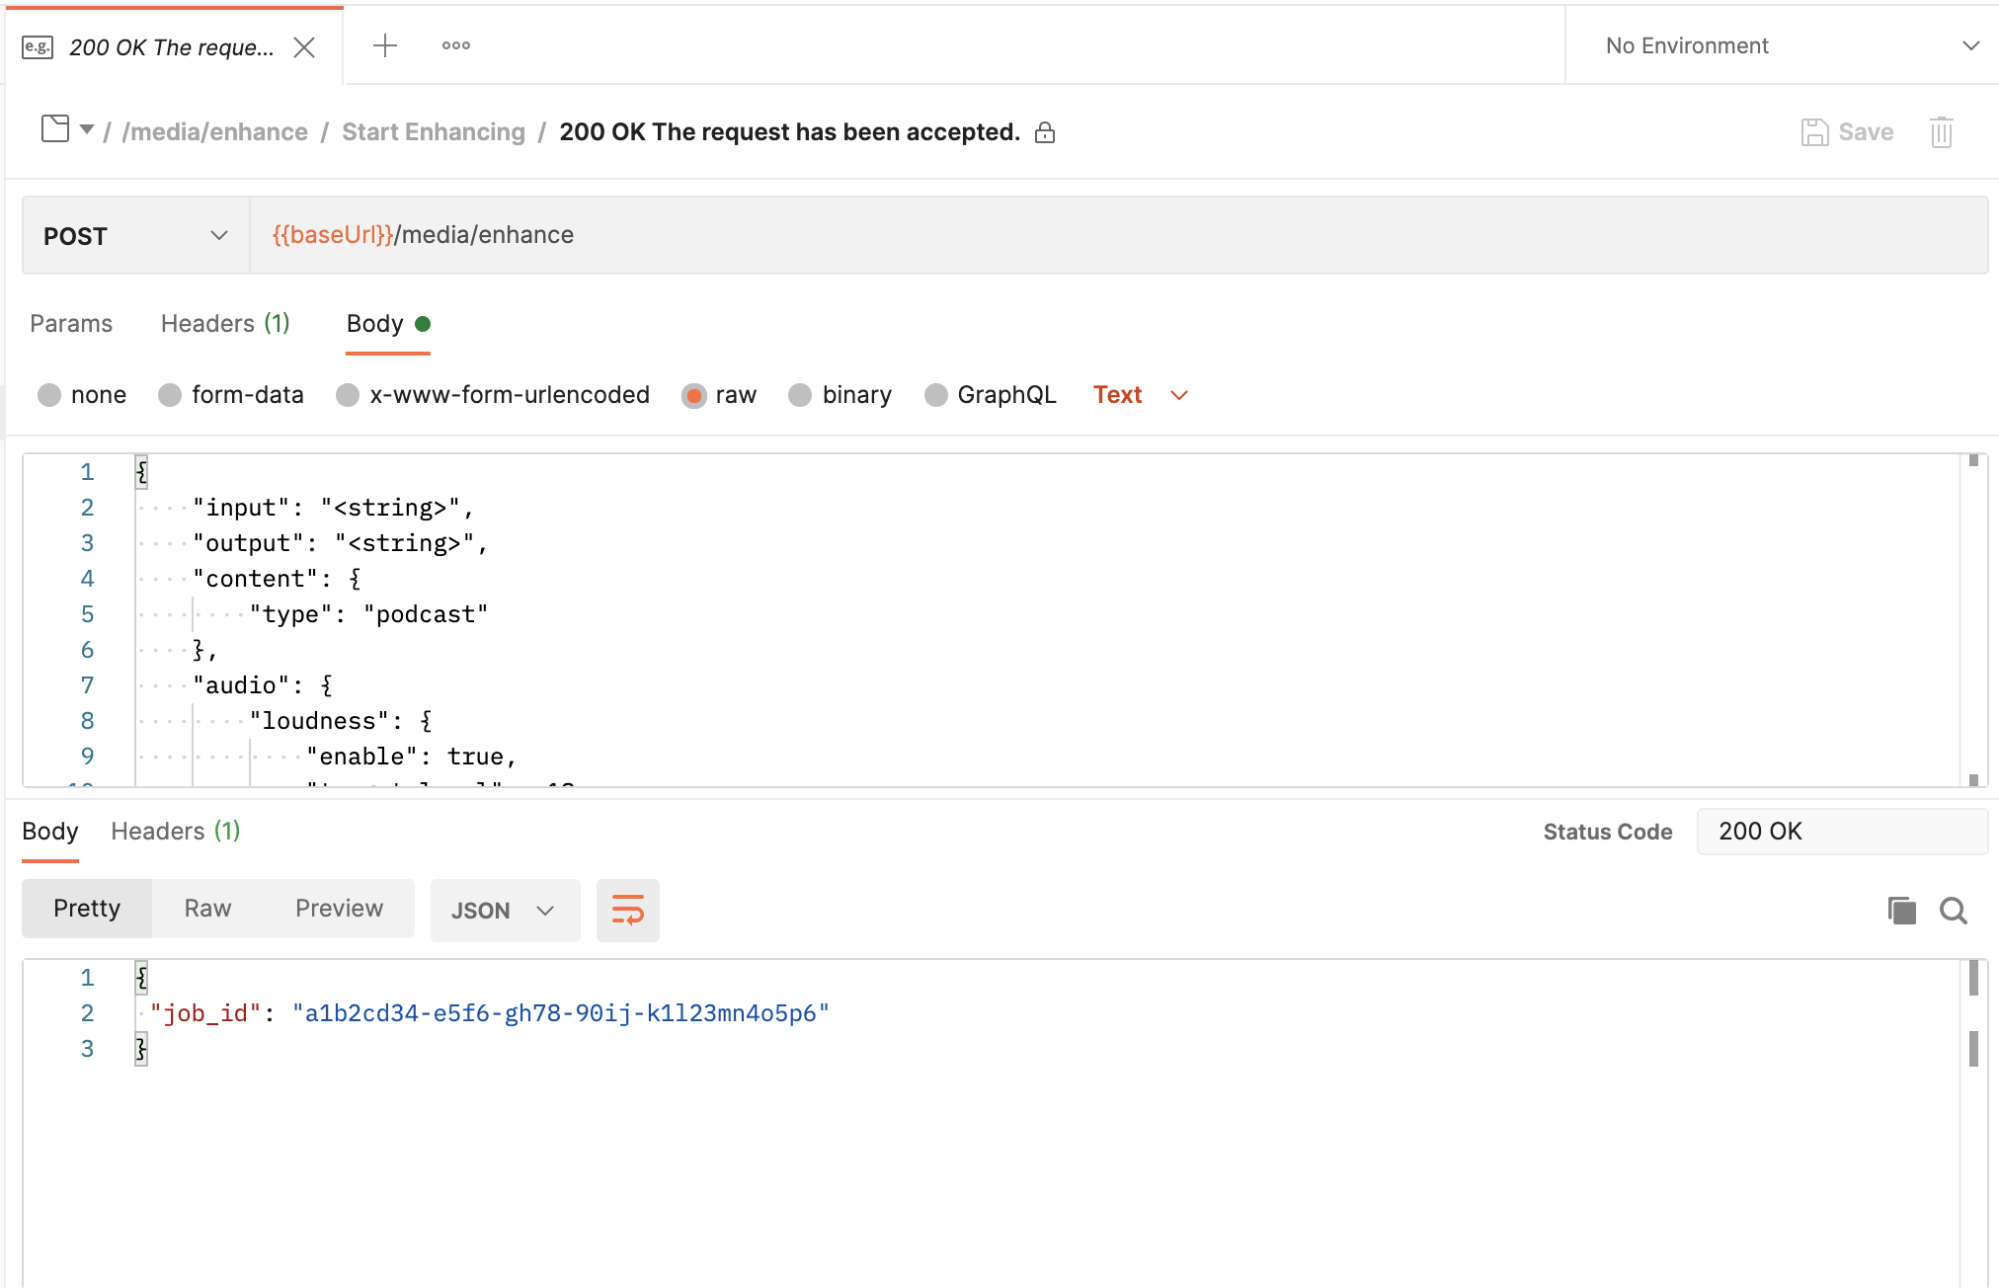
First, configure where the Dolby API will pick up the audio file. To do that, let’s send a POST request. We can follow the Example request and response for a 200 OK. We can configure input to point to an AWS bucket. You can learn more about input configuration here. This request accepts audio noise reduction, dynamics, and more. Sending this request returns a job ID, which we will use to track how much the audio has been enhanced.
Step 5: Check progress
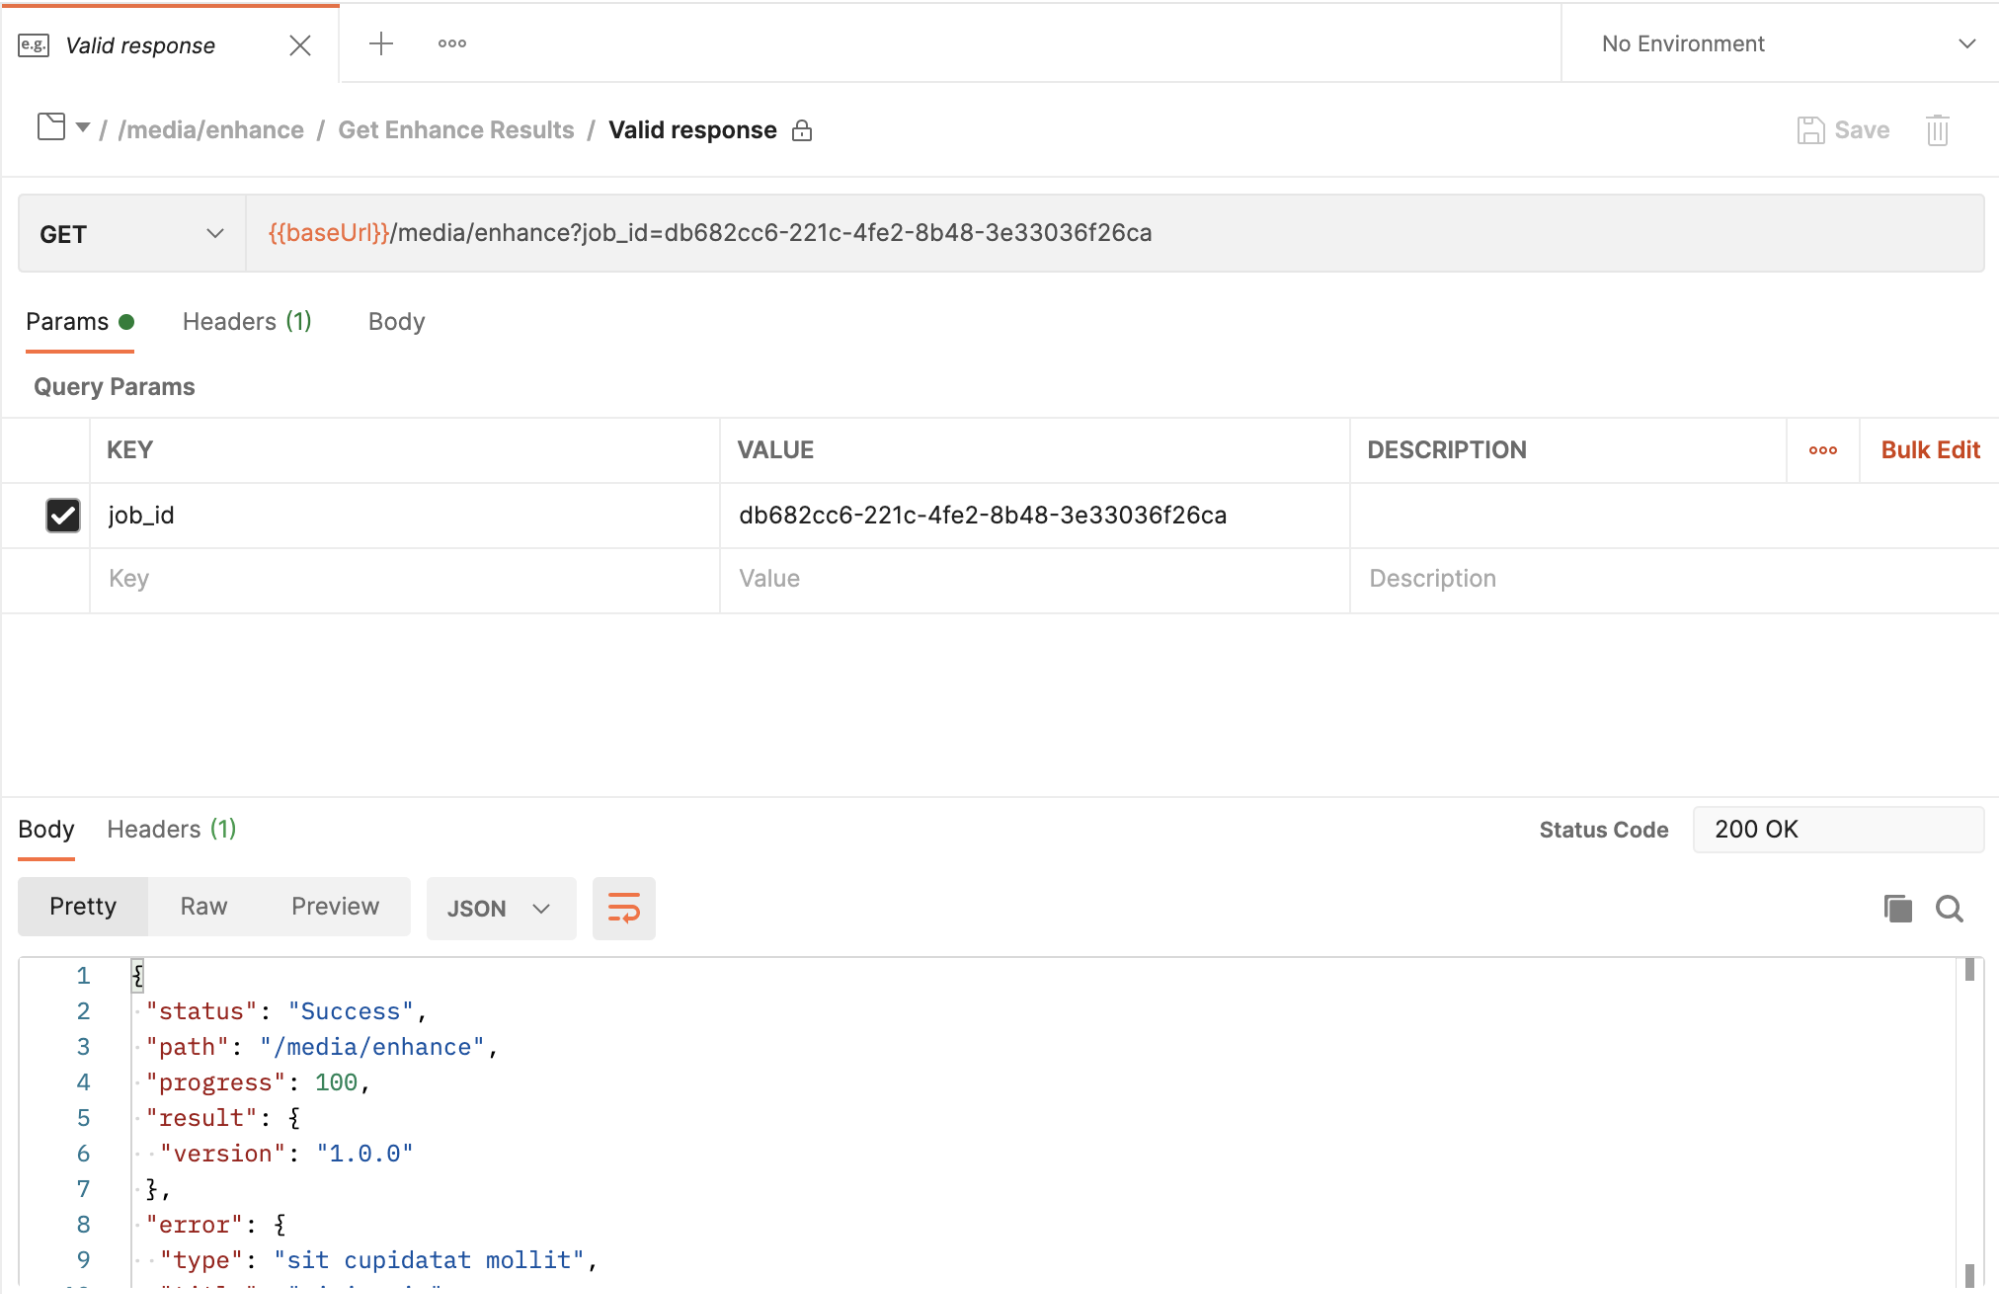
The GET request returns the progress made while processing. We can see the types of responses it might return under the Examples for that request. It will return the following for successful cases:
Enhancing the audio may take a while. Do you want to keep hitting the API manually all day? Probably not. Okay, let’s learn how to automate this process.
Step 6: Enter Postman monitor
To save you time, you want something that will hit the API for you and notify you of the result. Do a quick search on the Postman Learning Center to find information about the Postman monitor. Postman monitors allow us to monitor a collection. In case a test fails for any request in the collection, we can choose to be notified by email or use other options for integrations.
Related: What is API Monitoring?
First, we want to add tests to this request, which should fail only when processing is erroneous or complete. A monitor then notifies if a test fails. Since we need to be notified upon error or when processing is complete, let’s make sure the test passes only when the status is “Running,” as shown here:
pm.test("Status is Running", function () {
   pm.expect(pm.response.json().status).to.eql("Running");
});
Since we just want to monitor this single request, we must make sure that the GET request is the first request in the collection. Next, add the following to the Pre-request Script so that the same GET request runs repeatedly:
postman.setNextRequest(this.request.name);
In order to create a monitor for the collection, right-click on the collection and select Monitor Collection to set up the configuration details.
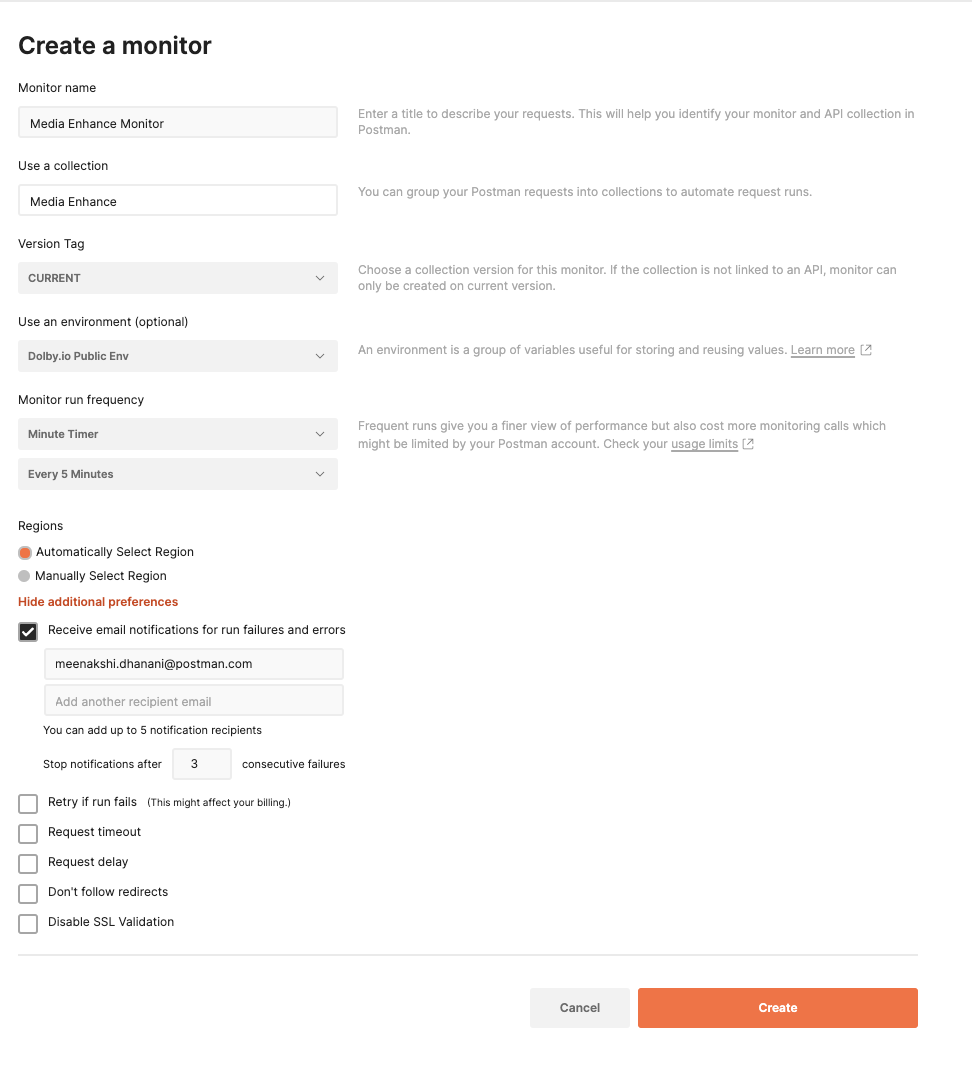
We can configure the monitor to run every five minutes and notify us by email upon failure. Simply add your email in the recipient list. We have chosen the environment as Dolby.io Public Env. Since the monitor runs on the Postman server, it will need to access the API key and the job ID variables. To enable that, we need to persist these as INITIAL VALUES in environment settings so that they can get synced with Postman servers and picked up by the monitor.
Click on the Web Dashboard for the monitor. Click on Run to start the monitor.
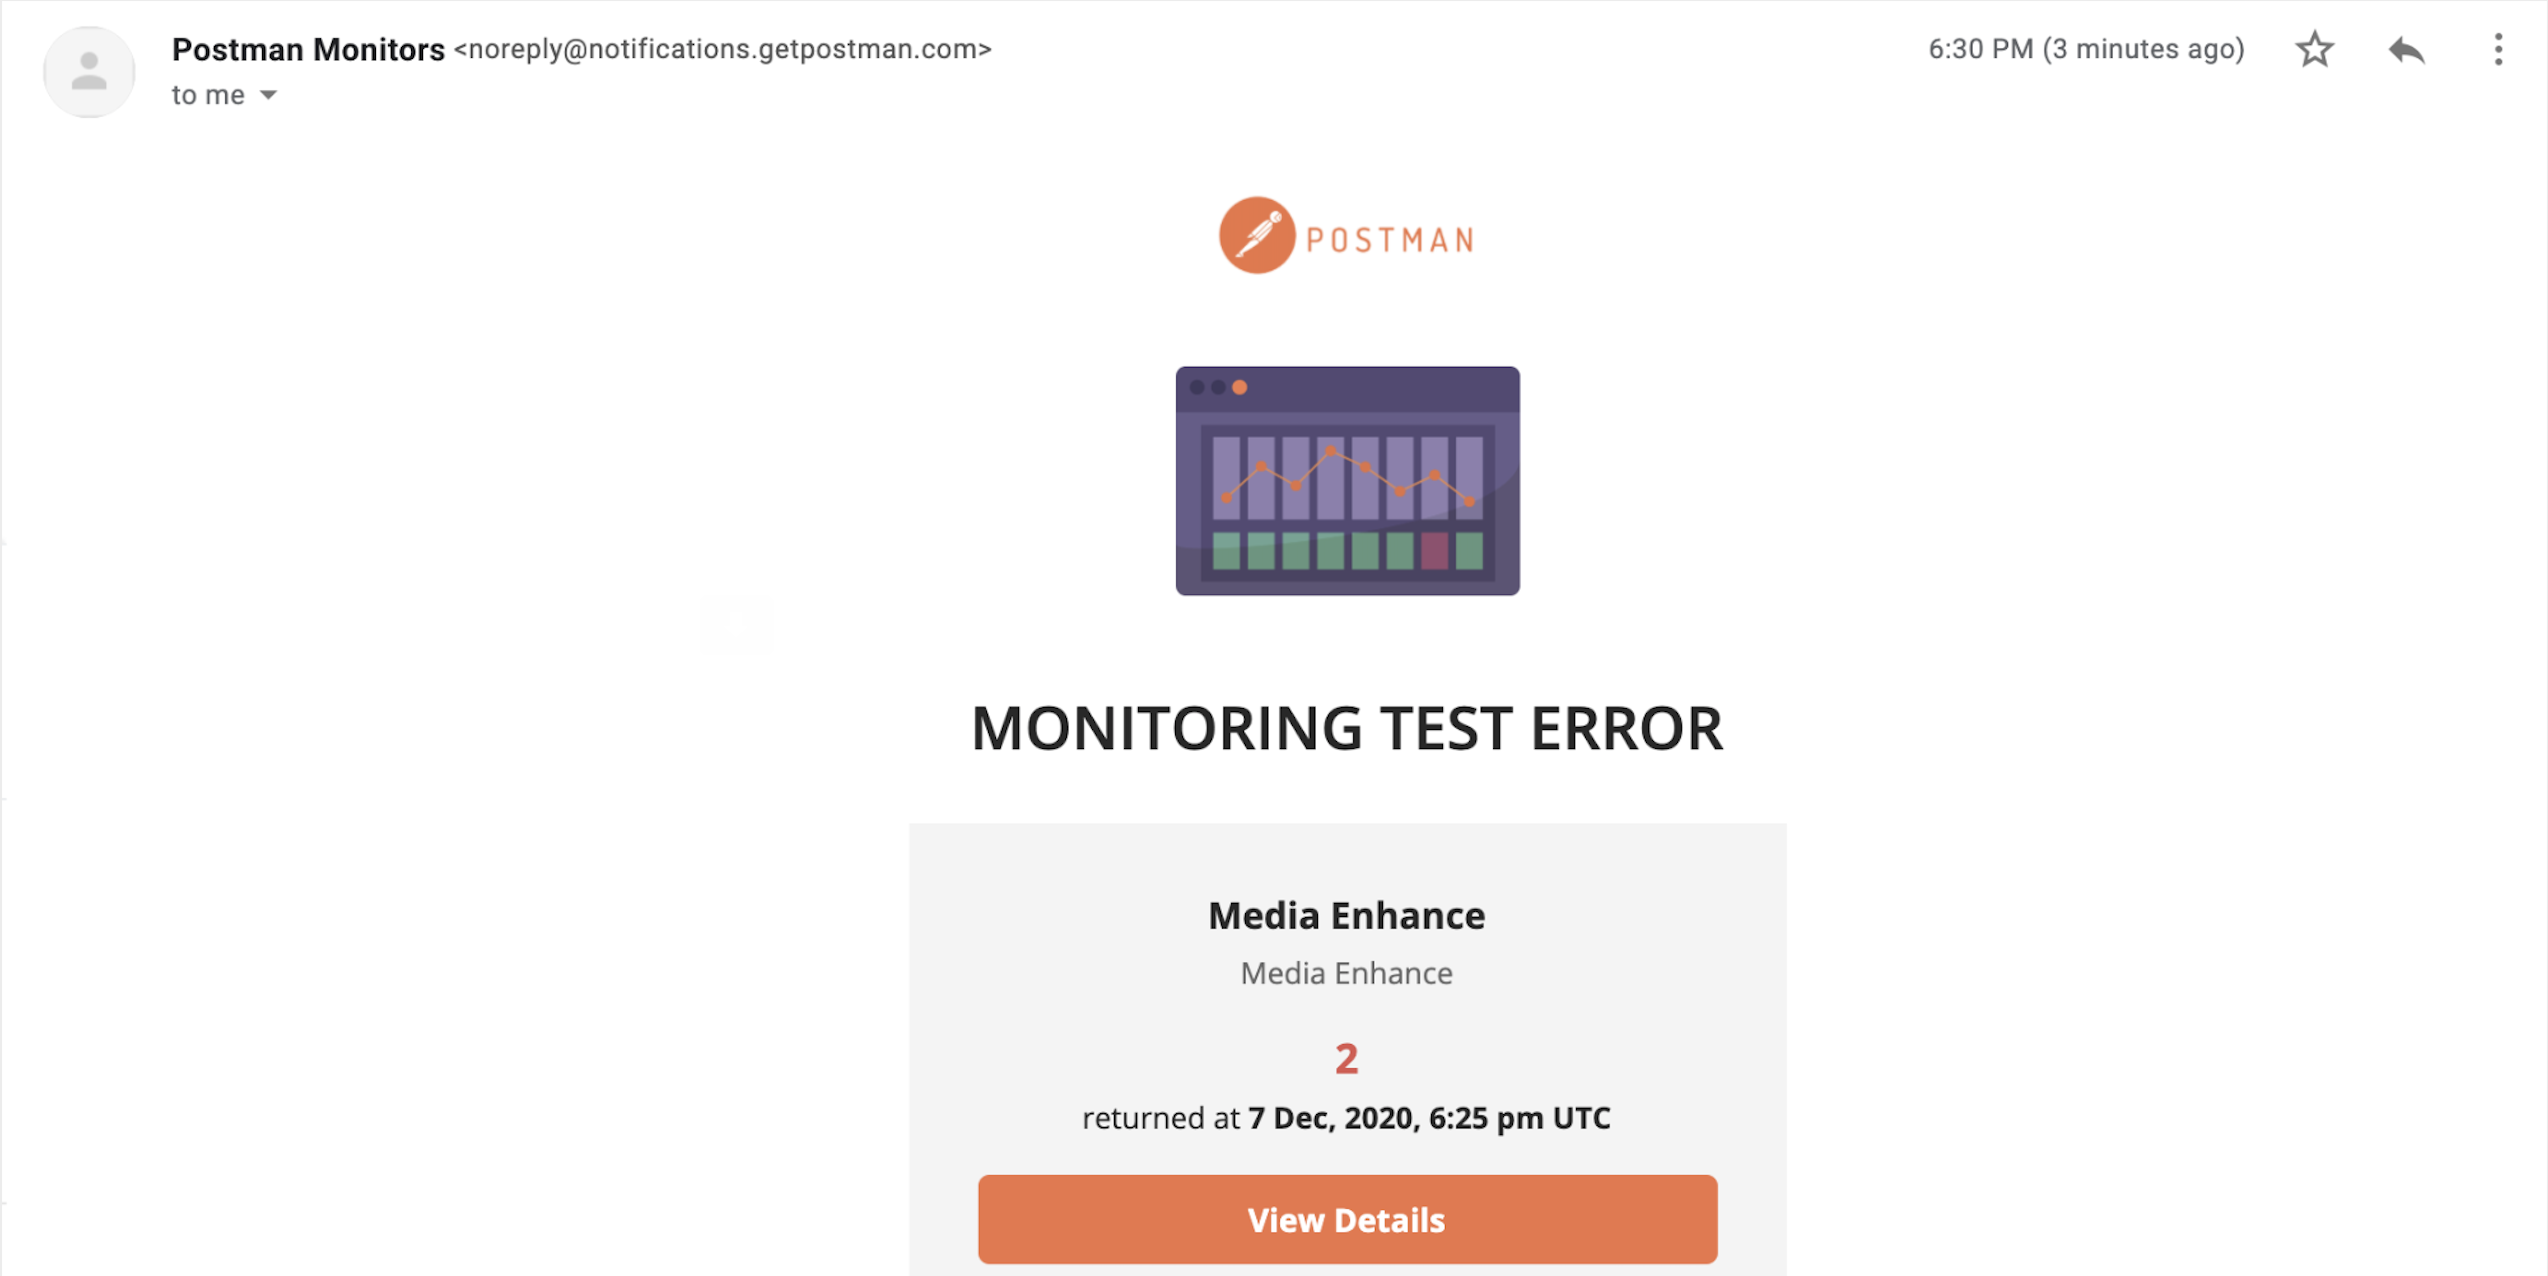
Now you can walk away to do your chores—don’t wait around, just let the monitor work its magic. Once processing completes, the test should fail and you should receive an email similar to the following:
API monitoring that’s music to our ears
In the end, the birthday messages for my mother sounded loud and clear because I used this method. I recommend you try out the Dolby APIs on Postman to improve the sound quality for your own recordings when you’re building a podcast, lecture, or other media. You can also explore the Analyze collection to learn more about audio-quality metrics.
In addition to exploring the Dolby Collection in this blog post, we’ve also learned about the Postman monitor—which is a simple workaround for moving away from a pull mechanism (polling the API manually) to a push mechanism (receiving a notification once a task is complete). Don’t forget to dive deeper into Postman Monitoring by visiting the Postman Learning Center here. And if you’re an audiophile, you might want to get your hands (and ears) on the “Daily Mix” with Postman Monitors and Spotify.

What do you think about this topic? Tell us in a comment below. You can also give product feedback through our Community forum and GitHub repository.