How HubSpot uses Postman and GitHub for real-time API updates


This is a guest post written by Hannah Seligson, senior developer advocate, and Rohit Panicker, API tooling engineer at HubSpot.
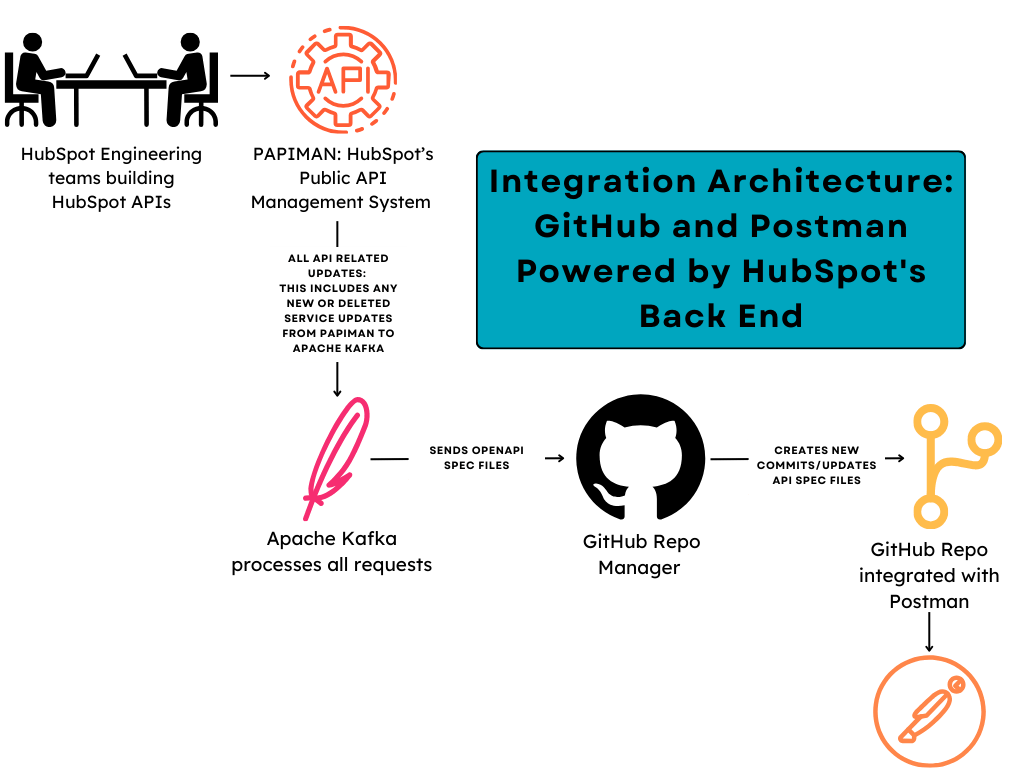
It can be challenging for organizations that offer public services to ensure that end-users have access to the latest version of them—especially if the company’s engineering culture empowers teams to deploy frequently. This used to be the case at HubSpot. Until HubSpot partnered with Postman, the HubSpot public APIs and Postman Collections were not well maintained or easily accessible, which resulted in a frustrated community and a poor developer experience.
To address these problems, HubSpot’s API tooling and developer advocacy teams joined forces. Their combined efforts led to an integration between GitHub and Postman, allowing HubSpot to publish and manage their API definitions in their Postman workspace using GitHub.
Consolidating HubSpot’s public API definitions into a single repository eliminated the manual effort of constantly tracking schema changes and updating the Postman workspace, which includes over 40 services.
In this blog post, we’ll guide you through this integration process and demonstrate what steps you need to take to ensure your GitHub repository is the source of truth for your Postman workspace.
Integrating your API schemas with GitHub and Postman
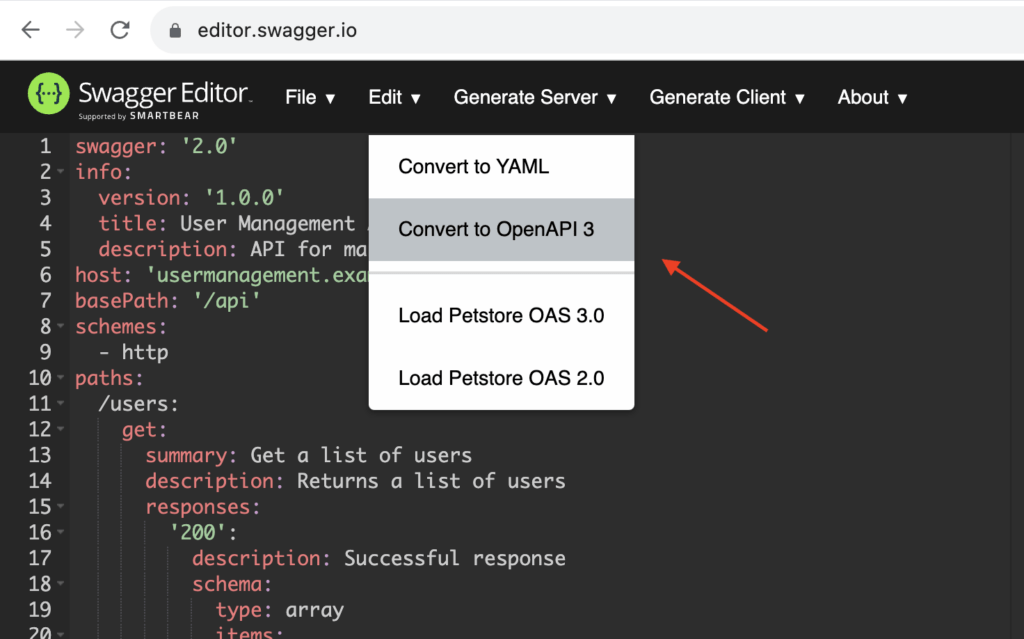
Before we begin, it’s important to ensure that your specs use OpenAPI 3.0. If you are using version 2.0 (Swagger), you can convert with the REST endpoints provided by Swagger, or you can use the Swagger editor:
Step 1: Upload your API schemas to a GitHub repository
Upload and commit all your API schema files to a GitHub repo that you set up for making an API. It’s a good idea to name your files clearly and have a distinguishable directory structure so that you can easily tell them apart and pick the right one when you’re building your API.
We at HubSpot do something similar: we have our own GitHub repository where we keep all the definitions for our Public APIs. You can check it out here.
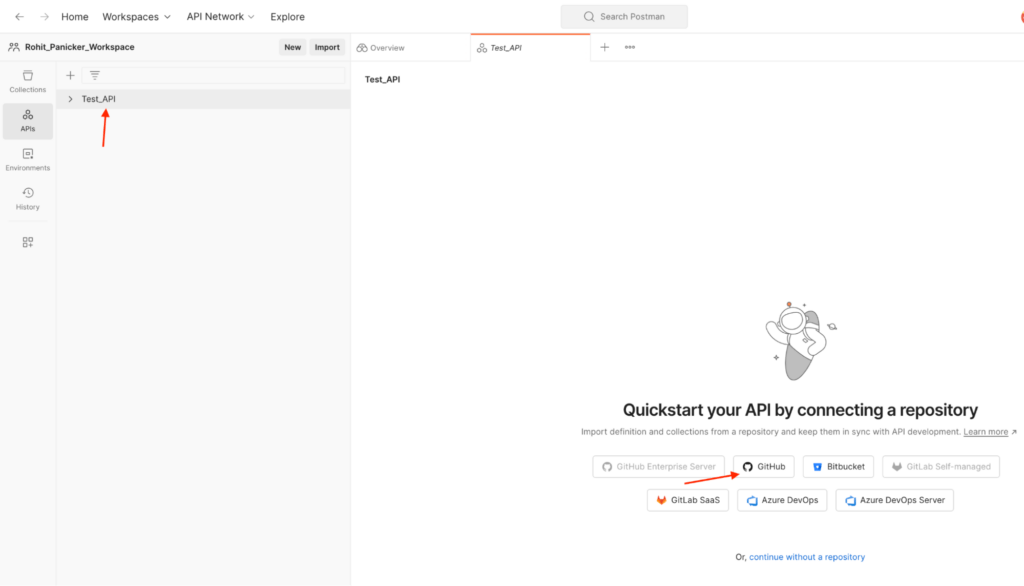
Step 2: Synchronize API schema updates with APIs in Postman
Begin by creating a new API by importing its schema file from the Github repository. This initial step is vital for constructing an API that monitors updates to its definition. To achieve this, click Create a New API in Postman and select the GitHub Repository option. This ensures seamless integration between your API in Postman and its corresponding schema file in GitHub:
Next, select an API schema file for API creation with the API schema file option:
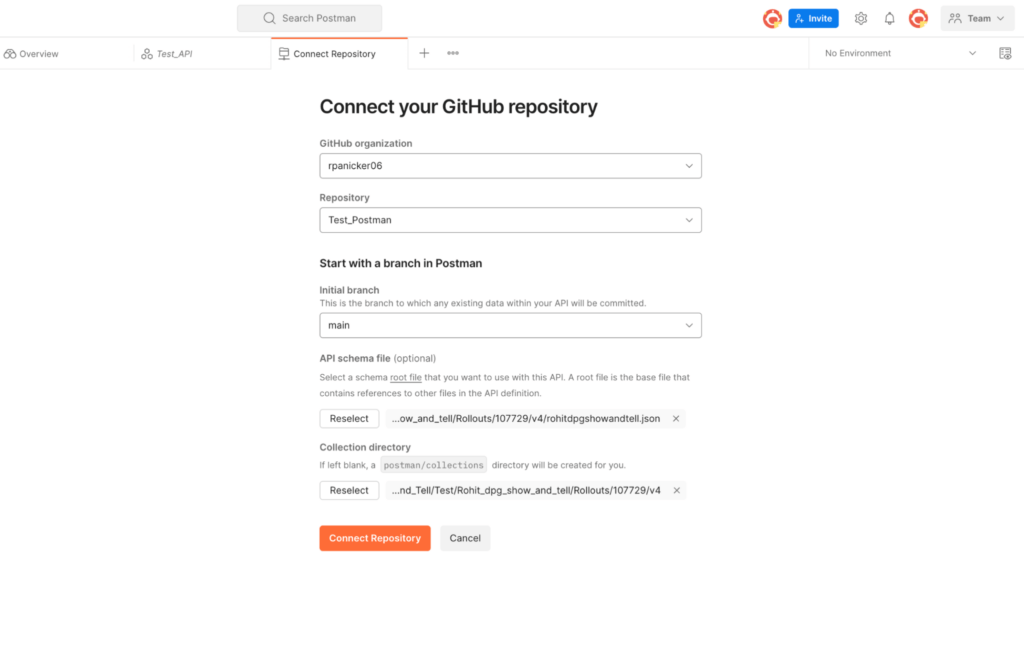
When creating multiple APIs from specs in the same GitHub branch, ensure you don’t leave the collection directory option empty. Instead, create a new directory at the location where you imported your API definition. Then, use this new path as your collection directory path.
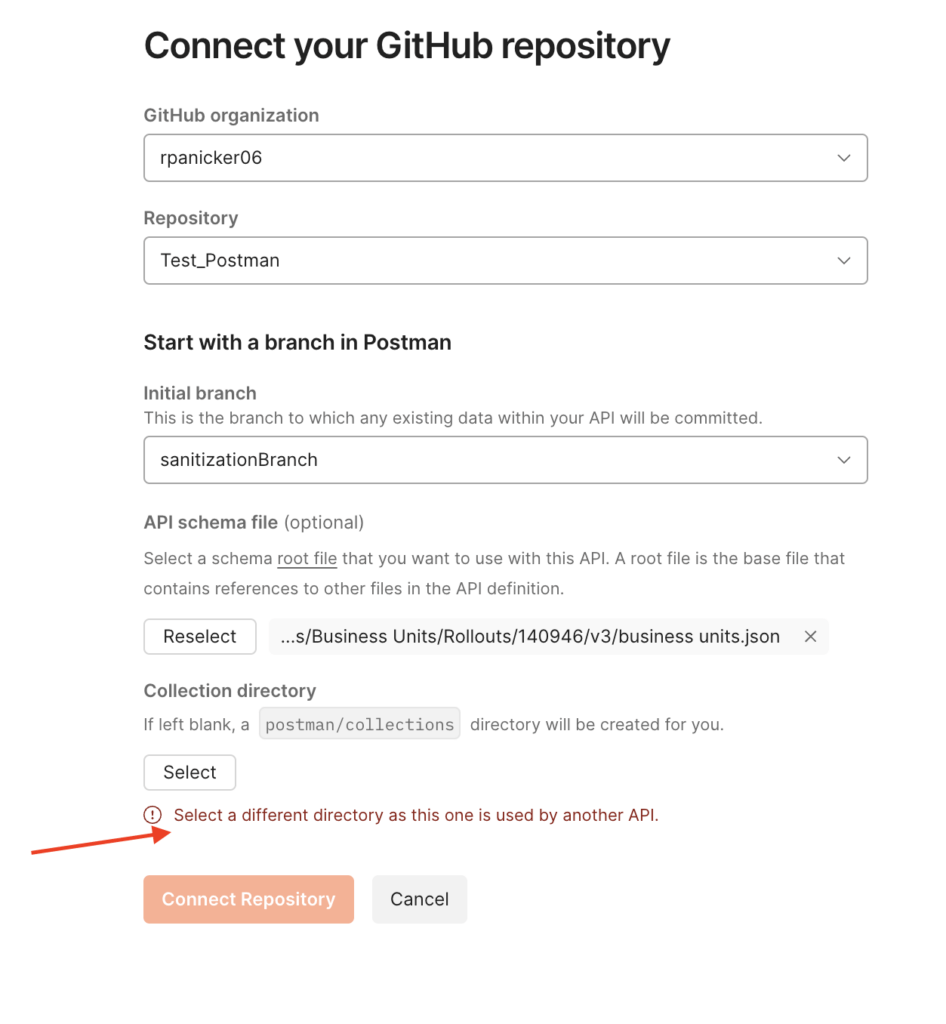
Caution: If you select the default collection directory (postman/collections) when setting up your first API, you will encounter errors while creating subsequent APIs. This issue highlights the importance of having a well-organized and distinct directory structure in your GitHub repository:
You’re now ready to generate forkable collections for each API. Simply click on the API name and navigate to the Collections option to generate a collection from the imported schema:

That’s all it takes to create APIs that can automatically track updates to API schemas. But how do you know when the definition file is updated, like when a new endpoint is added or a schema file property changes?
With your APIs linked to a GitHub repository, Postman will notify you in the UI of any changes to an API definition file:
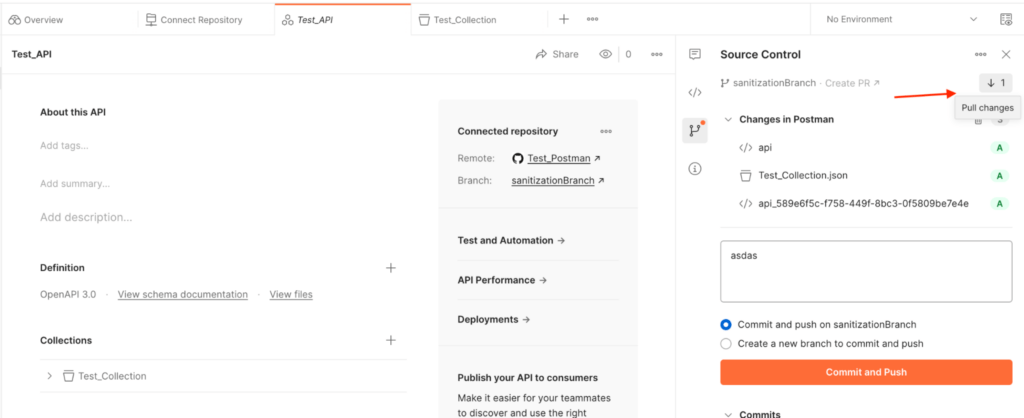
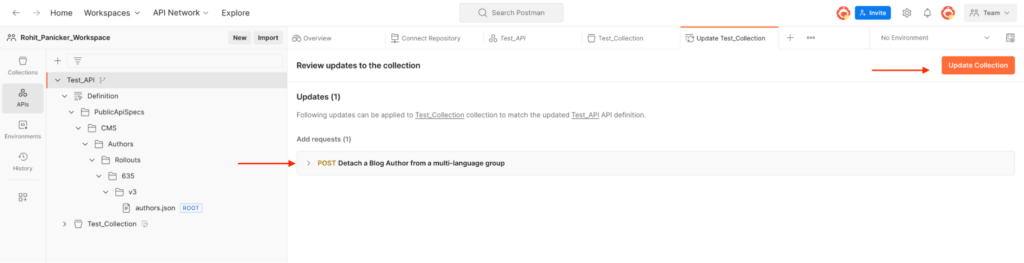
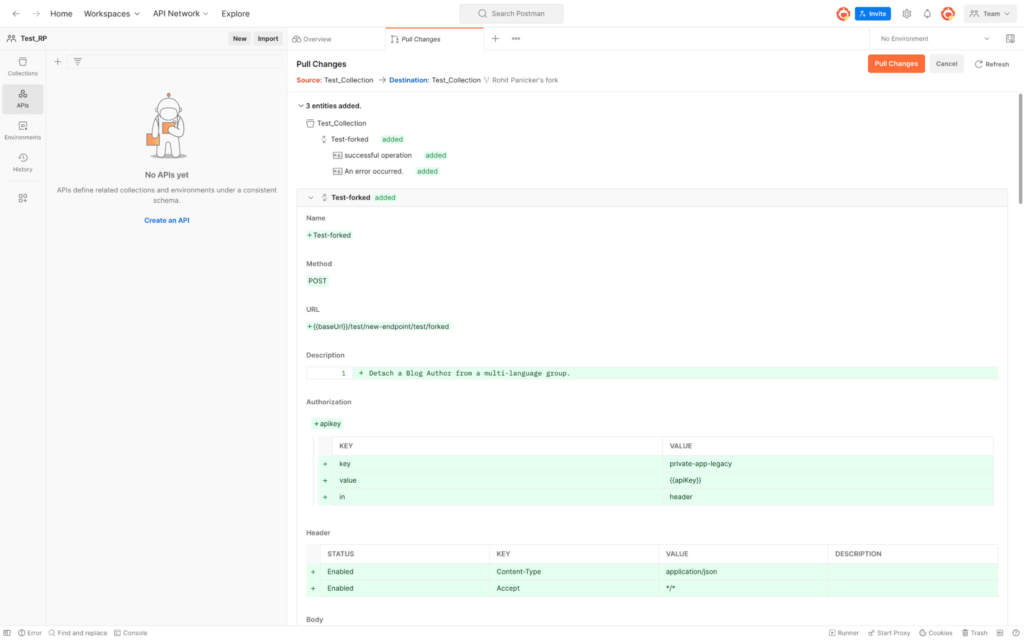
When you pull these changes, Postman informs you of any updates to your collection. For example, in this blog post, I’ve updated the schema with a new endpoint:
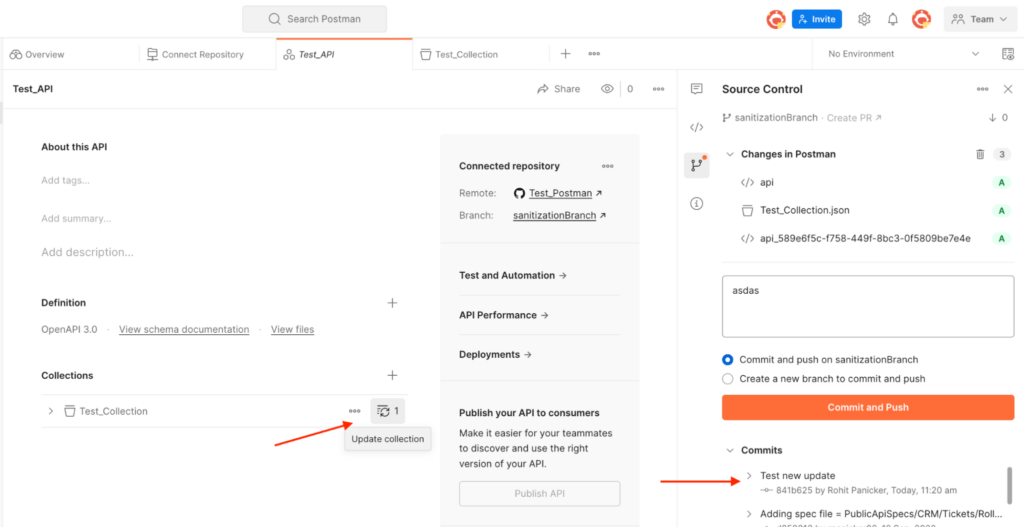
Review your updates and update your collection:
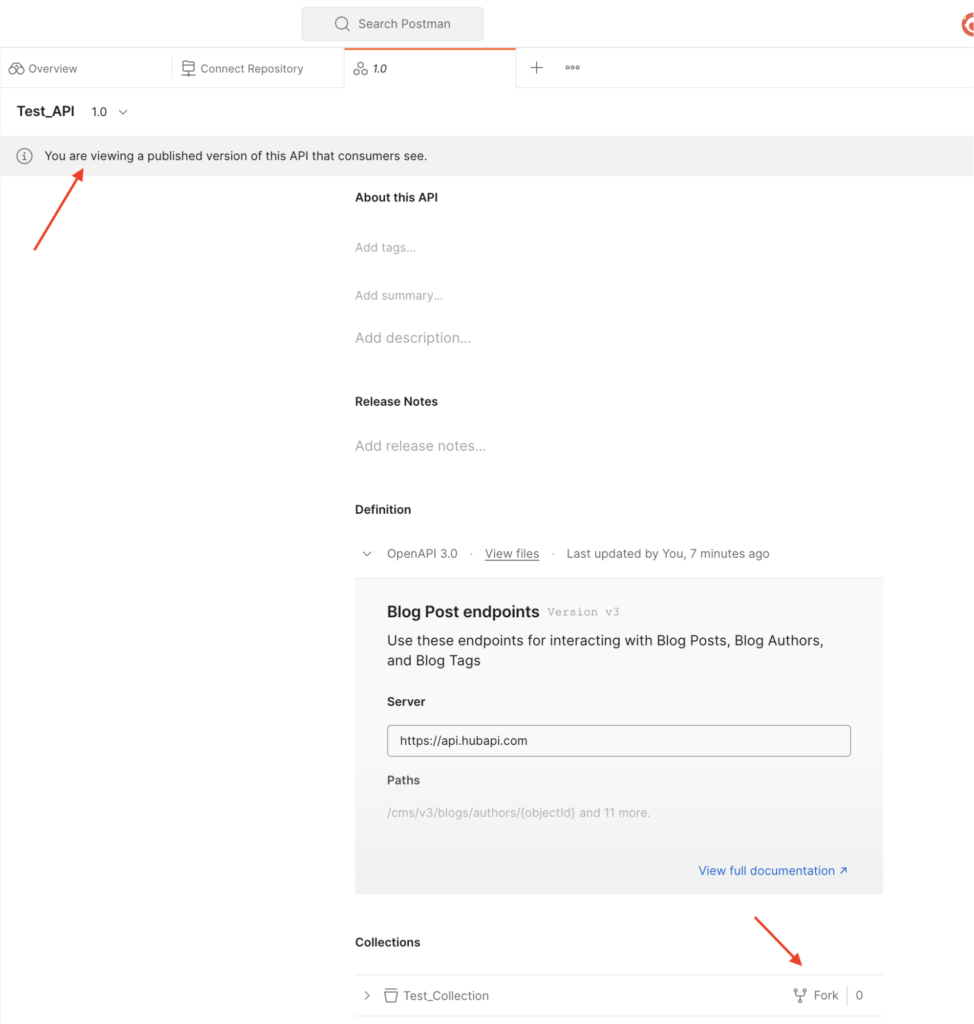
Step 3: Publish APIs for external consumers
Updates to collections are managed by workspace admins. Publishing a versioned API allows external consumers access to the latest collections.
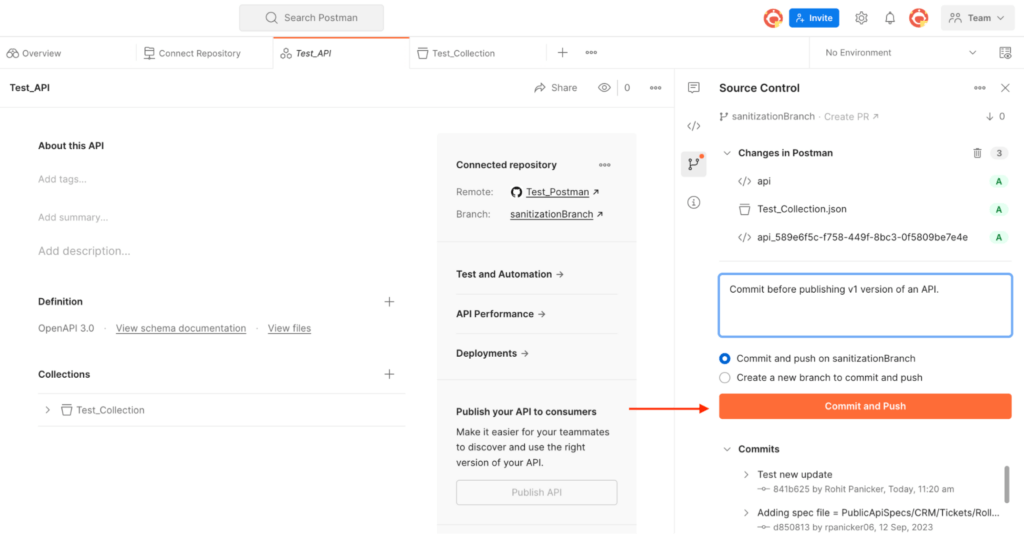
Before publishing, you must commit all files to GitHub that Postman has created for tracking API operations. Postman requires all changes to be committed before allowing API publication:
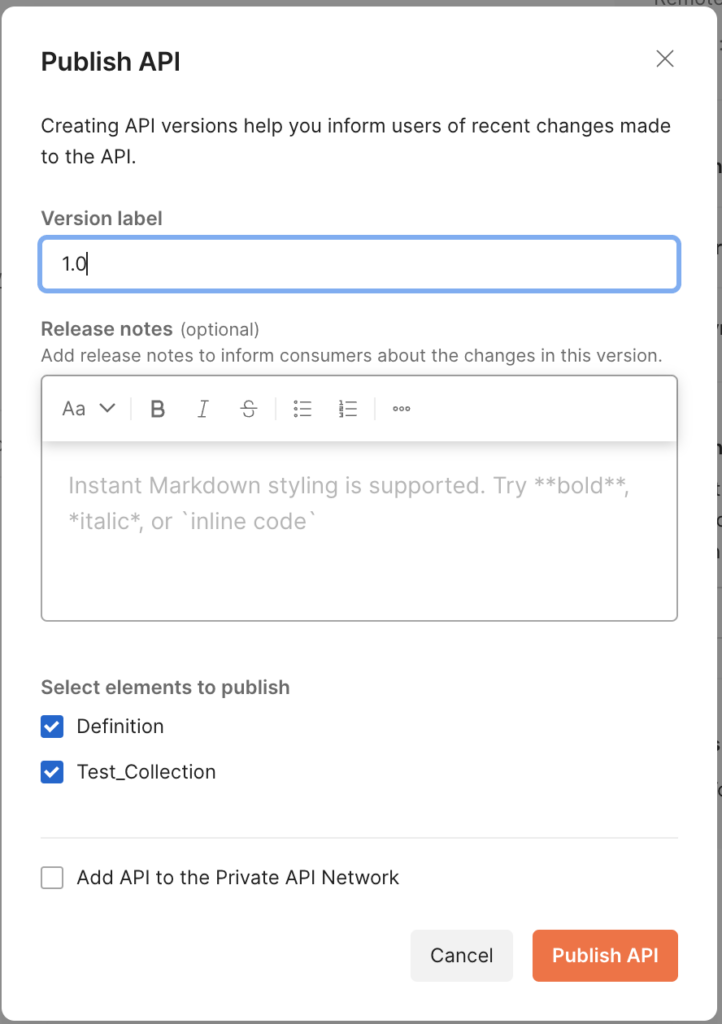
It’s now time to publish the API, which enables users to fork the collections to their workspace. To do this, navigate to the Publish API option by clicking on the API name:
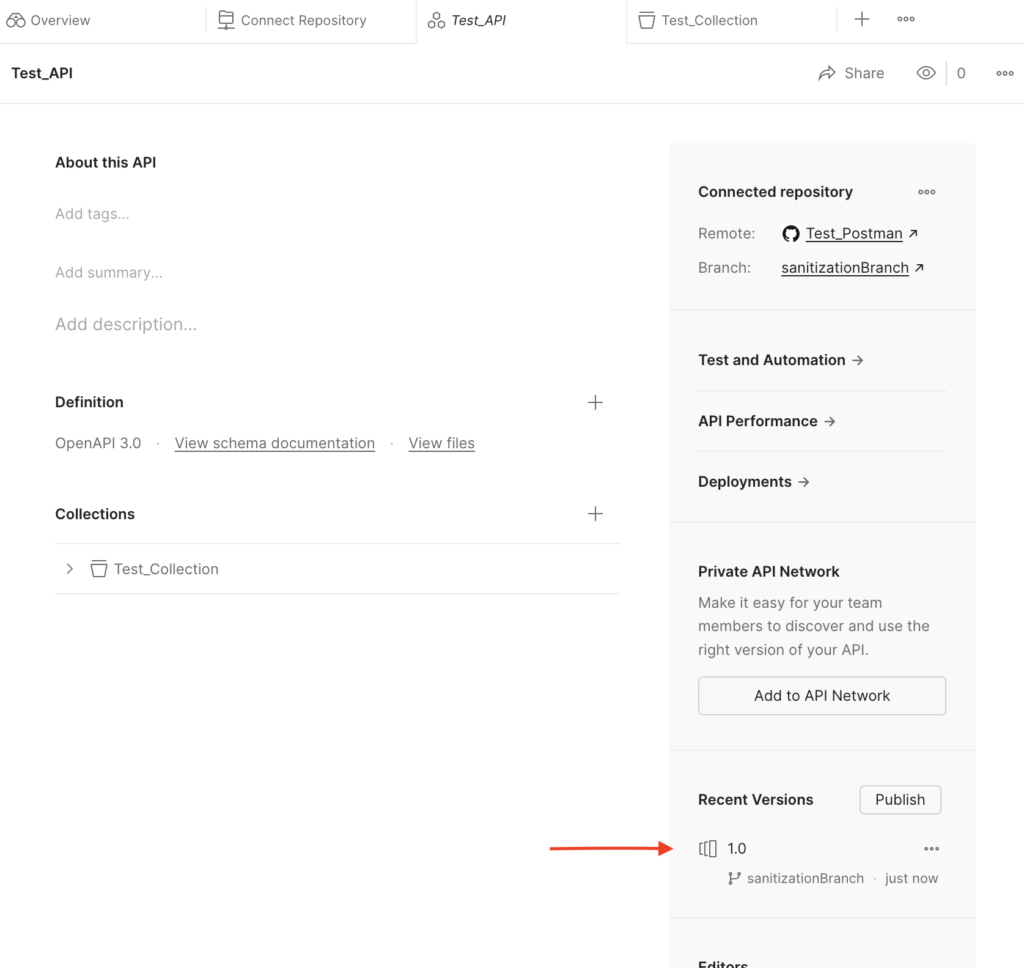
You will then be able to see a list of recent versions:
Step 4: Publish new API versions with latest updates (optional)
The end-consumer will see a snapshot of the collection as it was at the time of API publication. Updates to the original API definition file won’t be automatically reflected in the forked collection in the consumer’s workspace.
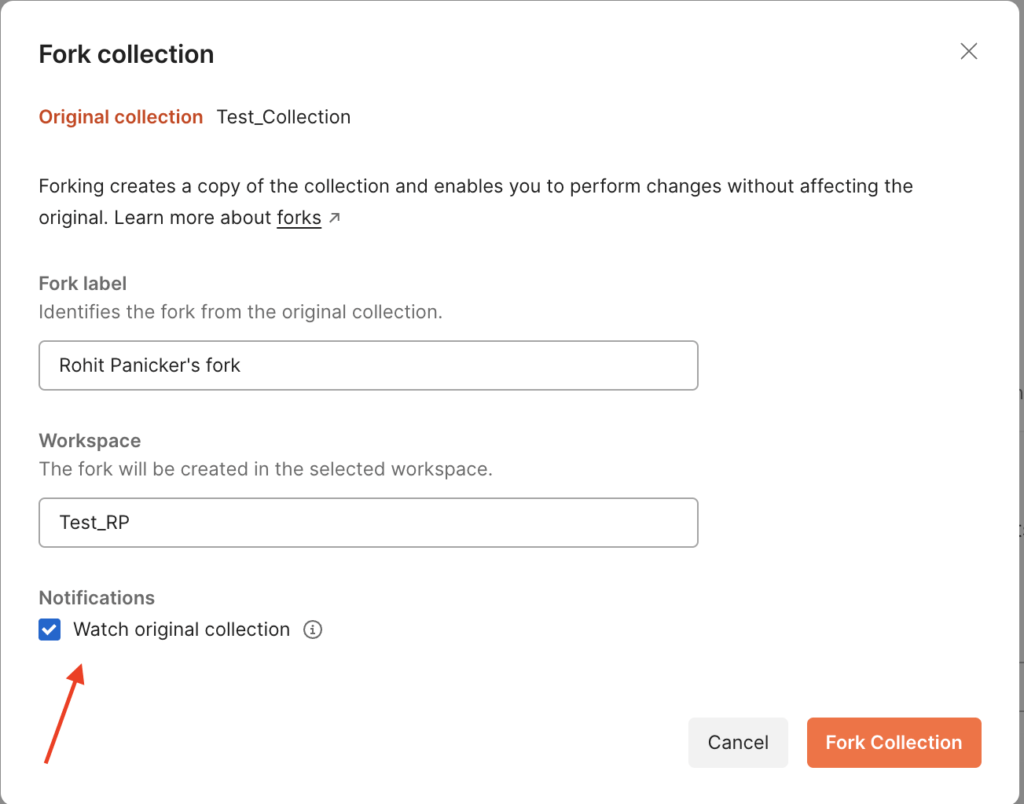
However, workspace admins can publish new versions of the API with updated version numbers. Consumers then have the option to update their forked collections with these newer versions:
To do this, consumers must ensure the Watch original collection checkbox is ticked when they fork the collection:
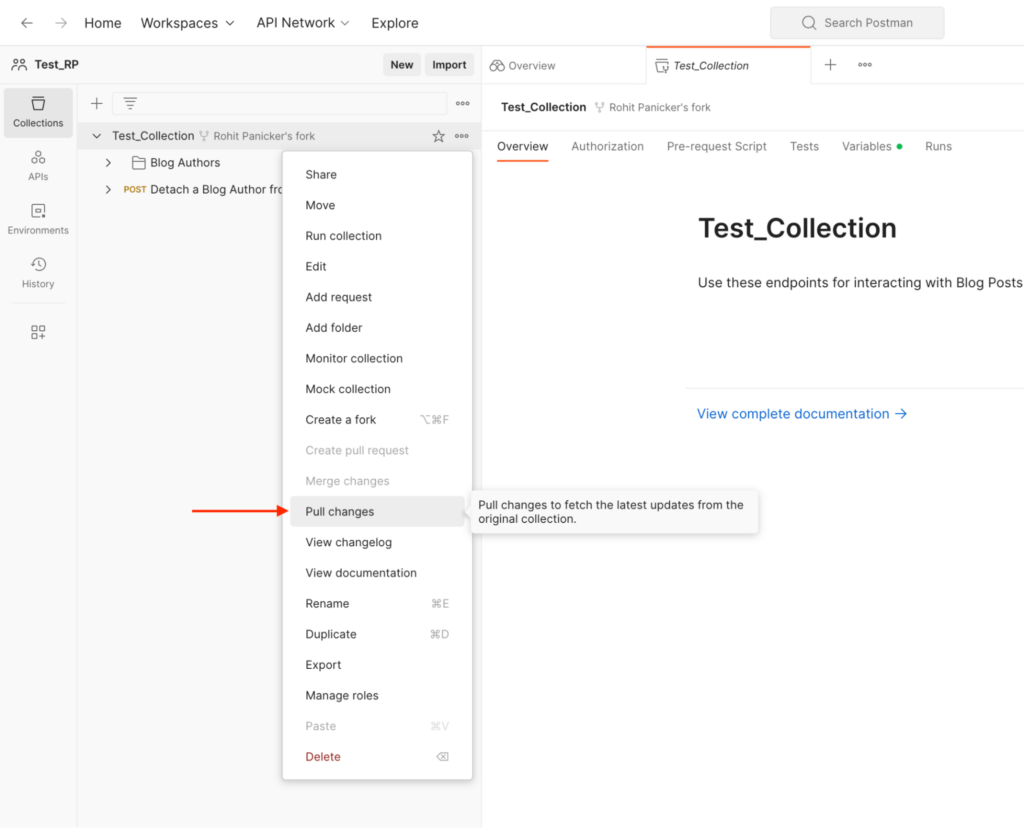
Consumers can then update their collection to the latest published version by clicking the Pull changes option:
Give it a try
In this blog post, we have provided a comprehensive guide to integrating your API schemas with GitHub and Postman. This integration offers automatic tracking of updates to API schemas, seamless management of API operations, and easy access for external users to the latest API collections. By implementing this process, HubSpot’s developer relations and API tooling teams have improved the developer experience, and we hope it inspires you to do the same.
We invite you to check out HubSpot’s blog post that introduces HubSpot’s new Postman workspace. This workspace, which was made possible by the GitHub and Postman integration discussed in this post, makes it easier than ever to access and work with public APIs. We believe that this integration supports our developer community, and we encourage you to try it out for yourself!


What do you think about this topic? Tell us in a comment below.