
How to Get Started with the Postman API
Did you know that Postman has its own API? Yes, Postman, an API platform that helps you design, test, mock, and document APIs in a collaborative fashion, has its own API. Why would you use the Postman API, you may ask. While most of the work can and should be done interactively using a GUI, you sometimes need to automate certain tasks and integrate Postman with other tools. The Postman API is a great way to do just that. During this article, you’ll learn how to use the Postman API, and you’ll get hands-on building a project that lets you synchronize your local OpenAPI specification files with Postman. Let’s get started then.
Finding information about the Postman API
The easiest way to start learning is by consulting the official Postman API documentation. You will find general information on getting started and specific documentation for each of the existing endpoints and operations. There’s also available information about rate limits, the different HTTP status codes, and the required authentication that uses the API key scheme.
Getting an API key
Related: How to use API keys
To start interacting with the Postman API, you first need to have an API key. You can think of an API key as a way to identify who you are whenever you make a request to any of the endpoints available on the Postman API. An API key identifies who you are and lets the system know what you can do with the Postman API. If you share an API key with someone else, they will be able to interact with the Postman API on your behalf. So, how do you get an API key, and how do you use it? Follow these steps to generate an API key:
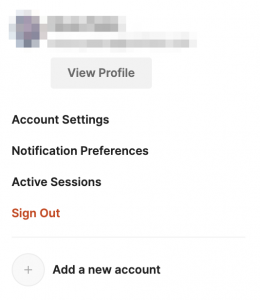
- Click on your avatar in the top right corner.

- You should see a dropdown menu. Click on “Account Settings.”
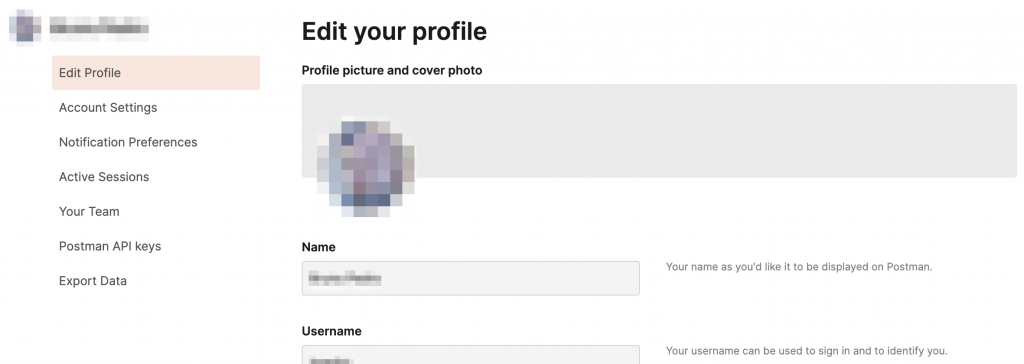
- Your profile form appears, letting you edit it. On the same screen, you should see a left navigation menu. Click on “Postman API keys.”
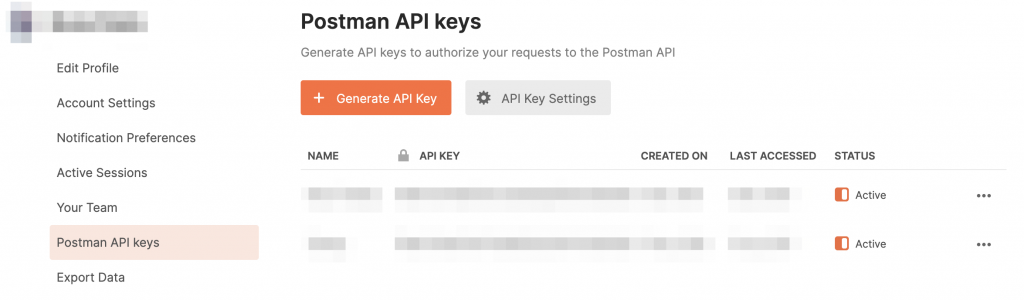
- You should now see a screen that lets you manage your API keys. Click on “Generate API key.”
- A form will open, asking you to name your new API key. Give it a name, and then click on “Generate API Key.”
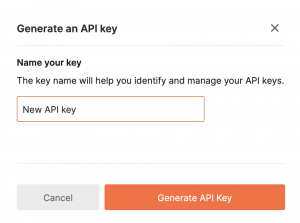
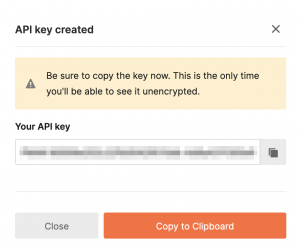
- Your new API key is generated, and you’re asked to copy it to the clipboard; otherwise, you’ll lose it forever.
Storing the API key in an environment
Having generated an API key, it’s now time to store it in a place where you can easily use it whenever you need it. Postman has a great way of doing that, and it’s called an environment. Environments are used to store values that you can later use when making requests. Let’s first create an environment by following these steps:
- Click on “Environments.” You should see a list of your existing environments, or if you don’t have any, a message inviting you to create one.
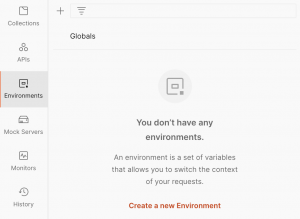
- Create a new environment by clicking on “Create a new Environment” or, if you already have environments, by clicking on the plus sign above (“+”).

- Give your new environment a meaningful name, e.g., “Postman Production,” and add a new variable called
postman_api_key. Copy the value of the generated API key into the “Initial value” cell. Once you’re done, click “Save,” and you’ll have your generated API key store on an environment.
Making your first request
Now that you have your API key safe and stored in an environment and access to the Postman API documentation, it’s time to start using it. To make calls to the Postman API, you’ll use Postman itself. The first thing to do is find a good candidate for a first call to the Postman API. Let’s find an endpoint that doesn’t change anything and lets you understand how the Postman API works and how you can interpret its responses. You’ll start with the /me endpoint. Reading the documentation shows that the endpoint “allows you to fetch relevant information about the API key being used.” In other words, this endpoint will return information about the user that owns the API key that is being used to authenticate the call.
Let’s get started by forking the Postman API collection. Forking creates a copy of the whole collection that you can use without remembering how the API works. To fork the Postman API collection, follow these steps:
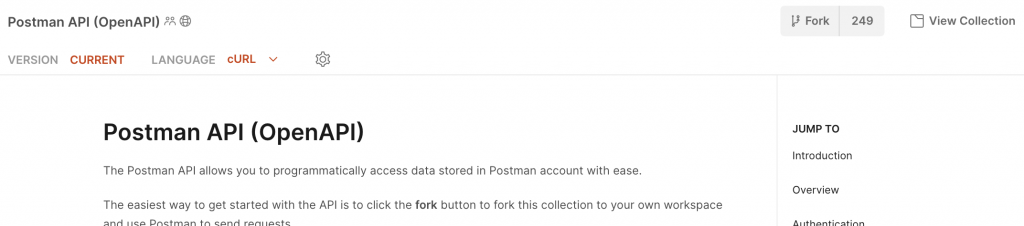
- Open the official Postman API documentation. Among other things, you should see the documentation and the “Fork” button on the header, as illustrated by the following image.
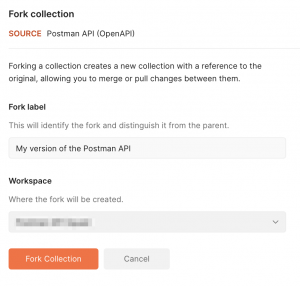
- Click on the “Fork” button. You should see a form that lets you pick a label for your fork and select the workspace where your fork will be made.
- You should now see the Postman API collection on the workspace you selected on the fork process above. Open the “User” folder by clicking on it.
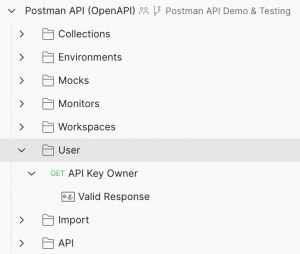
- Click on “
GETAPI Key Owner.” You should see a screen similar to the one below.
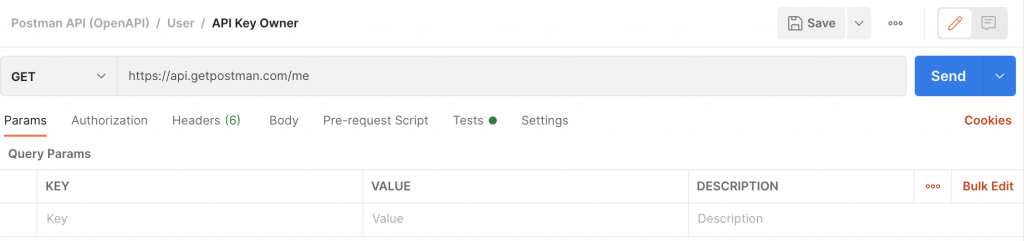
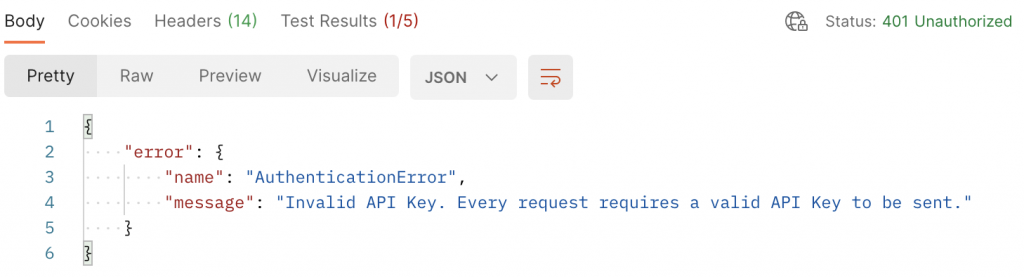
- If you click on “Send” now (the big blue button), you will get an
HTTP 401(Unauthorized) response, as expected. This endpoint requires authorization because it returns information about the owner of the API key.
- It’s at this point that you’ll get to use the API key that you’ve stored in an environment. To do that, select the environment where you stored your API key.
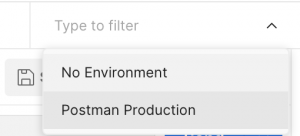
- Now, click again on “Send,” and you should see a successful response similar to the one below.
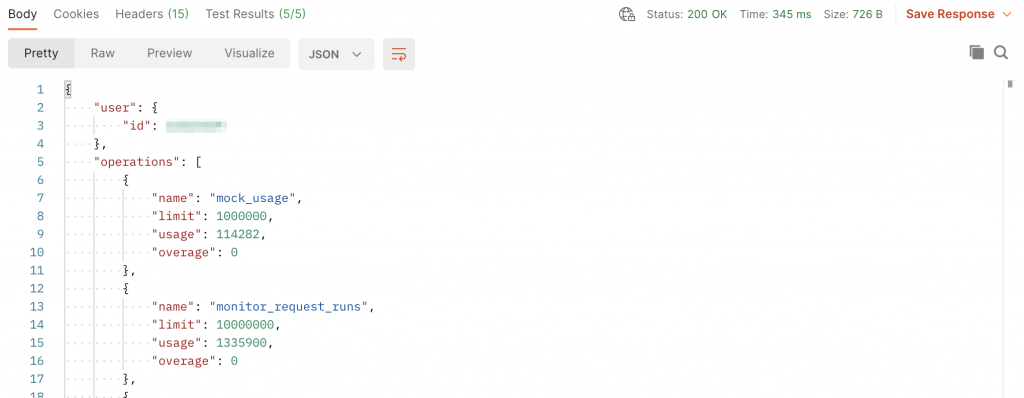
Congratulations! You have successfully made a request to the Postman API. However, this was just a simple example to get you started. Let’s now dig into a project that you might find useful if you work with OpenAPI files.
Synchronizing an API between a local copy and Postman
In this project, you will be working with an initial local copy of an OpenAPI specification that you will synchronize with Postman. In the project, you’ll use Nodejs to create a local script that reads an OpenAPI specification file and synchronizes it with Postman’s available version, making sure that versioning is honored. You will heavily use the following requests:
-
GETAll APIs: to find an API with a given name available on your workspace on Postman. -
POSTCreate an API: to create the API the first time the script is executed. -
PUTUpdate an API: to update the name and description of an API. -
GETAll API Versions: to find an API version corresponding to the one on the local OpenAPI specification. -
GETAn API Version: to get the full contents of a single API version, including the associated schema ID. -
POSTCreate an API Version: to create a new version of the API every time there are changes to the version on the local OpenAPI specification. -
POSTCreate a Schema: to create a schema and associate it with a given API version. -
PUTUpdate a Schema: to update an existing schema.
Here is the flow that you’re going to implement:
-
Read a local OpenAPI specification file.
-
Obtain the local API name and version from the specification file.
-
Check if there is an API with the same name on Postman.
-
If not, create an API with the same name and description as the local OpenAPI specification.
-
Create an API version with the same value as the local OpenAPI specification if one doesn’t already exist.
-
Update the API schema with the value from the local OpenAPI specification.
Communicating with the Postman API
You will be using Nodejs and the axios HTTP client to communicate with the Postman API during this project. To start with, you should grab your Postman API key that you have generated previously and store it in the POSTMAN_API_KEY environment variable. You can do that with the following shell command:
export POSTMAN_API_KEY=<your Postman API key>
Then you will want to identify the ID of the Postman workspace where you want to synchronize your API. To do that on the Web UI, go to your workspace and then copy its URL. It should be similar to https://postman.postman.co/workspace/My-workspace~xxxxxxxx-xxxx-xxxx-xxxx-xxxxxxxxxxxx/overview. Copy the characters between the ~ and the /, and you should have your Postman workspace ID. Once you have it, store it in the POSTMAN_WORKSPACE_ID environment variable by running the following command:
export POSTMAN_WORKSPACE_ID=<your Postman workspace ID>
Let’s test if the communication is working using the axios HTTP client and making a request to the /me endpoint—the same endpoint that you’ve used earlier. To do that, create the postman-sdk.js script and add the following code:
const axios = require('axios');
const querystring = require('querystring');

class Postman {
  config = {
    apiKey: null,
    workspaceId: null,
    apiBaseUrl: 'https://api.getpostman.com'
  };

  constructor (apiKey, workspaceId = null) {
    this.config.apiKey = apiKey;
    this.config.workspaceId = workspaceId;
  }

  async request(method = 'get', path, params = null, data = null) {
    try {
      const options = {
        method,
        url: `${this.config.apiBaseUrl}/${path}?${querystring.stringify(params)}`,
        headers: {
          'Content-Type': 'application/json',
          'X-API-Key': this.config.apiKey
        },
        data: JSON.stringify(data)
      };

      const result = await axios(options);
      return result.data;
    } catch (err) {
      throw new Error(`${err.response.status} (${err.response.statusText}) while performing a ${method} on ${path}`);
    }
  }

  async get(path, params) {
    return await this.request('get', path, params);
  }
}
module.exports = Postman;
Now, create the index.js script and make a call to the Postman API /me endpoint:
const Postman = require('./postman-sdk.js');

const postman = new Postman(
  process.env.POSTMAN_API_KEY,
  process.env.POSTMAN_WORKSPACE_ID
);

(async() => {
  try {
    const me = await postman.get('me');
    console.log(me);
  } catch (err) {
    console.error(err);
  }
})();
Finally, run the index.js script, and you should see information about yourself as the script’s output.
Reading a local OpenAPI specification
To read a local OpenAPI specification, so you’re able to interpret it, you’re going to use an OpenAPI parser. First, let’s find you a good example of an OpenAPI specification. The Petstore example is a good candidate for that. Grab the YAML version and save it locally on your filesystem:
wget https://raw.githubusercontent.com/OAI/OpenAPI-Specification/master/examples/v3.0/petstore.yaml
Now, let’s read it using Nodejs. To do that, we’ll use the APIDevTools swagger-parser package since it’s a good parser capable of understanding OpenAPI 3.0. Let’s see how our index.js script looks like right now:
const SwaggerParser = require('@apidevtools/swagger-parser');
const Postman = require('./postman-sdk.js');

const postman = new Postman(
  process.env.POSTMAN_API_KEY,
  process.env.POSTMAN_WORKSPACE_ID
);

(async() => {
  try {

    const localAPI = await SwaggerParser.parse('petstore.yaml');
    console.log(localAPI);

} catch (err) {
    console.error(err);
}
})();
Running the index.js script should now display the contents of the Petstore OpenAPI specification that you downloaded earlier.
Reading, creating and updating APIs on Postman
Now that you have a local OpenAPI specification that you can interpret and use inside your Nodejs script, it’s time to connect again to the Postman API. This time, you’ll want to check if there is already an API with the same name as your local OpenAPI specification. If so, you want to make sure that it has the same description as your local version. If there isn’t an API on Postman that matches your local one, you want to create it. You’ll need to implement the operations of finding an API, creating a new one, and updating an existing one. Let’s add those methods to the postman-sdk.js script that you have created earlier.
  async post(path, params, data) {
    return await this.request('post', path, params, data);
  }

  async put(path, params, data) {
    return await this.request('put', path, params, data);
  }

  async apis(filter = null) {
    let { apis } = await this.get('apis', {
      workspace: this.config.workspaceId
    });
    if (filter) {
      apis = apis.filter(filter);
    }
    return apis;
  }

  async createAPI(data = {}) {
    const { api } = await this.post('apis', {
      workspace: this.config.workspaceId
    }, {
      api: data
    });
    return api;
  }

  async updateAPI(apiId, data = {}) {
    const { api } = await this.put(`apis/${apiId}`, null, {
      api: data
    });
    return api;
  }
You have added the post() and put() helper methods, and the three methods to find, create and update APIs. Now, let’s go back to your index.js script and add the code to perform those operations.
    // Obtain a remote representation of the API
    // defined by the local OpenAPI specification.
    let remoteAPI = await postman.apis(api => api.name == localAPI.info.title);
    if (!remoteAPI.length) {
      remoteAPI = await postman.createAPI({
        name: localAPI.info.title,
        description: localAPI.info.description
      });
    } else {
      remoteAPI = remoteAPI[0];
      if (remoteAPI.name != localAPI.info.title ||
          remoteAPI.description != localAPI.info.description) {
        remoteAPI = await postman.updateAPI(remoteAPI.id, {
          name: localAPI.info.title,
          description: localAPI.info.description
        });
      }
    }
Reading and creating API versions on Postman
Now that you have a remote representation of your local API let’s make sure that its version is also synchronized. To do that, you’ll have to search for the right version and, if it doesn’t exist, you’ll create one. Let’s change the postman-sdk.js script again to add those methods.
  async apiVersion(apiId, apiVersionId) {
    let { version } = await this.get(`apis/${apiId}/versions/${apiVersionId}`);
    return version;
  }

  async apiVersions(apiId, filter = null) {
    let { versions } = await this.get(`apis/${apiId}/versions`);
    if (filter) {
      versions = versions.filter(filter);
    }
    return versions;
  }

  async createAPIVersion(apiId, version = null) {
    const data = await this.post(`apis/${apiId}/versions`, null, {
      version: {
        name: version
      }
    });
    return data;
  }
This time you didn’t have to add any helper methods because you had already added them before. Now, you can add the logic to the index.js script, and you’re done.
    // Obtain a remote representation of the API version
    // defined by the local OpenAPI specification.
    let remoteAPIVersion = await postman.apiVersions(remoteAPI.id, version => version.name == localAPI.info.version);
    if (!remoteAPIVersion.length) {
      remoteAPIVersion = await postman.createAPIVersion(remoteAPI.id, localAPI.info.version);
      remoteAPIVersion.schema = [];
    } else {
      remoteAPIVersion = await postman.apiVersion(remoteAPI.id, remoteAPIVersion[0].id);
    }
Creating and updating API schemas on Postman
By now, you should have found—or created—a remote representation of your API, including its version. It’s now time to add a schema or, if it already exists, to update it making sure that it reflects the local version. You’ll also be storing the schema in YAML format on Postman, so you’ll need to be able to convert the locally parsed OpenAPI specification to the YAML format. To do that, you’ll use the yaml package and add two methods to the postman-sdk.js script. Here’s the full postman-sdk.js in its final form.
const axios = require('axios');
const YAML = require('yaml');
const querystring = require('querystring');

class Postman {
  config = {
    apiKey: null,
    workspaceId: null,
    apiBaseUrl: 'https://api.getpostman.com'
  };

  constructor (apiKey, workspaceId = null) {
    this.config.apiKey = apiKey;
    this.config.workspaceId = workspaceId;
  }

  async request(method = 'get', path, params = null, data = null) {
    try {
      const options = {
        method,
        url: `${this.config.apiBaseUrl}/${path}?${querystring.stringify(params)}`,
        headers: {
          'Content-Type': 'application/json',
          'X-API-Key': this.config.apiKey
        },
        data: JSON.stringify(data)
      };

    const result = await axios(options);
    return result.data;
    } catch (err) {
      throw new Error(`${err.response.status} (${err.response.statusText}) while performing a ${method} on ${path}`);
    }
  }

  async get(path, params) {
    return await this.request('get', path, params);
  }

  async post(path, params, data) {
    return await this.request('post', path, params, data);
  }

  async put(path, params, data) {
    return await this.request('put', path, params, data);
  }

  async apis(filter = null) {
    let { apis } = await this.get('apis', {
      workspace: this.config.workspaceId
    });
    if (filter) {
      apis = apis.filter(filter); } return apis; }

  async createAPI(data = {}) {
    const { api } = await this.post('apis', {
      workspace: this.config.workspaceId
    }, {
      api: data
    });
    return api;
  }

  async updateAPI(apiId, data = {}) {
    const { api } = await this.put(`apis/${apiId}`, null, {
      api: data
    });
    return api;
  }

  async apiVersion(apiId, apiVersionId) {
    let { version } = await this.get(`apis/${apiId}/versions/${apiVersionId}`);
    return version;
  }

  async apiVersions(apiId, filter = null) {
    let { versions } = await this.get(`apis/${apiId}/versions`);
    if (filter) {
      versions = versions.filter(filter);
    } return versions;
  }

  async createAPIVersion(apiId, version = null) {
    const data = await this.post(`apis/${apiId}/versions`, null, {
      version: {
        name: version
      }
    });
    return data;
  }

  async createAPISchema(apiId, apiVersionId, schema = null) {
    const data = await this.post(`apis/${apiId}/versions/${apiVersionId}/schemas`, null, {
      schema: {
        type: 'openapi3',
        language: 'yaml',
        schema: YAML.stringify(schema)
      }
    });
    return data;
  }

  async updateAPISchema(apiId, apiVersionId, schemaId, schema = null) {
    const data = await this.put(`apis/${apiId}/versions/${apiVersionId}/schemas/${schemaId}`, null, {
      schema: {
        type: 'openapi3',
        language: 'yaml',
        schema: YAML.stringify(schema)
      }
    });
    return data;
  }
}
module.exports = Postman;
If you now update your index.js script and add the logic, you’ll see the whole flow working, and you’ll have your local OpenAPI specification available on Postman. Here’s the full index.js ready for you to use.
const SwaggerParser = require('@apidevtools/swagger-parser');
const Postman = require('./postman-sdk.js');

const postman = new Postman(
  process.env.POSTMAN_API_KEY,
  process.env.POSTMAN_WORKSPACE_ID
);

(async() => {
  try {

    const localAPI = await SwaggerParser.parse('petstore.yaml');

    // Obtain a remote representation of the API
    // defined by the local OpenAPI specification.
    let remoteAPI = await postman.apis(api => api.name == localAPI.info.title);
    if (!remoteAPI.length) {
      remoteAPI = await postman.createAPI({
        name: localAPI.info.title,
        description: localAPI.info.description
      });
    } else {
      remoteAPI = remoteAPI[0];
      if (remoteAPI.name != localAPI.info.title ||
          remoteAPI.description != localAPI.info.description) {
        remoteAPI = await postman.updateAPI(remoteAPI.id, {
          name: localAPI.info.title,
          description: localAPI.info.description
        });
      }
    }

    // Obtain a remote representation of the API version
    // defined by the local OpenAPI specification.
    let remoteAPIVersion = await postman.apiVersions(remoteAPI.id, version => version.name == localAPI.info.version);
    if (!remoteAPIVersion.length) {
      remoteAPIVersion = await postman.createAPIVersion(remoteAPI.id, localAPI.info.version);
      remoteAPIVersion.schema = [];
    } else {
      remoteAPIVersion = await postman.apiVersion(remoteAPI.id, remoteAPIVersion[0].id);
    }

    // Synchronize the remote API schema with the one
    // defined by the local OpenAPI specification.
    if (!remoteAPIVersion.schema.length) {
      await postman.createAPISchema(remoteAPI.id, remoteAPIVersion.id, localAPI);
    } else {
      await postman.updateAPISchema(remoteAPI.id, remoteAPIVersion.id, remoteAPIVersion.schema[0], localAPI);
    }

  } catch (err) {
    console.error(err);
  }
})();
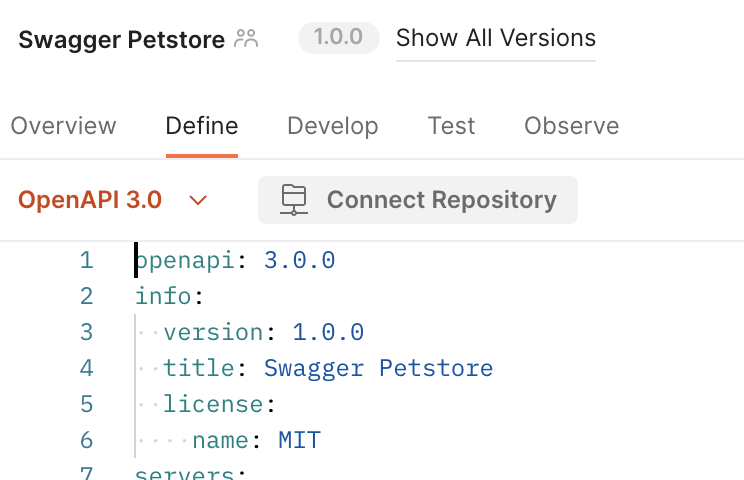
Running the script for the first time will create an API called Swagger Petstore with a single version named 1.0.0 and a schema identical to your local file.
Now the fun begins! Try changing the version of your local OpenAPI file, rerun the script, and see that a new API version has been created. If you change anything on your local schema and run the script, the changes will appear on Postman.
If you found this project useful, please refer to a complete and up-to-date working version on the postman-api-sync project on GitHub.
Conclusion
You started this article by learning what the Postman API is and what it can be used for. Then you interacted with it using Postman itself. For that, you have generated and stored a Postman API key in an environment that you later used to make a request. You then advanced into building a local project using Nodejs to synchronize a local OpenAPI specification file with Postman. During that process, you’ve learned how to find, create and update APIs, API versions, and schemas. In the end, you have working code that can be useful for you in the future.


Collection not found
We could not find the collection you are looking for.
Do I have to pay for public API?
Under the Communicating with Postman API section in index.js file, I guess the it should be
postman.get(‘me’) instead of postman.get(‘/me’) because the later gives a 404 error.
Dont mind the comment if already resolved
Thanks
Thanks for noticing the typo, Devendra. I have updated the article following your suggestion.
what would be the response of collections version ?. i means export collection version v2.1 or v2 or it will change based on export version .