
Home automation with MQTT
Home Assistant is a popular open source home automation platform that provides a unified interface to control and monitor different smart devices. Instead of juggling separate apps for different brands, you can manage everything through a single Home Assistant web dashboard on a local server like Raspberry Pi.
We’ve previously explored Home Assistant’s WebSocket API using Postman. Now let’s delve into Home Assistant’s MQTT integration, used by 44% of all active installations, to access smart devices across your connected home.
REST, WebSockets, and MQTT for a connected home
When it comes to transmitting data in a connected home environment, REST, WebSockets, and MQTT are commonly used protocols, but for different use cases.
- With REST, you have a request-response pattern, where a client sends a request to a server, and the server responds with the requested data. This is good for turning on a light or retrieving information about a set of devices.
- With WebSockets, you have bidirectional streaming between a client and server with real-time messages being relayed. This is helpful for ongoing updates, such as for a live dashboard displaying the status of all the connected devices in your home.
- With MQTT, you have real-time data transmission, similar to WebSockets, but optimized for low-power and low-bandwidth devices. Clients publish data to a centralized broker or hub, which then relays this data to other clients who have subscribed to receive notifications about a particular topic. This publish-subscribe messaging pattern is good for smart home devices that might lose and then resume a connection.
In the next section, let’s try using MQTT with Home Assistant for home automation.
Using MQTT with Home Assistant
Home Assistant is well-liked among DIY smart-home tinkerers because it supports a wide range of integrations and protocols, allowing you to customize automation scenarios based on events, schedules, and sensor readings. In addition to a REST API and WebSockets API, Home Assistant also provides an MQTT integration.
To learn how to authenticate the Home Assistant MQTT integration and send and receive messages with the MQTT broker, follow along with this step-by-step tutorial, watch the video, and reference the sample collection.
- Add the MQTT integration to your Home Assistant instance here.
- Run an MQTT broker. The recommended setup method is to use the Mosquitto MQTT broker add-on.
- Fork this sample collection to your own workspace, select the collection, and add your credentials to my-username and my-password under the Variables tab, and Save your updates. Notice these variables are used under the Authorization tab of each request in this collection.
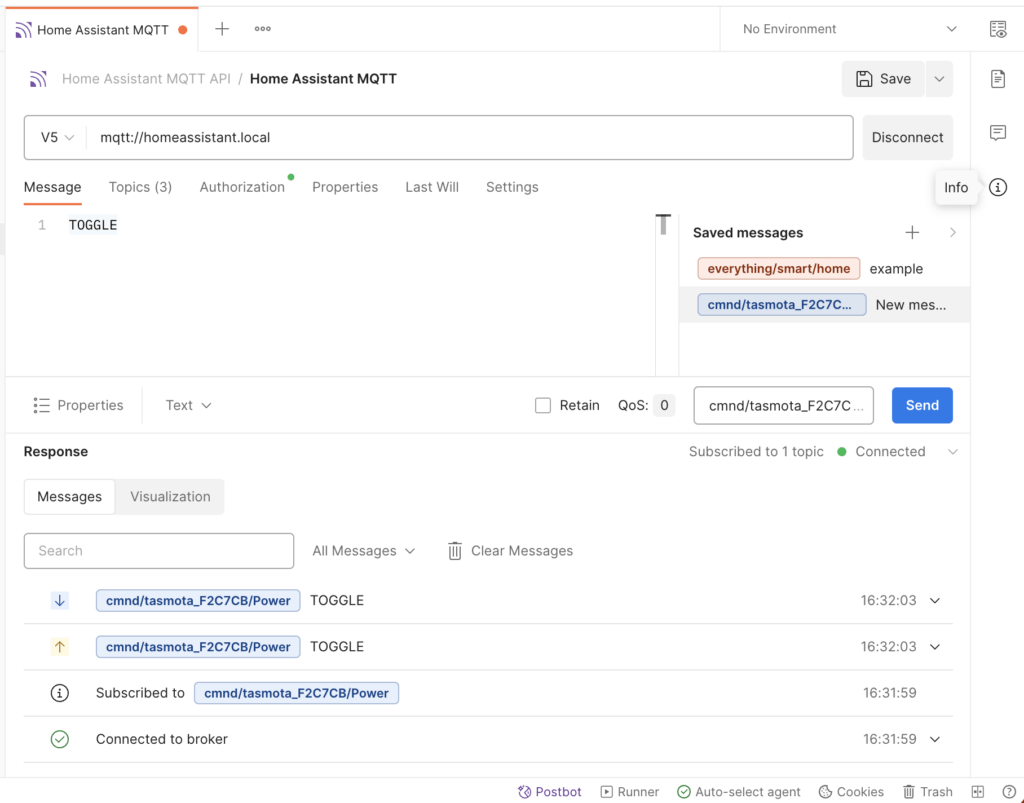
- Connect to
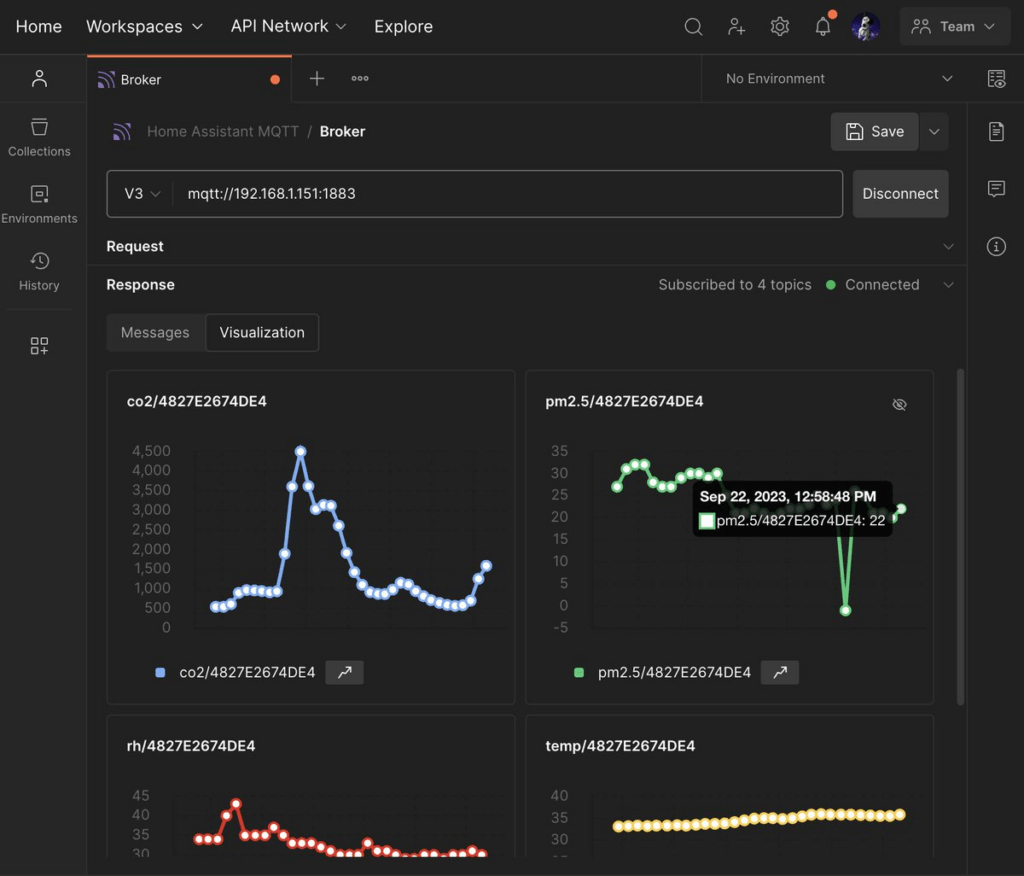
mqtt://homeassistant.local - Under the Message tab, send data to a specified topic. Under the Topics tab, subscribe to topics. And observe the inbound and outbound messages at the bottom.
Additional resources
Learn more about MQTT support in Postman, and explore more API patterns and protocols in Postman:
Browse the Program smart lights public workspace for APIs from other providers, such as Philips Hue and Elgato, to automatically control smart lights in your home or office. And let us know in the comments below what kind of projects you want to learn about, and what you’re doing with MQTT.


What do you think about this topic? Tell us in a comment below.