Capturing requests using the new Postman v0.9.4
Software complexity grows exponentially. As the size of the the code base increases, so does the interlocking between various parts of the system. Hence, finding out what’s going on exactly becomes critically important to debug your code and to ensure that everything works properly.
This is even more important for API calls. While most developers have a basic understanding of the API they are working with, things might go wrong due to a myriad number of reasons. The underlying library might not be configured correctly, a parameter might be missing or you might be sending data using the wrong encoding.
To help you avoid this, Postman now supports capturing your API calls through the PostmanProxy command line tool.
You can start the proxy with a single command, enable it inside Postman and see all HTTP calls which are made by a device configured to use the proxy. You can filter the calls through URL patterns and methods to focus only on the calls that you care about.
The entire setup takes a couple of minutes and requires absolutely no changes in your code. Here is what you have to do:
- Install the Postman packaged app v0.9.4. If you are already using the packaged app then make sure it’s updated. The app now needs TCP/UDP permissions too so if Chrome has disabled the app you have to re-enable it from the Tools menu.
- Install the PostmanProxy python package using “pip install PostmanProxy“. If you do not have pip installed, see instructions for installing it.
- Run the proxy using
pmproxy save --tcp_connection true
. This would start everything using the default values of 127.0.0.1 and port 8080.
4. Set your browser, computer or your phone to use the proxy. This varies between devices but a quick google search should give you the answer within seconds if you don’t know it already. If you are in a local wi-fi/LAN network then you can set the proxy to the local IP of the machine on which the proxy is running.
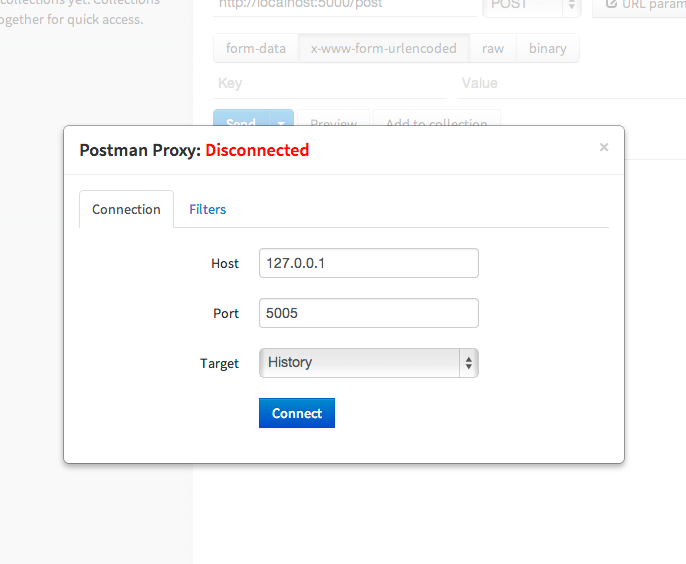
5. Click on the top right to show the proxy manager modal.

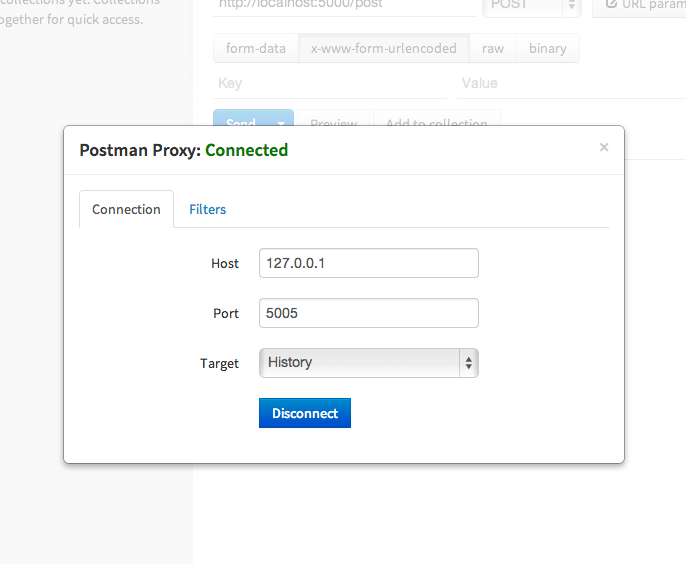
6. Hit “Connect” in the modal that comes up

7. Browse your website or your app like you would normally do.
If everything works properly, you should see calls streaming into the history sidebar. You can stop streaming by hitting “Disconnect” or closing the proxy. You can even choose to add all calls to a particular collection. This is amazing for building new collections. You can build custom cases or flows for calls and share them as before. Once a request is inside, you get the power to work with using the tools which Postman provides.
PostmanProxy uses libmproxy, the excellent library provided by mitmproxy. The earlier proxy code was based on Twisted but I found working with mitmproxy much easier. Another advantage of mitmproxy is that it can help you monitor SSL connections. The documentation for that is available at the mitmproxy page. You need to follow the same instruction for PostmanProxy.
A couple of other options are available with PostmanProxy. You can save a collection file directly instead of syncing with Postman by using
pmproxy save
. The earlier use case of the proxy, which was to bypass restricted headers, is also taken care of within this code. For this you will have to use
pmproxy filter
. To find out about more options use
pmproxy --help
This is still a work in progress and expect to see a lot of new stuff in the coming days around this feature. This has been tested on Linux and OS X.
If you run into any problems, let me know on Github or Twitter!


Can we use a different proxy like Charles? It’s a great powerful tool for modifying headers/ dns spoofing, throttling – and it would be great if postman could work with charles.
Charles is available only for the Mac. The aim is to open up a public API for Postman so that other tools can integrate with it.
Charles is available for Mac, Windows and Linux: http://www.charlesproxy.com/download/
Very nice, thanks! Note that “pmproxy save –tcp_connection true” should be “pmproxy save –-tcp_connection True” and “pmproxy save –help” should be “pmproxy –help” above. The double-dash and capitalization of True are needed.
Thanks Jim. Fixed!
Can you provide an Getting Started Howto for Windows users with Python 3.3 or 3.4? Because Python 3.4 has pip included. Note you have to run pip from command.com as pip3.4 or pip3. Tooked me an bit of time to find this out, that there is no “pip” command but “pip3.4” and “pip3”.
Would be nice, because I use currently Windows while Developing.