Automate Your Reading List with a Typeform and Notion Integration

This is a guest post written by Nicolas Grenié, developer advocate at Typeform.
“What book would you bring on a deserted island?” is a common conversation icebreaker you’ve probably faced because the response can help us learn more about a person. But I recently realized that I never have a good answer for this question. I don’t read many books anymore, and all the books I can think of are usually the ones I enjoyed as a kid. With this realization, I decided that I want to get back into reading more books.
And you know what helps you start and keep a good habit? Tracking it in order to see progress and reflect on your growth regularly.
Because I’m not inherently a very organized person, I’ve been trying to document all my personal projects and ideas using Notion. If you aren’t familiar with Notion, think of it as serving as your second brain: you can create a Notion page for any task or idea that crosses your mind and drop as many details as you want in it. If you use it in business, it’s perfect for documenting company processes and collaborating with teammates.
Tracking goals with Typeform and Notion
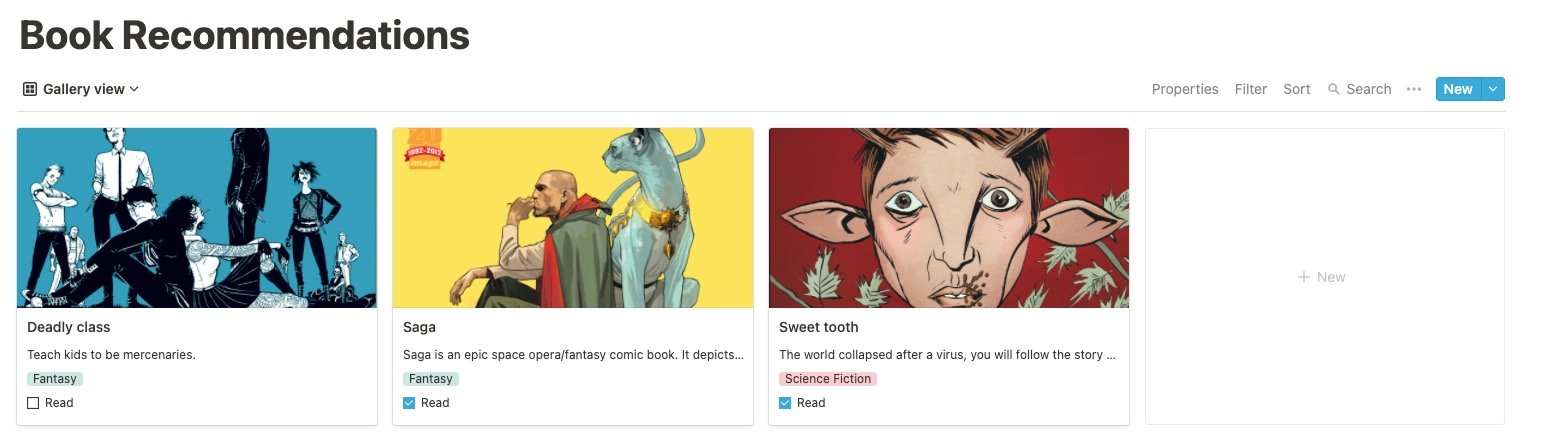
To achieve my personal reading goal, I need to maintain a list of all the books I want to read and update the list each time I complete a book. This means that at the end of the year, I can look back and see how much I’ve read in total. By employing a Notion database to organize my new Book Recommendations list, I can see basic details—including the book’s title, genre, and a short one-line description:

While I can easily add books to the database, I would love to allow others to add suggestions. So, I want to use Notion’s collaborative functionalities to invite folks to add their recommendations directly to my list. But it seems like a bit of overkill to invite people to contribute to my page one by one. Instead, I can use a convenient Typeform submission form—called a “typeform”—so that people can drop their suggestions and have this form feed my database automatically. All I have to do is share the form link on my website or social media pages.
Okay, let’s go ahead and streamline a new reading list by integrating Typeform and Notion with some API calls and Postman.
Prerequisites
Before we get started, let’s make sure you have the three essential things needed to follow this step-by-step tutorial:
- A Notion workspace: Create a free account here.
- A Typeform account: Create one and activate a free month here.
- A Postman account: Download Postman on the web or the Postman app here.
Once you have each of these in place, you are good to go.
Set up the Typeform and Notion workflow in Postman
To connect things in a smooth way, I’ve built a Typeform Hacks public workspace in Postman with collections so that you won’t have to code anything. Fork the collection to your workspace.
We need API keys to authenticate and authorize our requests to both Typeform and Notion APIs. Both APIs support OAuth 2.0, but because we don’t need a broad access to resources, it is easier to create tokens with limited scope to access only our account.
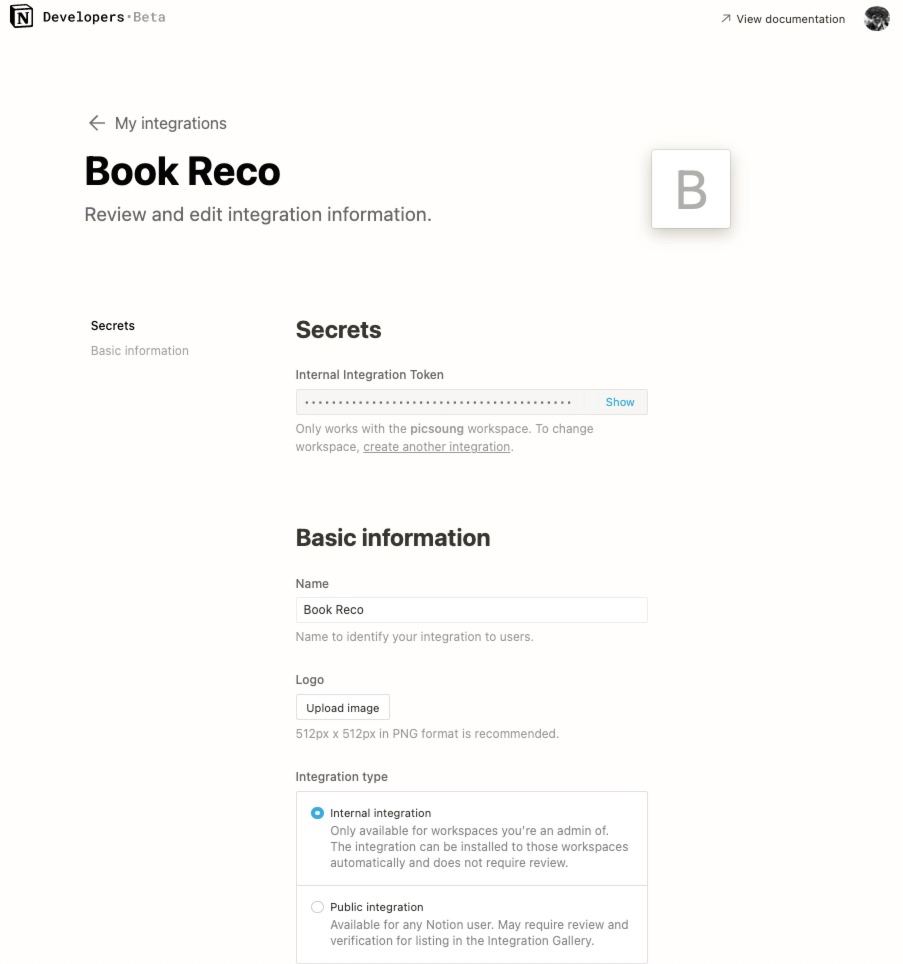
Set up Notion token
In Notion, you can create integrations by going to the My Integrations page. Create a new integration; you can call it “Book Reco,” for example. Make sure it is an internal integration.
Once the token has been created, copy its value and paste it into the collection variable named NOTION_API_TOKEN.
Set up Typeform token
In Typeform, you can generate a “personal token” that will only have access to forms and responses on your account. Go to the account settings page to create this token.
When creating a personal token, you can restrict its access parameters. This adds a level of security if the token is leaked in the wild. In our case, we just need forms:read, forms:write, and responses:read scopes.
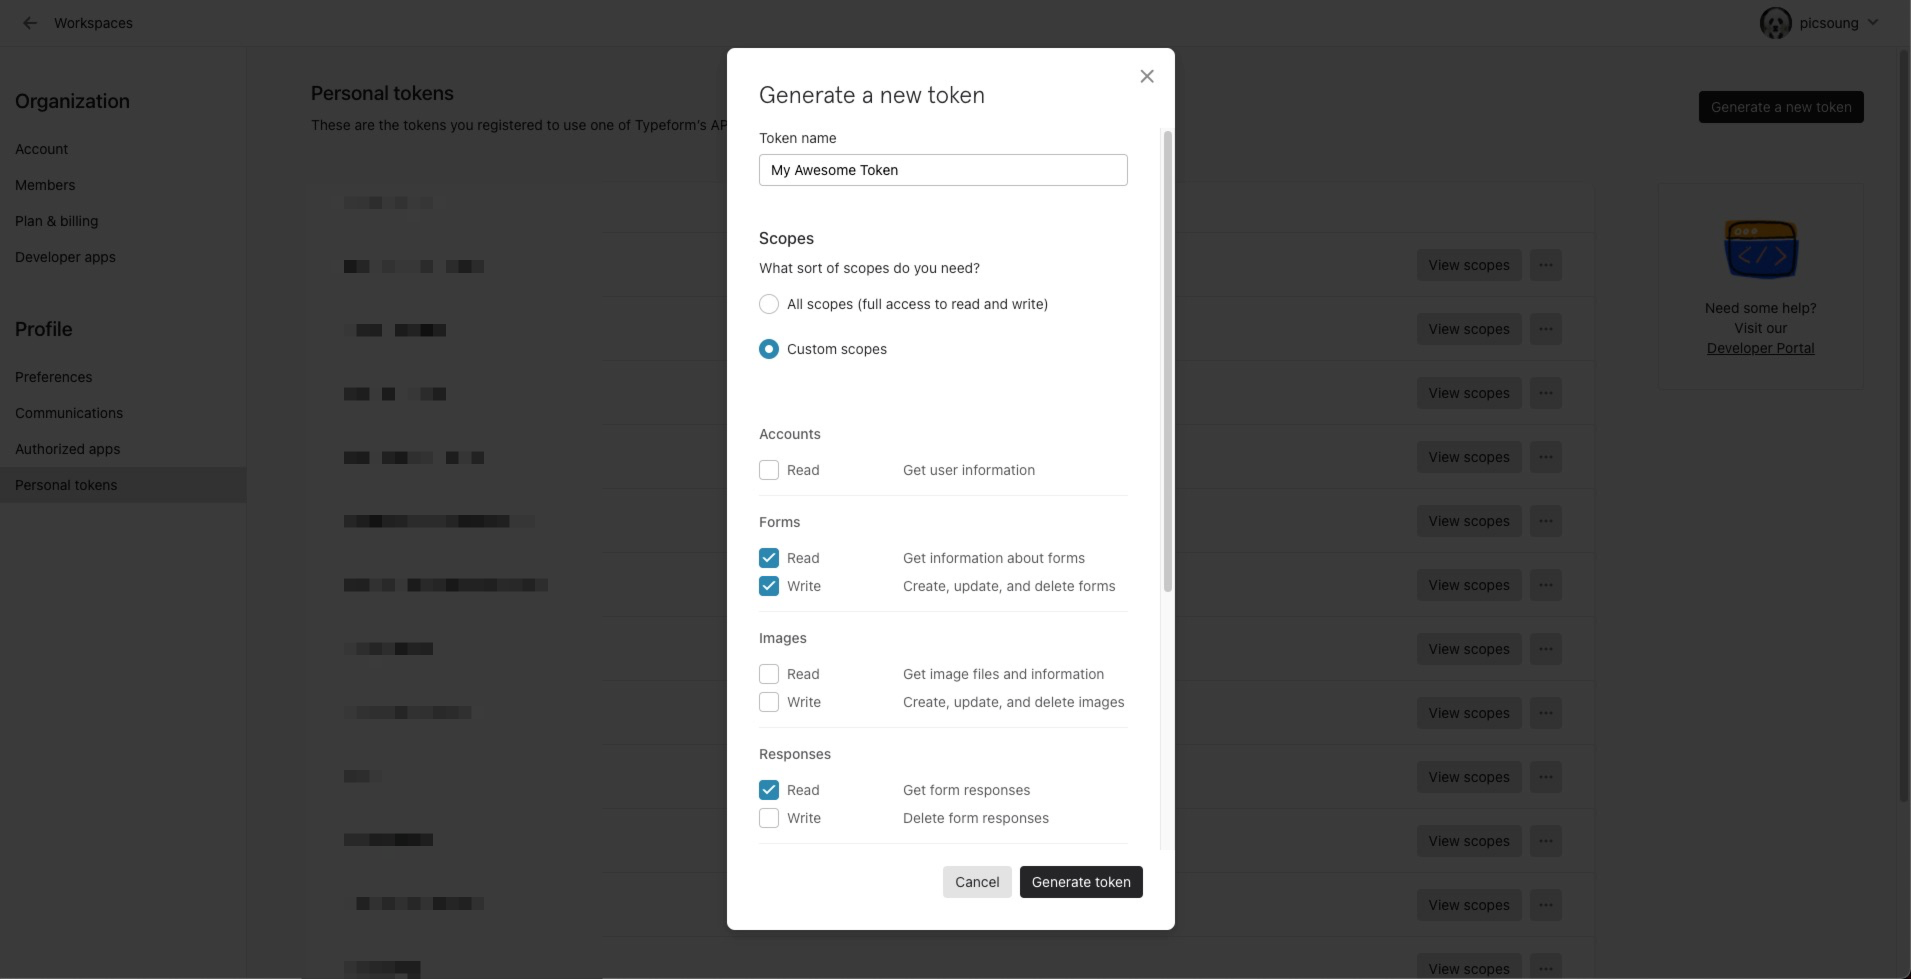
Once the token has been generated, copy its value and paste it in the collection variable named TYPEFORM_API_TOKEN.
With this set up we can now move to the requests under the Setup folder in the collection.
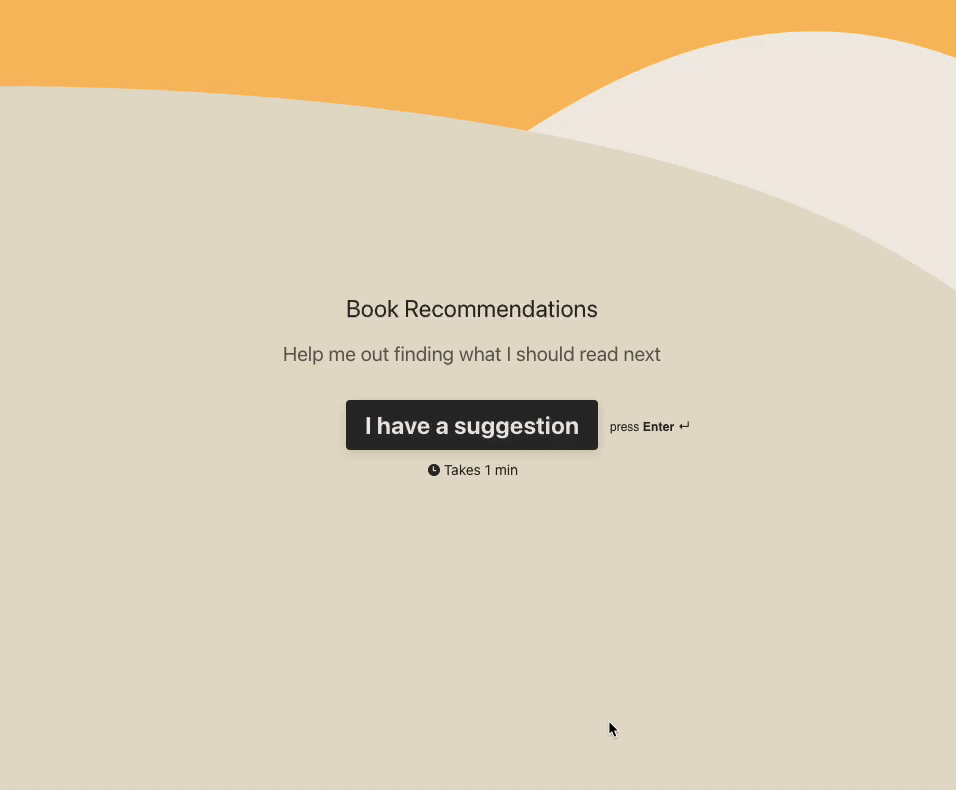
1. Create the typeform to collect recommendations.
The request is already set up with a template form, asking for a book title, the genre, one-line description, and the name of the person recommending this book. If you look closely at the JSON payload, you can see that each field has a custom reference like book_title or recommended_by. This will be useful when we extract the data from the Typeform Responses API.
To create a new form, click the Send button. The form ID of the newly created form is stored automatically in the TYPEFORM_FORM_ID collection variable.
If everything goes well, you should see your newly created form under the Visualize tab in Postman. You can already share the link publicly so that anybody can suggest books.
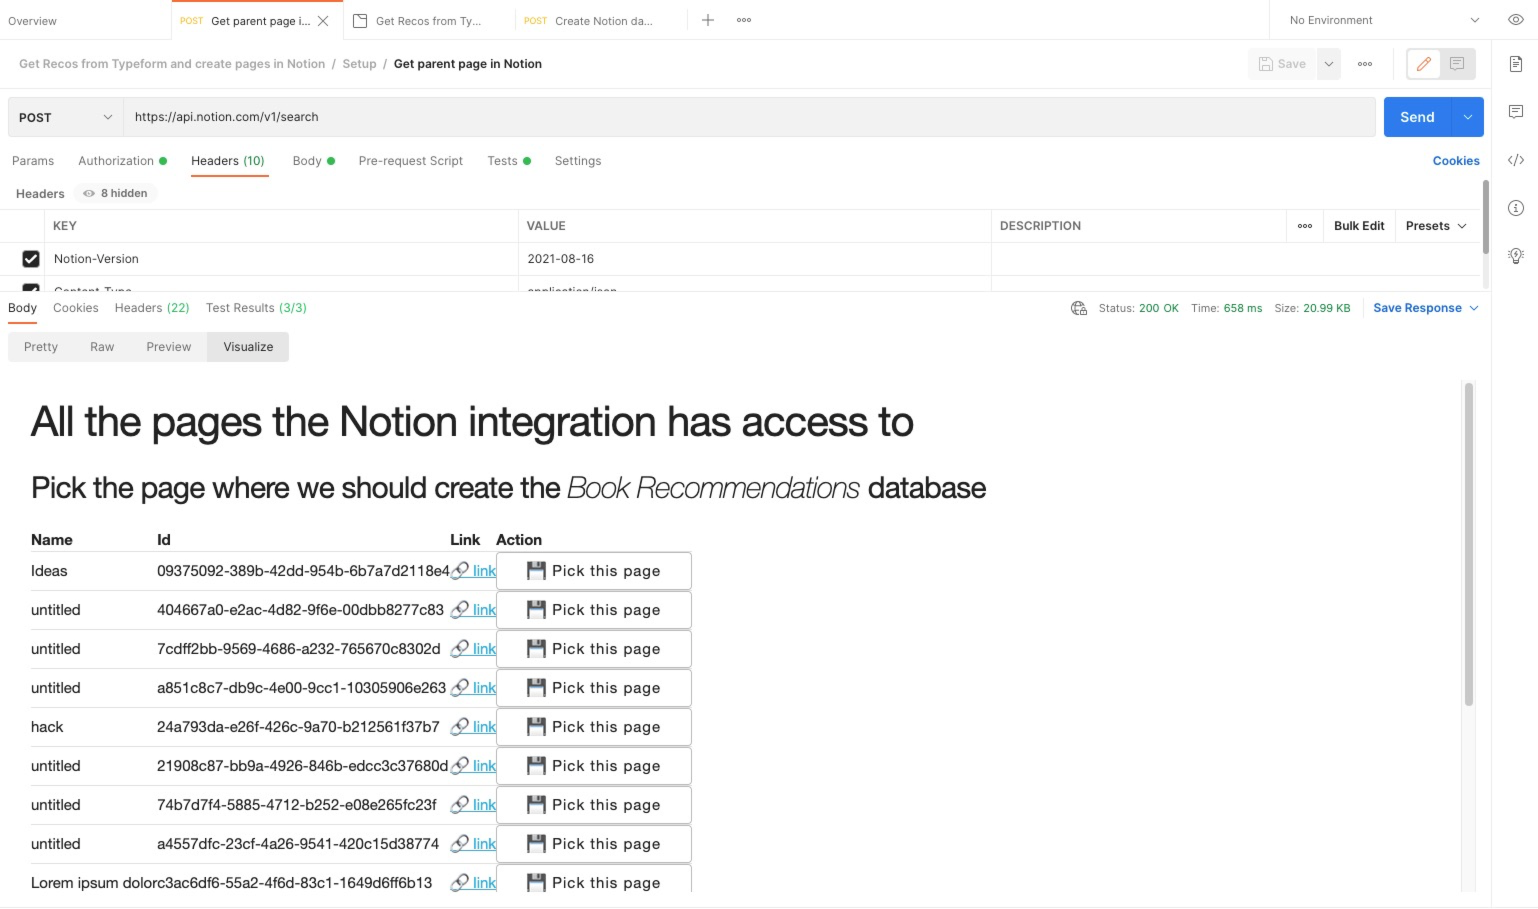
2. Get parent page in Notion.
Before we can create our Book Recommendations database in Notion, we need to know where it’s going to go in our workspace. Send this request, and head over to the Visualize tab to see all the pages available in your Notion workspace.
Once you’ve found the page where you want the database to be, copy its ID and paste it into the NOTION_PARENT_PAGE_ID collection variable.
3. Create Book Recommendations database in Notion.
We can create the Book Recommendations database manually directly in Notion, or we can make an API request to go faster—guess which is my preference?
Similar to the typeform, create a template for our Notion database. It connects the same columns as our typeform questions, plus a Read checkbox column to check off when you finish reading a book. Once you’ve sent the request, head over to the Visualize tab in Postman, and you should see the corresponding URL for this Notion database.
We now have everything in place to receive book recommendations from others. If you haven’t shared your Typeform links yet, I suggest submitting a few recommendations yourself so we can move on to the next step: creating records in the database on Notion.

If you select the Feed the database folder, you can just click on the Run button to execute the whole workflow. You should now see new records in your Notion database, success!
Let’s take a look at what’s going on under the hood.
What’s happening under the hood?
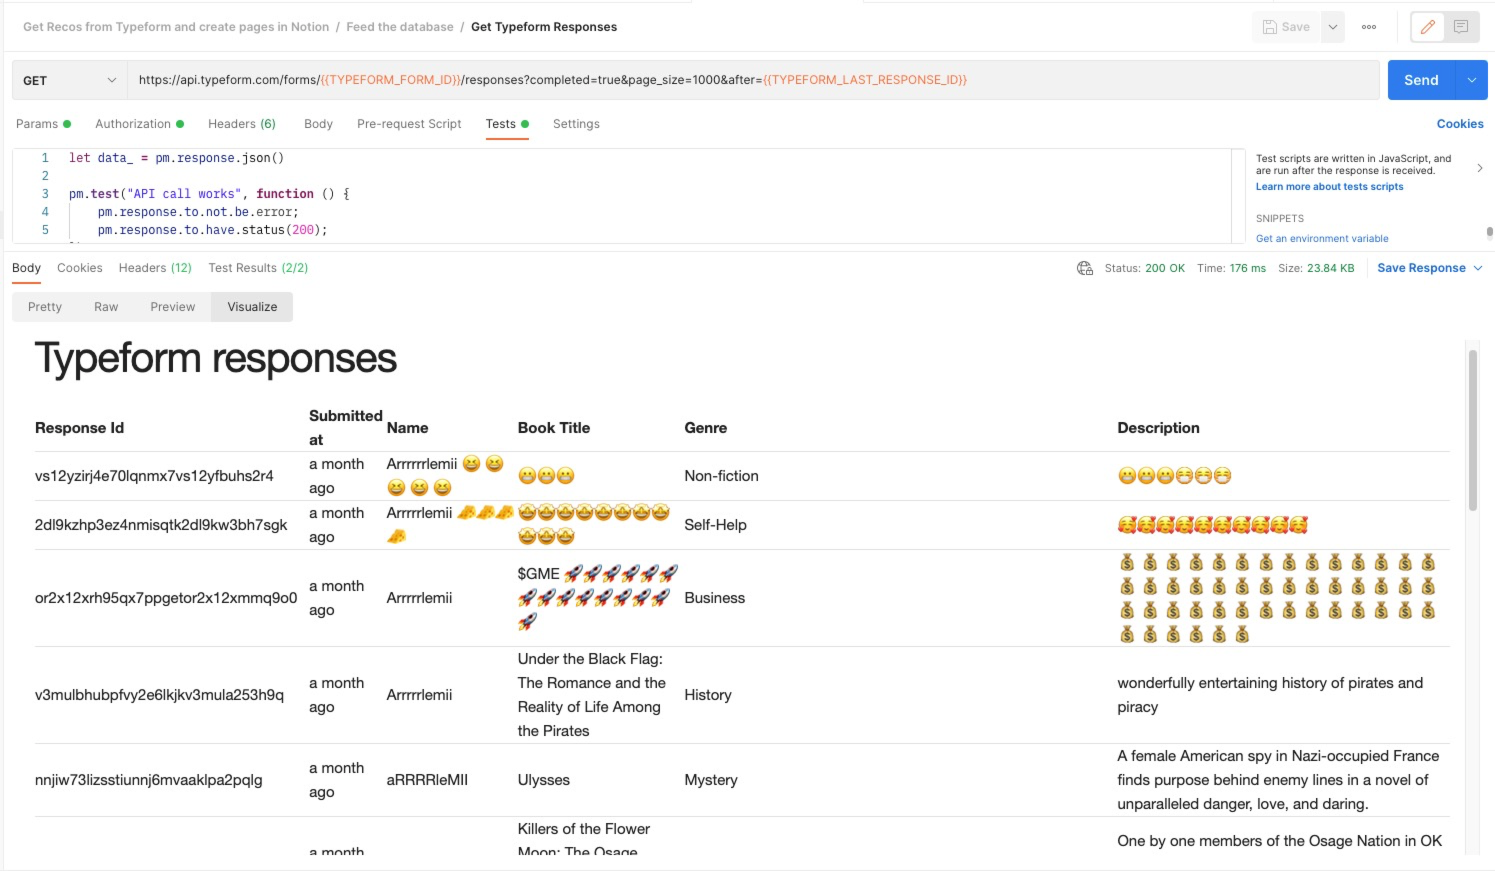
The Feed the database folder contains two requests. The first one, called Get Typeform Responses, is calling the Typeform Responses API to retrieve all the responses submitted to the form created in the setup phase.
If your form is very popular, it could be a pain to iterate over all the responses and deal with pagination. So, we are going to retrieve a maximum of 1000 responses at once. This should be enough for most cases. In the Visualize panel, you can see the detail of each response:
We don’t want to import into the database recommendations that we already imported. To avoid this redundancy, we can make the request to the Typeform Responses API dynamic. This particular endpoint is using the after query parameter to filter the responses that were submitted after a certain ID. Response IDs are unique and not incremental.
Using a script under the Tests tab, we save the ID of the last response submitted as the collection variable TYPEFORM_LAST_REPONSE_ID. The first time you run this request, you get all the responses, but the next call will only get the new responses submitted.
Recursion
Looking under the Tests tab, you should also note that we are storing the Typeform responses in a collection variable called TYPEFORM_RESPONSES.
To create all the records in Notion, we need to iterate through this array of responses and execute the Create Notion page in database request as many times as needed.
To make this happen, we use the pre-request script. There, we get the value of the TYPEFORM_RESPONSES collection variable. If there are responses, we will get the last element of the array (the oldest response submitted) and extract its details (i.e., name and book title).
Finally, we update the TYPEFORM_RESPONSES collection variable with leftover responses.
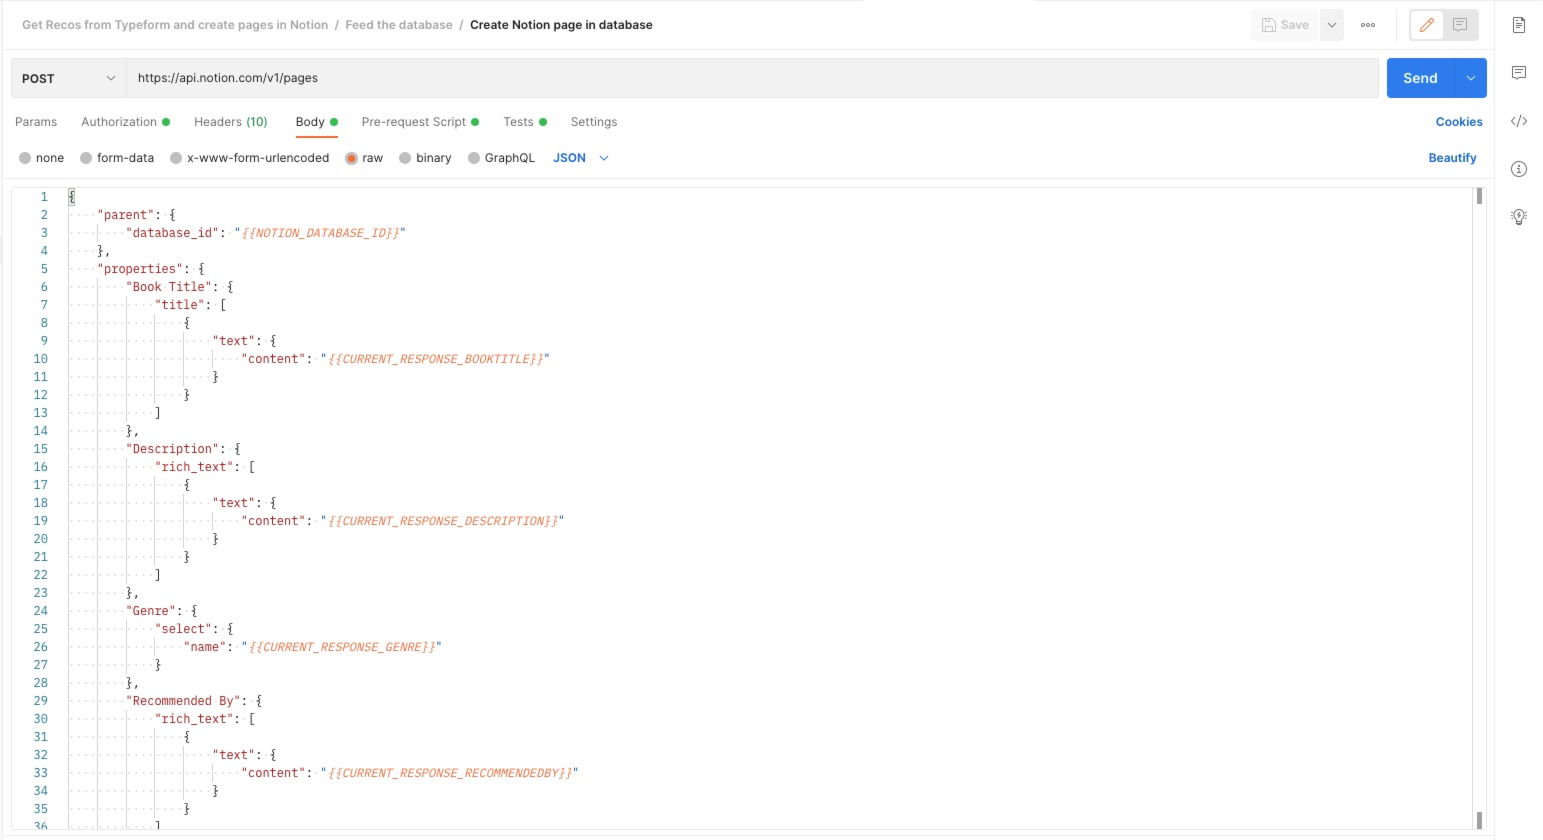
We store recommendation details in separate collection variables (i.e., CURRENT_RESPONSE_BOOKTITLE stores the book title).
In the body of the request, you can see that we use the CURRENT_RESPONSE collection variables as values for the Notion column:
Once the request is executed, we use the test scripts to determine if there are other Typeform responses to be treated. If there is, we set the following request to Create Notion page in database and rerun the same process. If not, we set the next request to null, and the workflow stops here:
let typeformResponses = JSON.parse(pm.collectionVariables.get('TYPEFORM_RESPONSES'))
if(typeformResponses && typeformResponses.length > 0){
  postman.setNextRequest('Create Notion page in database')
}else{
  //end the flow
  postman.setNextRequest(null)
}
With such a setup, you can run this folder regularly and add new book recommendations to your database.
Go beyond this scenario
With this example, we are only scratching the surface of what is possible with Postman to create connections between APIs.
If you want the process to be fully automated, you can create a monitor to run the Feed the database requests on a regular basis to your liking—once a day, every week, and so on.
Both our typeform and Notion databases are pretty basic and easy to modify. You can collect more details when asking for book recommendations and add more questions to your typeform either by editing directly in the Typeform builder or by adding fields to the JSON payload. You can do the same for the Notion database. Keep in mind that you need to update both requests in the Feed the database folder if you change your form or database structure.
To make the respondents’ experience smoother, you can also get as much data as possible from another source. For example, you can extract data from the OpenLibrary API. This can be helpful to get an “official” synopsis, rating, or even book cover:
Conclusion
I hope this tutorial helps you better understand and experience firsthand automation with Postman. What are you going to build with a Typeform and Notion integration? Share your work in a comment below or reach out to me at @picsoung—I look forward to seeing what you come up with.
And don’t forget to check out this Postman livestream where we play with the Typeform and Notion APIs:


What do you think about this topic? Tell us in a comment below.