
Testing APIs in Postman using advanced OAuth flows

This is a guest post written by Jonas Inggbom, director of sales engineering at Curity.
These days, it’s not uncommon for testers to need an OAuth 2.0 access token to call an API. Most commonly, this is a user-level access token that requires the tester to be redirected to authenticate as one or more test user accounts.
Postman supports the OAuth 2.0 code flow, as well as PKCE and OpenID Connect (OIDC) parameters. Yet sometimes the tester may need to run more advanced flows like the ones covered by the Financial-grade API (FAPI) Security Profiles:
- JWT-Secured Authorization Request (JAR)
- Pushed Authorization Requests (PAR)
- Client Initiated Backchannel Authentication (CIBA)
In this post, we’ll break down these advanced flows one by one. We’ll explore how they work and explain how they can be used to obtain an access token that can be used in Postman. To help with some of these flows, we’ll use an external test platform, OAuth Tools.
JWT-Secured Authorization Request (JAR)
JWT-Secured Authorization Request (JAR) is a way to secure the authorization request by sending the parameters encoded as a JWT instead of in the URL. The JWT, in this case, is referred to as a Request Object, and it can be both signed and encrypted depending on the necessary level of security.
The traditional approach of a URL-encoded authorization query leaves the parameters visible and vulnerable to eavesdropping. There is also no way for the authorization server to validate the parameters to ensure they have not been tampered with along the way.
Here is a traditional authorization request:
http
GET /oauth/v2/oauth-authorize HTTP/1.1
Host: idsvr.example.com
response_type=code
&client_id=demo
&scope=openid%20secret_scope
&redirect_uri=https://example.com/cb
The client can sign the contents by wrapping the request parameters in a Request Object. The request parameters are added as claims in a JWT alongside an aud and its claim that identify the intended audience, the authorization server, and the issuer of the Request Object (i.e., the client). Note that the audience is the value that the authorization server uses as its issuer:
json
{
  "aud": "https://idsvr.example.com",
  "iss": "demo",
  "response_type": "code",
  "redirect_uri": "https://example.com/cb",
  "scope": "openid secret_scope"
}
The Request Object can be signed and also optionally encrypted for strengthened security. Signing will protect the parameters from tampering and so-called man-in-the-middle attacks on the request parameters. However, if the Request Object is not encrypted, it is still visible to an eavesdropper. Encrypting the Request Object would solve that problem, but doing so would make the setup more complicated, as keys would need to be exchanged between the client and the authorization server.
Note that OAuth and OpenID Connect define the use of Request Objects differently. A detailed explanation of the differences is outlined in this OAuth and OIDC Request Objects article.
By value or by reference
The Request Object can be sent as a value or as a reference. When set as a value, the Request Object (the JWT) is added to a request query parameter in the authorization request:
http
GET /oauth/v2/oauth-authorize HTTP/1.1
Host: idsvr.example.com
response_type=code
&client_id=demo
&scope=openid%20secret_scope
&request=eyJhbGciOiJSUzUxMiJ9.eyJyZXNwb25zZV90eXBlIjoi…
It could be helpful to send the Request Object as a reference, especially if the size becomes very large. In the by-reference approach, a separate service—trusted by both the client and the authorization server—holds the Request Object. The client sends a reference to the Request Object in the request_uri parameter:
http
GET /oauth/v2/oauth-authorize HTTP/1.1
Host: idsvr.example.com
response_type=code
&client_id=demo
&scope=openid%20secret_scope
request_uri=https://example.com/request.jwt#MjZhNTY2NTVlNDgzNDE5O…
JAR request in OAuth Tools
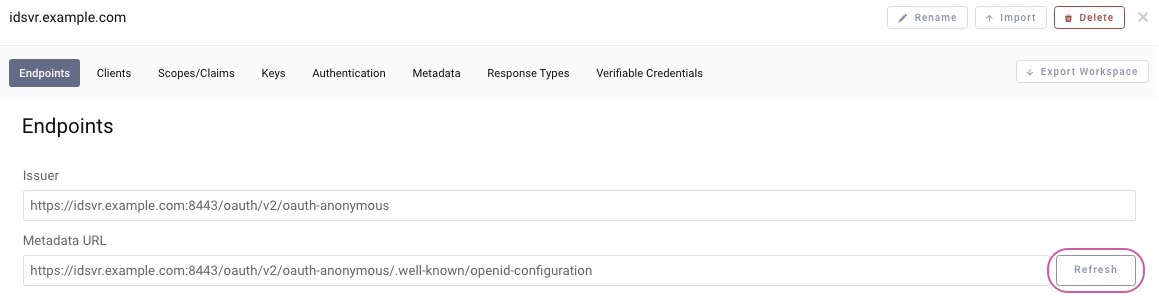
The JWT Secure Authorization Request (JAR) option is available in OAuth Tools if the server supports this option. OAuth Tools uses the .well-known/openid-configuration endpoint to resolve if JAR is enabled on the server side. If OAuth Tools has already been configured before enabling JAR on the server side, the metadata might have to be refreshed for the workspace by clicking the Refresh button:
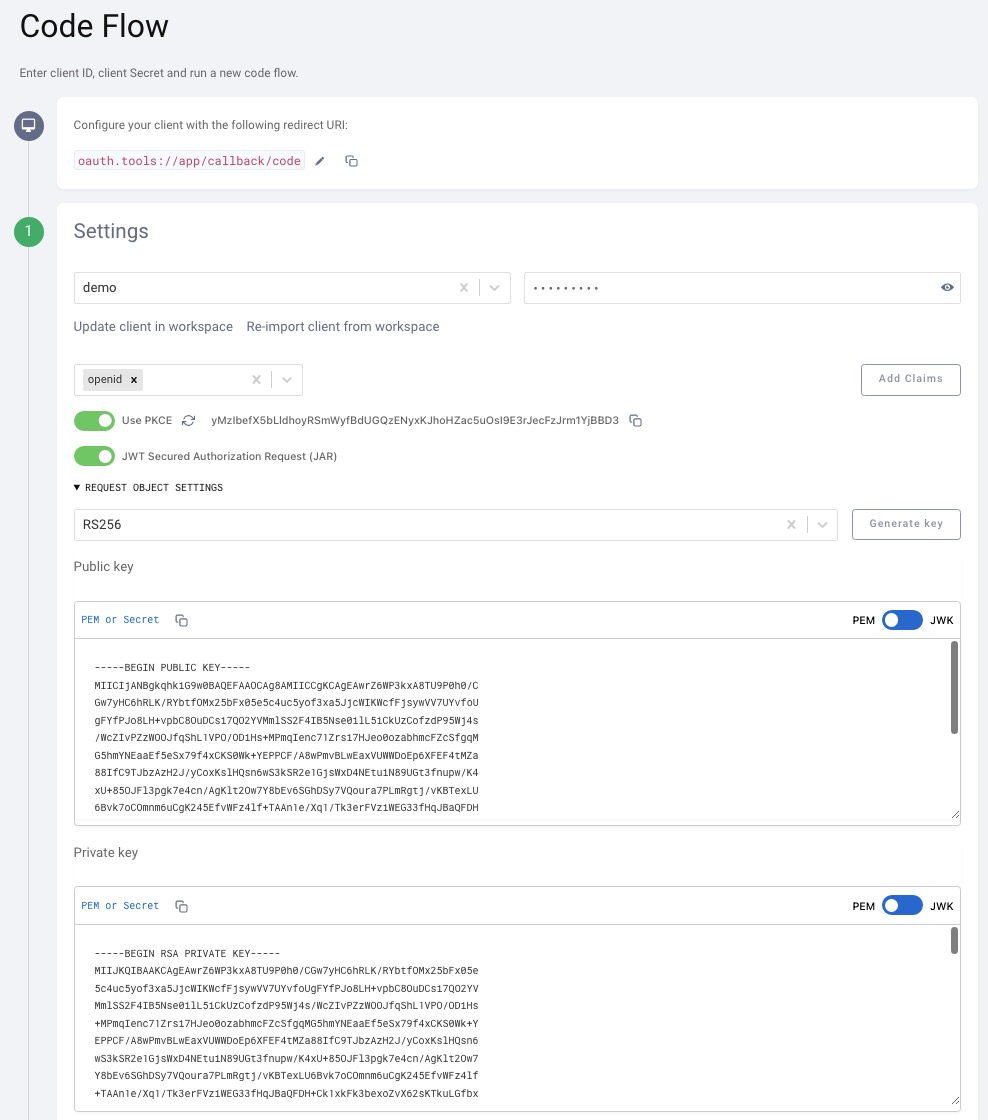
Step 1: The JWT Secured Authorization Request (JAR) option should be available as an option for the code flow. The Request Object Settings need to be configured accordingly. Either use an existing key pair or generate a new private/public key. Note that since OAuth Tools will sign this Request Object, the server must hold the public key to validate the incoming JWT:
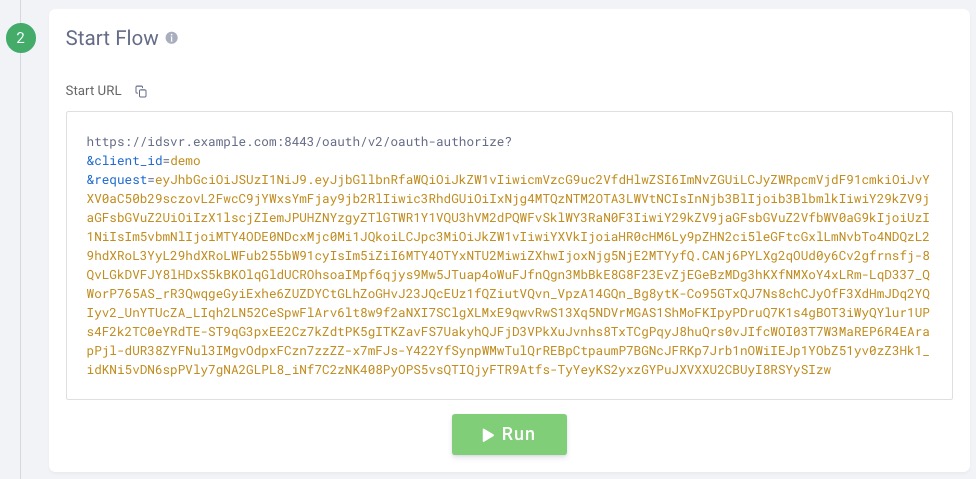
Step 2: OAuth Tools will automatically construct the request to start the flow. All request parameters from Step 1 (i.e., scopes, client, etc.) are encoded as a JWT, signed, and added to the request parameter:
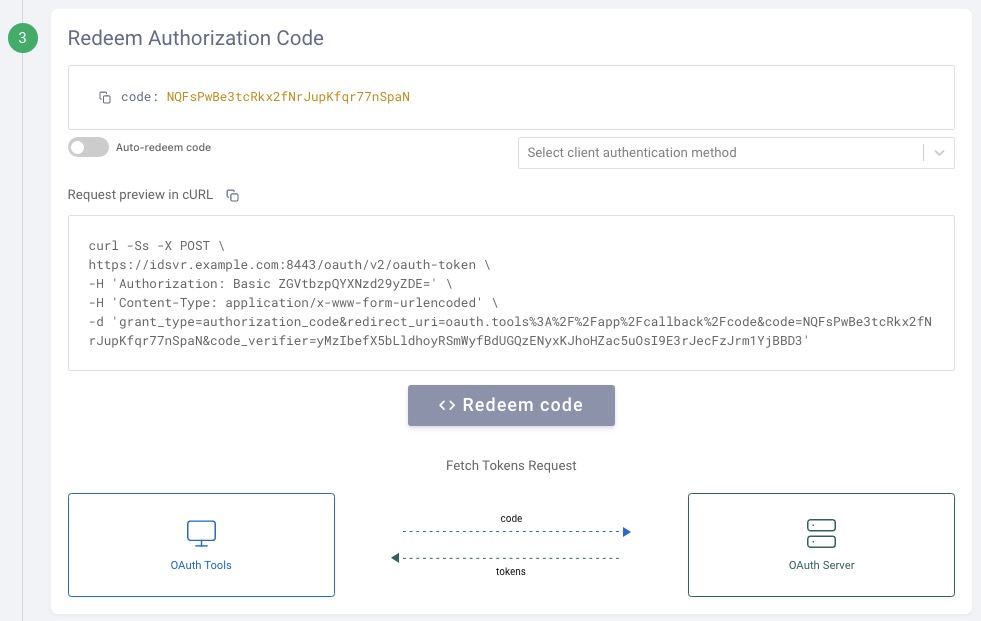
Step 3: OAuth Tools receives the authorization code if the server successfully processes the request. From this point onwards, the steps are the same as a traditional parameter-based request. The code can be redeemed for a token(s):
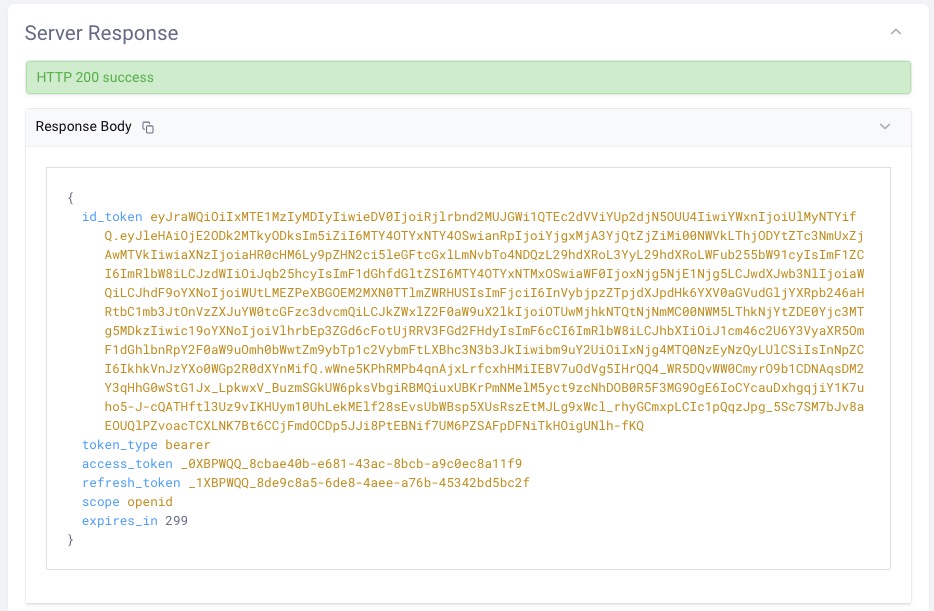
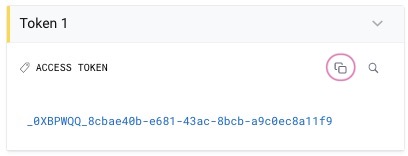
Step 4: OAuth Tools displays the received tokens in the response and also in a user-friendly format in the right-side panel. Use the Copy button to easily copy the token over to Postman:
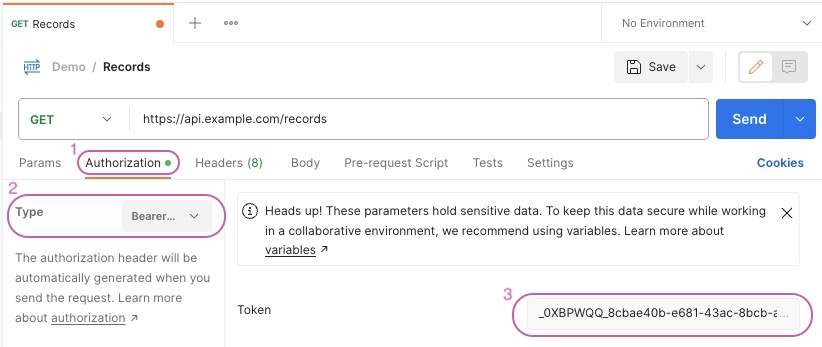
Step 5: In Postman, navigate to the Authorization (1) tab for a request. Choose the type Bearer (2) from the drop-down list and paste the token in the Token (3) field:
Pushed Authorization Requests (PAR)
The OAuth 2.0 Pushed Authorization Requests specification outlines how to securely initiate an OAuth or OpenID Connect flow. In a traditional approach, the client sends a set of request parameters in the query string:
http
GET /oauth/v2/oauth-authorize HTTP/1.1
Host: idsvr.example.com
response_type=code
&client_id=demo
&redirect_uri=https://example.com/cb
In this approach, the parameters pass through the user agent and, as such, are not integrity-protected since they are susceptible to tampering. The authorization request URL can also become very large, depending on the use case.
Both of these issues can be mitigated by using PAR, where the client initiates the authorization request through a POST request with the parameters in the body. The authorization server exposes a dedicated /par endpoint for this purpose that is authenticated in the same way the /token endpoint is and could, for example, leverage mTLS. This approach also allows the authorization server to validate the request for scopes, state, or PKCE. Unlike the previously outlined JAR approach, PAR does not require the client to manage cryptographic keys because the payload is not signed:
http
POST /authorize/par HTTP/1.1
Host: idsvr.example.com
response_type=code
&client_id=demo
&redirect_uri=https://example.com/cb
&state=1648668000757-u14
&scope=openid
The authorization server persists the request parameters in a Request Object and issues a request uniform resource name (URN) that it returns in the response to the client:
json
{
  expires_in 60
  request_uri urn:ietf:params:oauth:request_uri:c1d8ffee…84531
}
The client then passes the URN as a reference to the Request Object in the authorization request:
http
GET /authorize HTTP/1.1
Host: idsvr.example.com
request_uri=urn:ietf:params:oauth:request_uri:c1d8ffee…84531
&client_id=demo
The authorization server can now use the persisted Request Object to perform the authorization flow. The request parameters have already been validated, so the authorization server now knows that the parameters have not been tampered with.
The rest of the flow continues just like a traditional code flow, where the user is authenticated and the authorization server responds with a code that the client then redeems for tokens via the /token endpoint.
PAR request in OAuth Tools
A code flow that involves PAR requires several requests and responses to be executed. These steps can be a hassle to track, and the flow can be tedious when all that is needed is a token that can be used on behalf of a user for testing an API.
OAuth Tools streamlines the process for running a code flow in general, and it also supports PAR. With capabilities to construct the request appropriately and auto-execute requests when possible, it’s easy to run the flow and obtain a token in OAuth Tools. To do so, follow these steps:
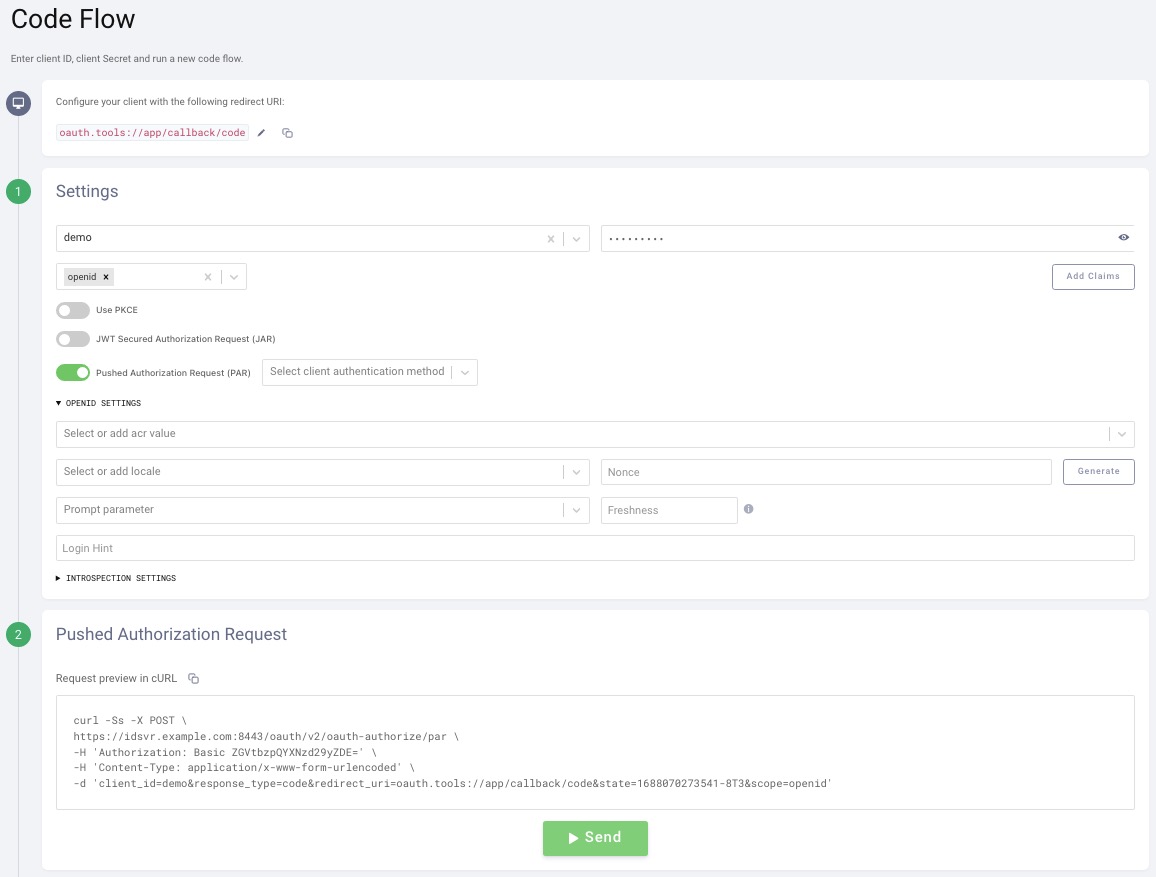
Step 1: Set the parameters for the client (i.e., what scope to request, etc.).
Step 2: The rest is constructed based on the options selected in Step 1. The POST request is visible and can be executed by clicking Send:
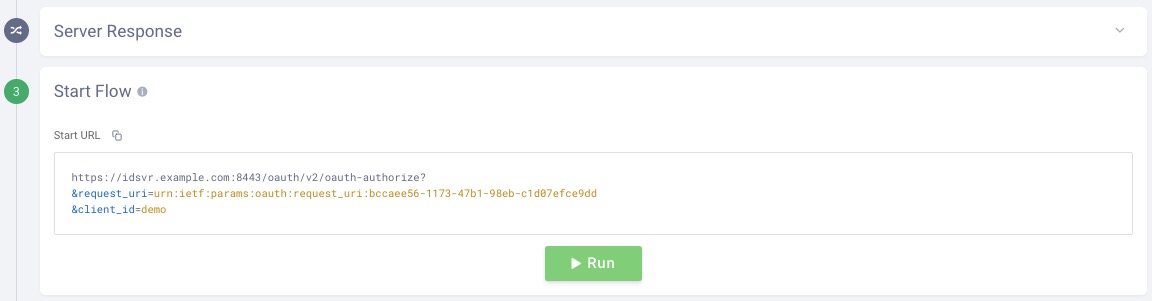
Step 3: The server responds with the request_uri and automatically creates the next request. This is where the traditional code flow starts. The request is sent to the authorize endpoint, and it passes in the request_uri received. This is the pointer the server will use to look up the parameters from the request in Step 2:
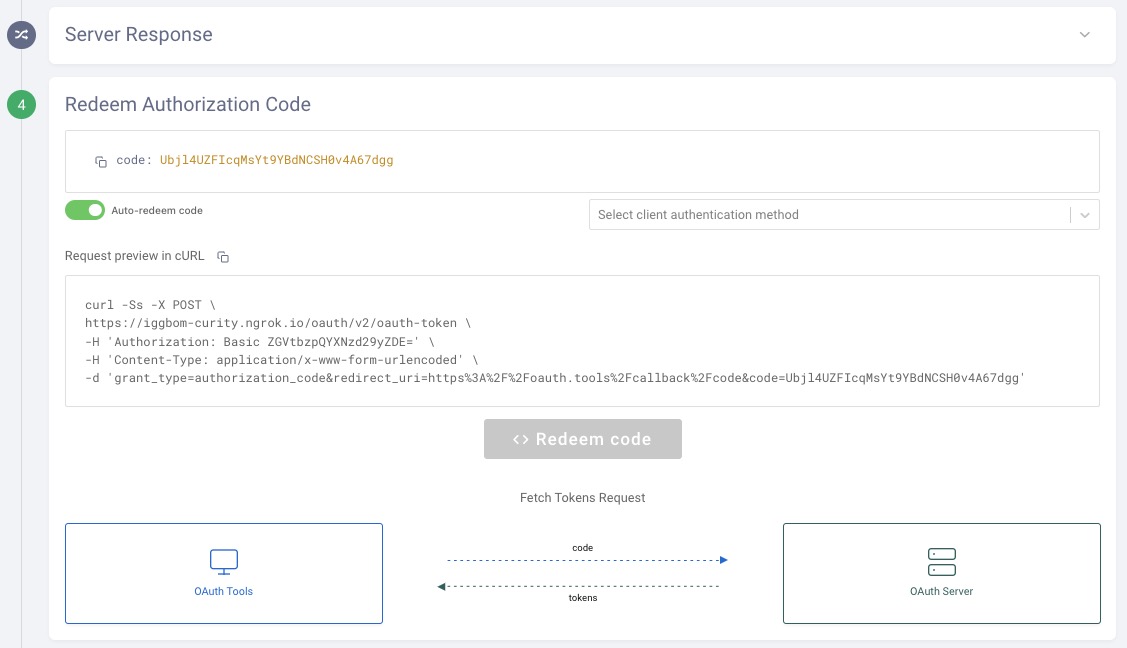
Step 4: The server responds with a code. OAuth Tools can auto-redeem the code for tokens if the toggle is enabled. If not, the Redeem code button can be used to call the token endpoint to obtain the requested token(s):
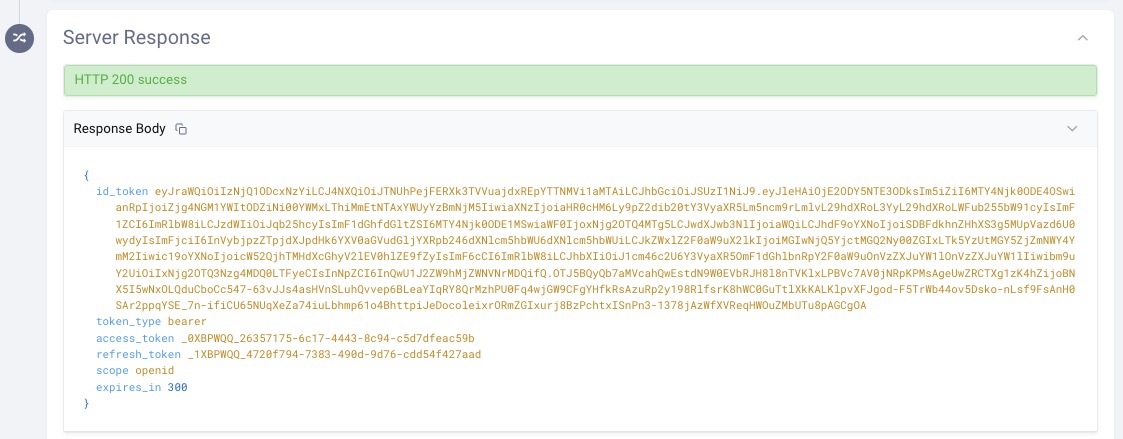
Step 5: In this example, an access token, refresh token, and ID token were obtained. The ID token is returned since, in the example, the openid scope was requested:
Step 6: To use your tokens in Postman, see steps 4 and 5 in the “JAR request in OAuth Tools” section above.
Client Initiated Backchannel Authentication (CIBA)
CIBA is a decoupled flow where the user performs authentication on an authentication device, but the user does not initiate the authentication itself. Instead, the flow starts with a consumption device initiating an authentication request to the authorization server. The best use case to describe CIBA is when a call center agent begins user authentication, and the customer performs the authentication on their device. The user can (optionally) consent for certain claims such as phone, email, and address. After successful authentication, this data becomes available to the call center representative:

CIBA in OAuth Tools
OAuth Tools supports the CIBA flow. It’s executed as a separate flow and not a code flow.
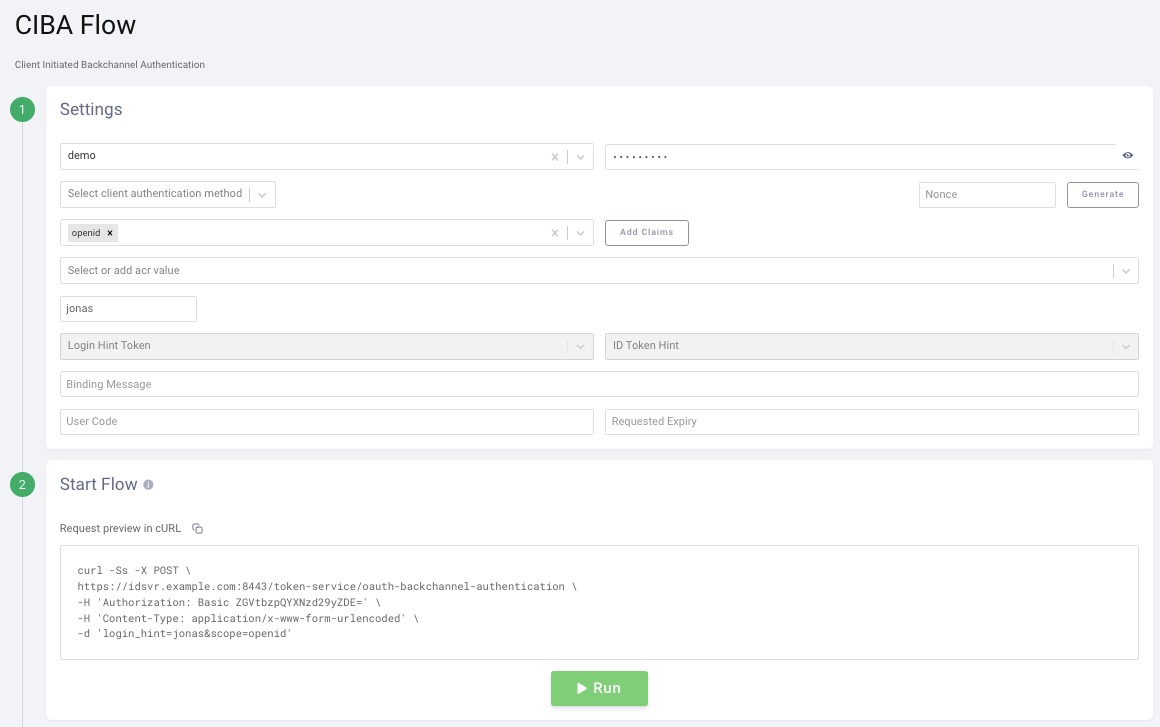
Step 1: Choose a client that has the CIBA flow enabled. Select the needed scopes (must be configured server-side also). The login_hint in the example below is a user in the system with an email address in its account information. It’s needed in the example since an email authenticator is used.
Step 2: The POST to the specific CIBA endpoint is displayed. Click Run to start the flow:
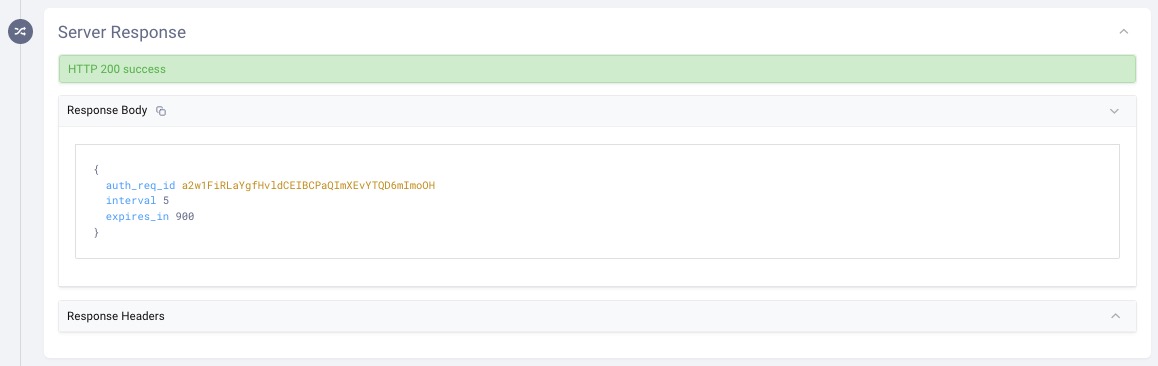
The server responds with a 200 and returns an auth_req_id in the response:
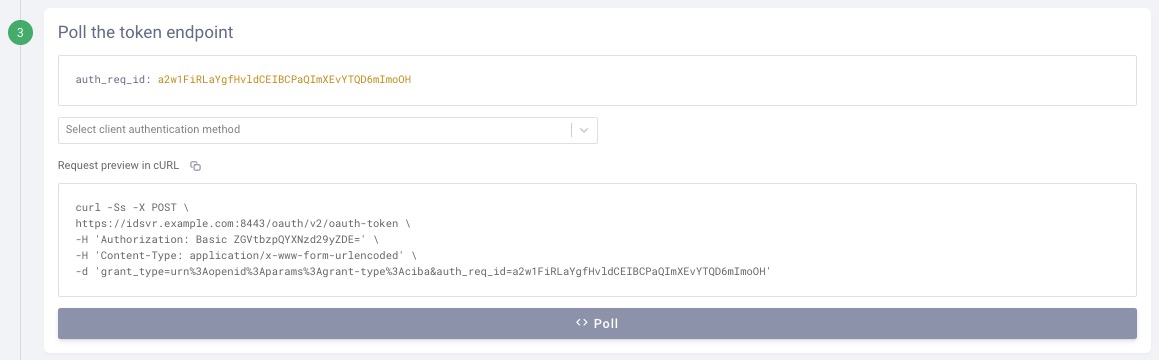
Step 3: OAuth Tools can poll the token endpoint using the received auth_req_id:
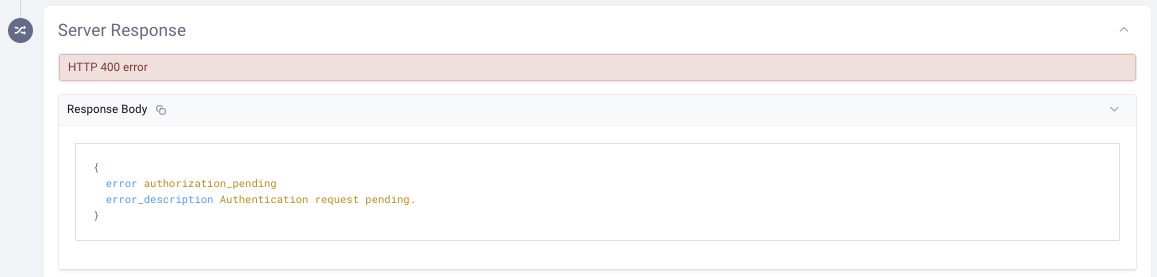
Step 4: As long as the email authentication (in this case) has not been completed, the response will be 400 with the message Authentication request pending. This is obviously because the out-of-band authentication has not been completed yet:
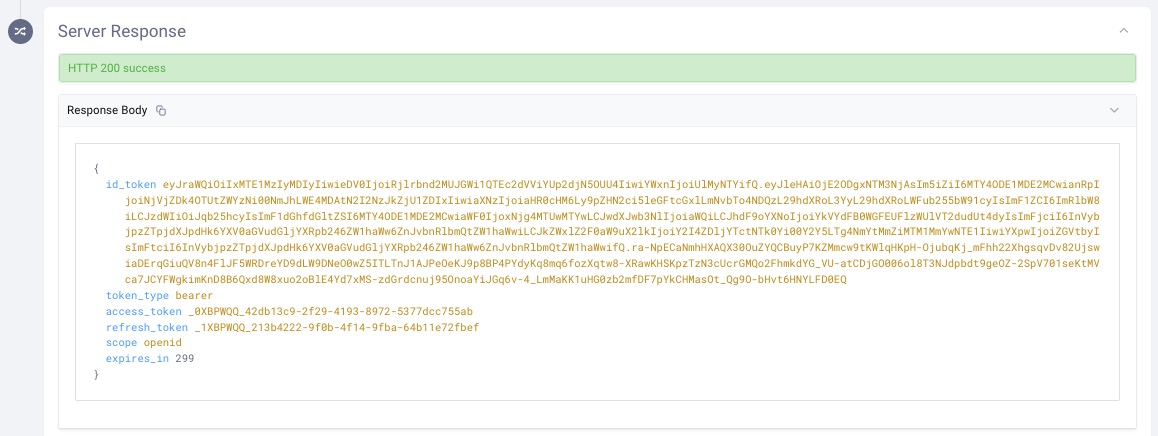
Step 5: When the out-of-band authentication has been successfully completed and the token endpoint is polled, the response will instead be a 200. The requested tokens will be returned in the response:
Step 6: To use the requested tokens in Postman, see steps 4 and 5 in the above “JAR request in OAuth Tools” section.
OAuth Tools and Postman
Postman includes many powerful features for running OAuth and OIDC flows. At times, you may need to authenticate users via flows that target higher security. The JAR, PAR, and CIBA flows were described separately in this post, but in some cases, these standards can be combined.
OAuth Tools is a visual standards-based tool for learning about OAuth flows, and it is kept up-to-date with emerging standards. It enables testers to visually run the correct OAuth flow and get the proper access token to send to APIs. This token can then be copied over to Postman and used to run Postman Collections, providing a productive, end-to-end approach for secure API testing.


What do you think about this topic? Tell us in a comment below.