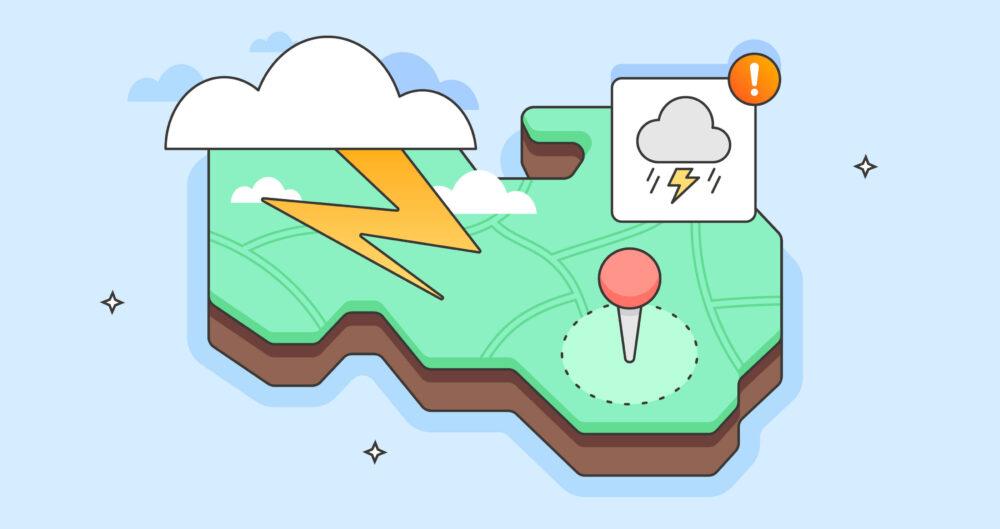
Set up severe weather alerts around a geofence
With Tomorrow.io and Postman currently running the Harness the Weather Hackathon through August 1, 2023 (featuring a top prize of US$1,000!), this is the second blog post in our series intended to inspire ideas for the hack. The demos in the blog series showcase what’s possible when working with Tomorrow.io and Postman.
This time, we’ll explore Tomorrow.io’s advanced alerting system that allows you to subscribe to locations of interest and national weather advisories with just a few steps. Following an official Tomorrow.io “recipe” on their docs, let’s walk through how to set up an alert for winter weather hazards, with the results in the tutorial theoretically notifying company staff in Boston via a Slack channel.
Follow along by forking the collection in Postman here.
1. Get your API key
Before we begin, sign up to their platform and, once logged in, grab your key.
2. Building parameters and body
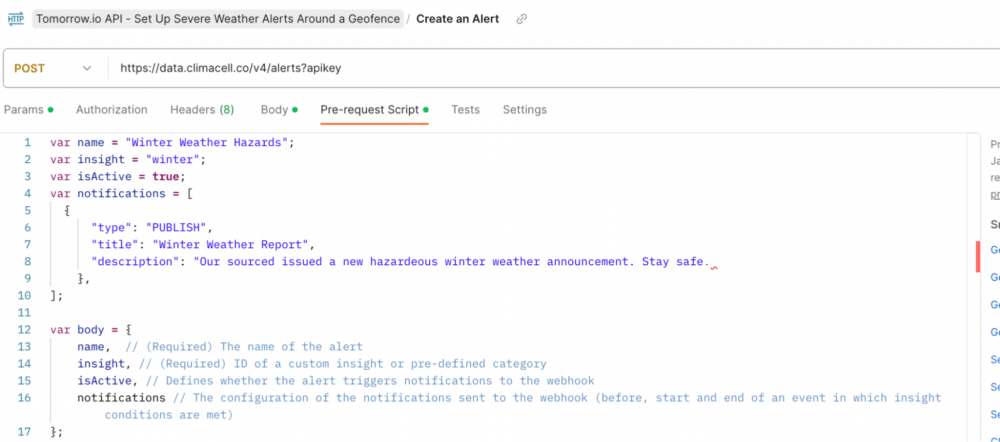
Next, in our first request to create alerts, we will be running a pre-request script to build our options.
Choose an insight category
In our case, we will automatically notify the company employees to stay home and safe whenever there’s an event of “winter” type.
First, we need to choose an insight category covering the weather events we’d like to monitor with alerts:

Note: Our collection currently mainly covers US weather reports issued by NWS. This will be extended soon, so keep an eye out for updates.
Specify the name and notification details
Next, we will add some descriptive text for these specific alerts that we can pull directly from the webhook’s payload to enrich our message—without needing additional handling by the distribution service.

Alerts based on a custom insight can be sent PRIOR/START/END of the detected weather event because they are calculated throughout the day. However, category insight alerts rely on external sources and only trigger notifications as they are published.
3. Create a severe weather alert
Now that we have all of the parameters, we can create the alert in the system to be linked to our locations of interest later.
By default, all alerts are created as active. If you wish to activate them at a later stage, make sure to set isActive as false, and after that, use the /activate and /deactivate endpoints:
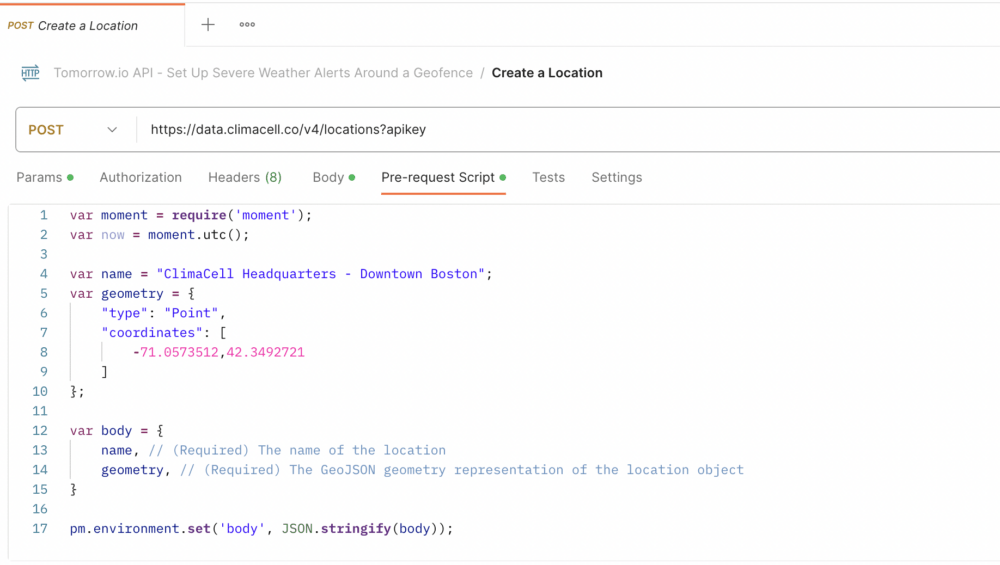
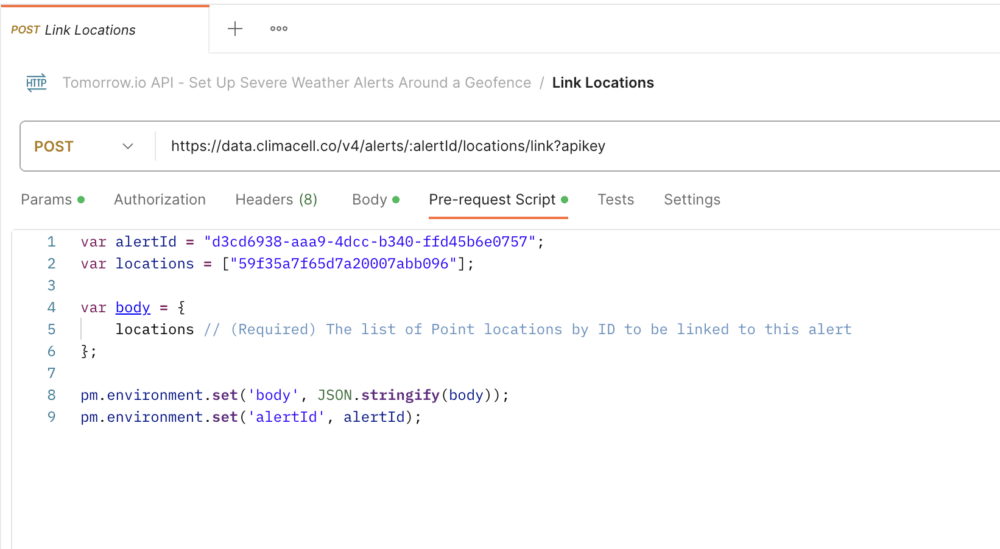
4. Link a predefined location to alert
Unlike custom insight alerts, these can be linked to any location type—be it Point, Polygon, or Polyline—as long as it is predefined in the system.
This uses the locationId of the Tomorrow.io headquarters neighborhood in Downtown Boston. When we set it up, we used a Polygon geometry to create a “geofence” around the office to ensure no nearby weather events were missed:
5. Configure the webhook URL
Finally, you need to connect the platform to your webhook URL, listen to incoming events, and parse the notification payload to distribute it to your chosen channel.
There are a few ways to go about this. Some are easier than others. Read our guide on Alert Listeners to learn how to set that up.
Using this, you can connect with other APIs for your Harness the Weather Hackathon project. Set up with Twilio to send text alerts or Slack to send notifications to office channels!
Give this a fork and a try, then create something cool for the Harness the Weather Hackathon—you just might win the top prize of US$1,000 when winners are announced at ClimaCon!


What do you think about this topic? Tell us in a comment below.