API testing in Kubernetes with Postman and Testkube

This is a guest post written by Bruno Lopes, product leader at Kubeshop.
If you’re a QA engineer or software developer, you want to help ship bug-free code at a healthy pace—regardless of your stack. That means you need to properly test the APIs you’re creating in every environment, be it staging, testing, or production. You are always creating new APIs or making changes to existing APIs. But there are a few challenges when it comes to API testing:
- Access to the environments you are testing against could be restricted. For instance, your APIs may be behind a VPN or a firewall, or you may need a special kind of authentication.
- Schemas and protocols might not be fully documented.
- There may be differences between your testing, staging, and production environments that could cause your API tests to fail in some—but not all—environments.
- Ongoing API development and the need to test multiple versions can make testing complex.
As a developer or tester, what you’re really hoping to gain with API testing is confidence in your APIs. You need to know if your APIs are doing what they’re supposed to do.
The state of API testing in Kubernetes
Building a test suite that’s capable of adequately testing your API is hard enough without all the barriers that modern infrastructure puts in your way. Kubernetes’ appeal is that it has a robust network model that abstracts away most networking complexity, but some of that complexity still remains. Many developers and testers create test runners to get around the network access issues that come with running Kubernetes inside a protected network. These test runners are often Docker containers that include all the dependencies required to run the API test and that you send to the Kubernetes cluster for processing.
When using Postman tests, you can create one or more Docker-based runners that can take your Postman Collections, “inject” them into your Kubernetes cluster, and run them against your microservices in the way you’ve specified. But creating and maintaining these runners isn’t necessarily a trivial task, which is where Testkube comes in.
How Testkube does Kubernetes API testing differently
A good-thinking model for Testkube is that it’s a “bridge” between your Postman tests and the internal workings of your Kubernetes cluster. Once you install Testkube, you can execute your API tests from inside your cluster without the headache of Docker configurations.
Testkube works well with Postman Collections, and it also supports over 11 additional testing tools, platforms, and plug-ins to help you centralize your test orchestration and reporting in a single UI. You can seamlessly hop between API tests, UI tests, load tests, and more—using tools like Cypress or k6—for truly holistic Kubernetes testing.
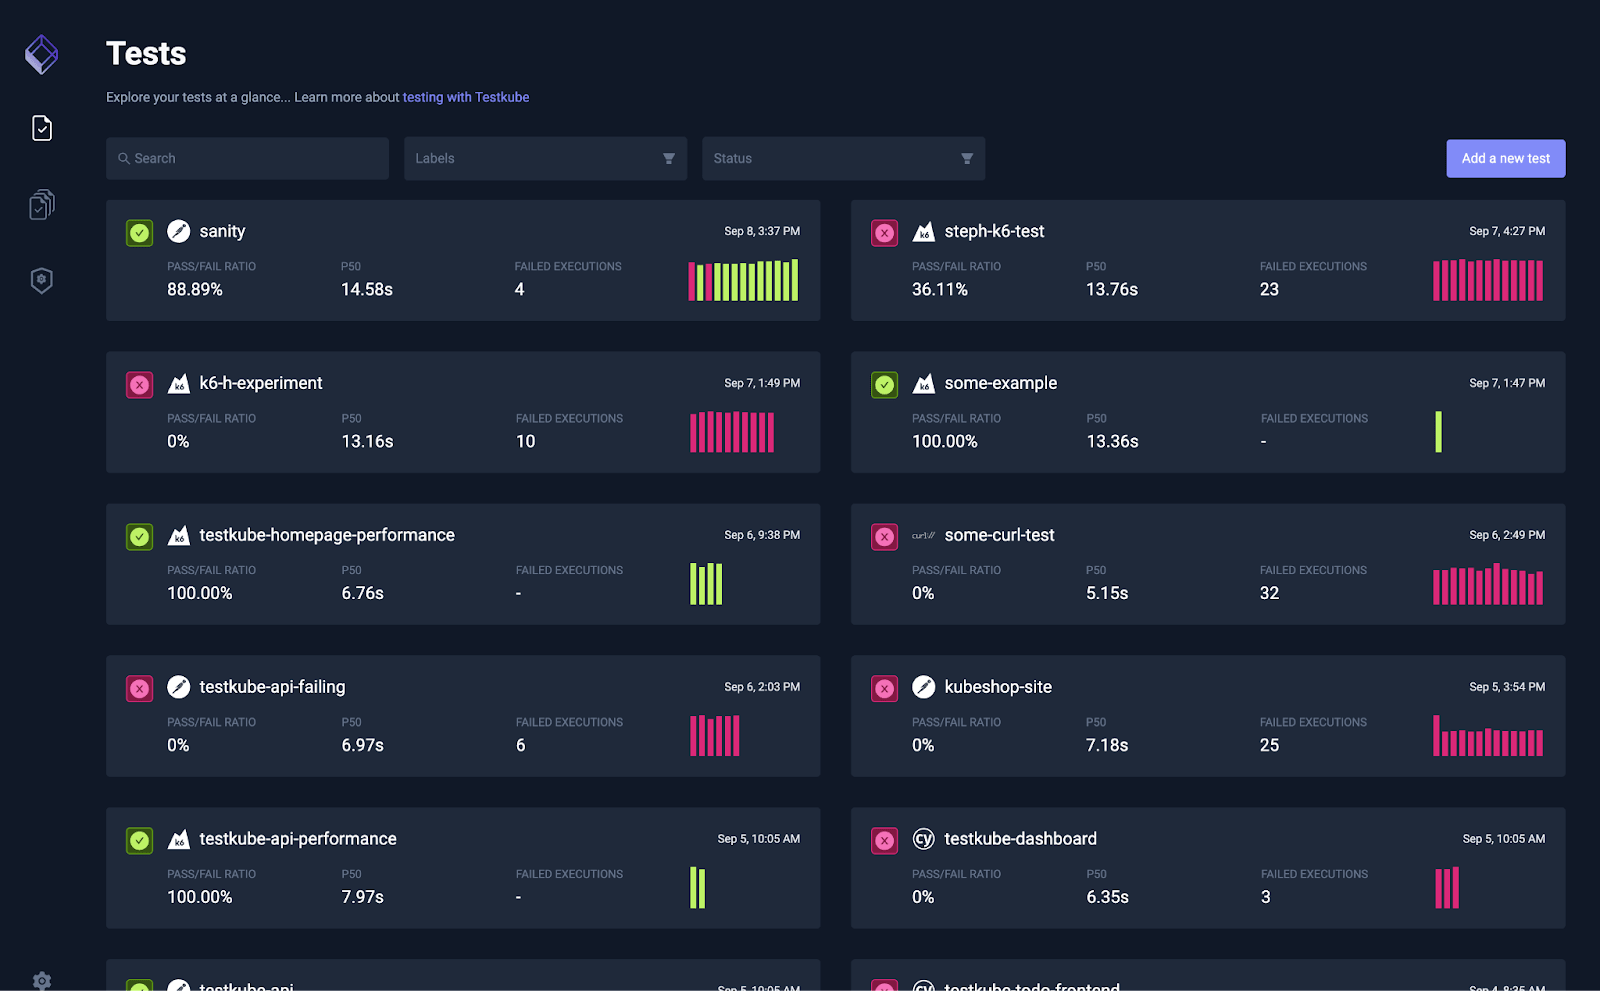
Running tests from inside your cluster is the best way to ensure reliability and bypass issues involving connectivity to your cluster. You can easily trigger the tests from your CI/CD pipeline or use Testkube’s more user-friendly UI to have a better look at the state of your tests:
By using Testkube and Postman together, you will achieve the most robust and uncomplicated API testing in Kubernetes. This will enable you to quickly and repeatedly validate how your application responds in many ways, such as its:
- Performance: What’s the latency between receiving a standard query and returning a valid response?
- Security: What’s contained in the response’s JSON/XML output, and does it leak any private user data?
- Correctness: Does the response contain all the data you need—and nothing extra?
- Uptime: Does your API respond to requests every time?
Perhaps most importantly, you’ll be able to determine if your application does what you expect when you call an API endpoint.
Creating your first Postman API test in Testkube
As a tester, you can install Testkube on your command line to create, manage, and run your API tests. You can also perform these tasks by accessing the Testkube UI, which runs from within your cluster.
To keep this article simple, we’ll create and run a test against Testkube’s demo cluster and UI. Feel free to use it to experiment with all of Testkube’s features and test types. When you’re ready to run Testkube on your own cluster, you can install both the CLI tooling and Testkube components in two simple commands.
Create your Postman API test
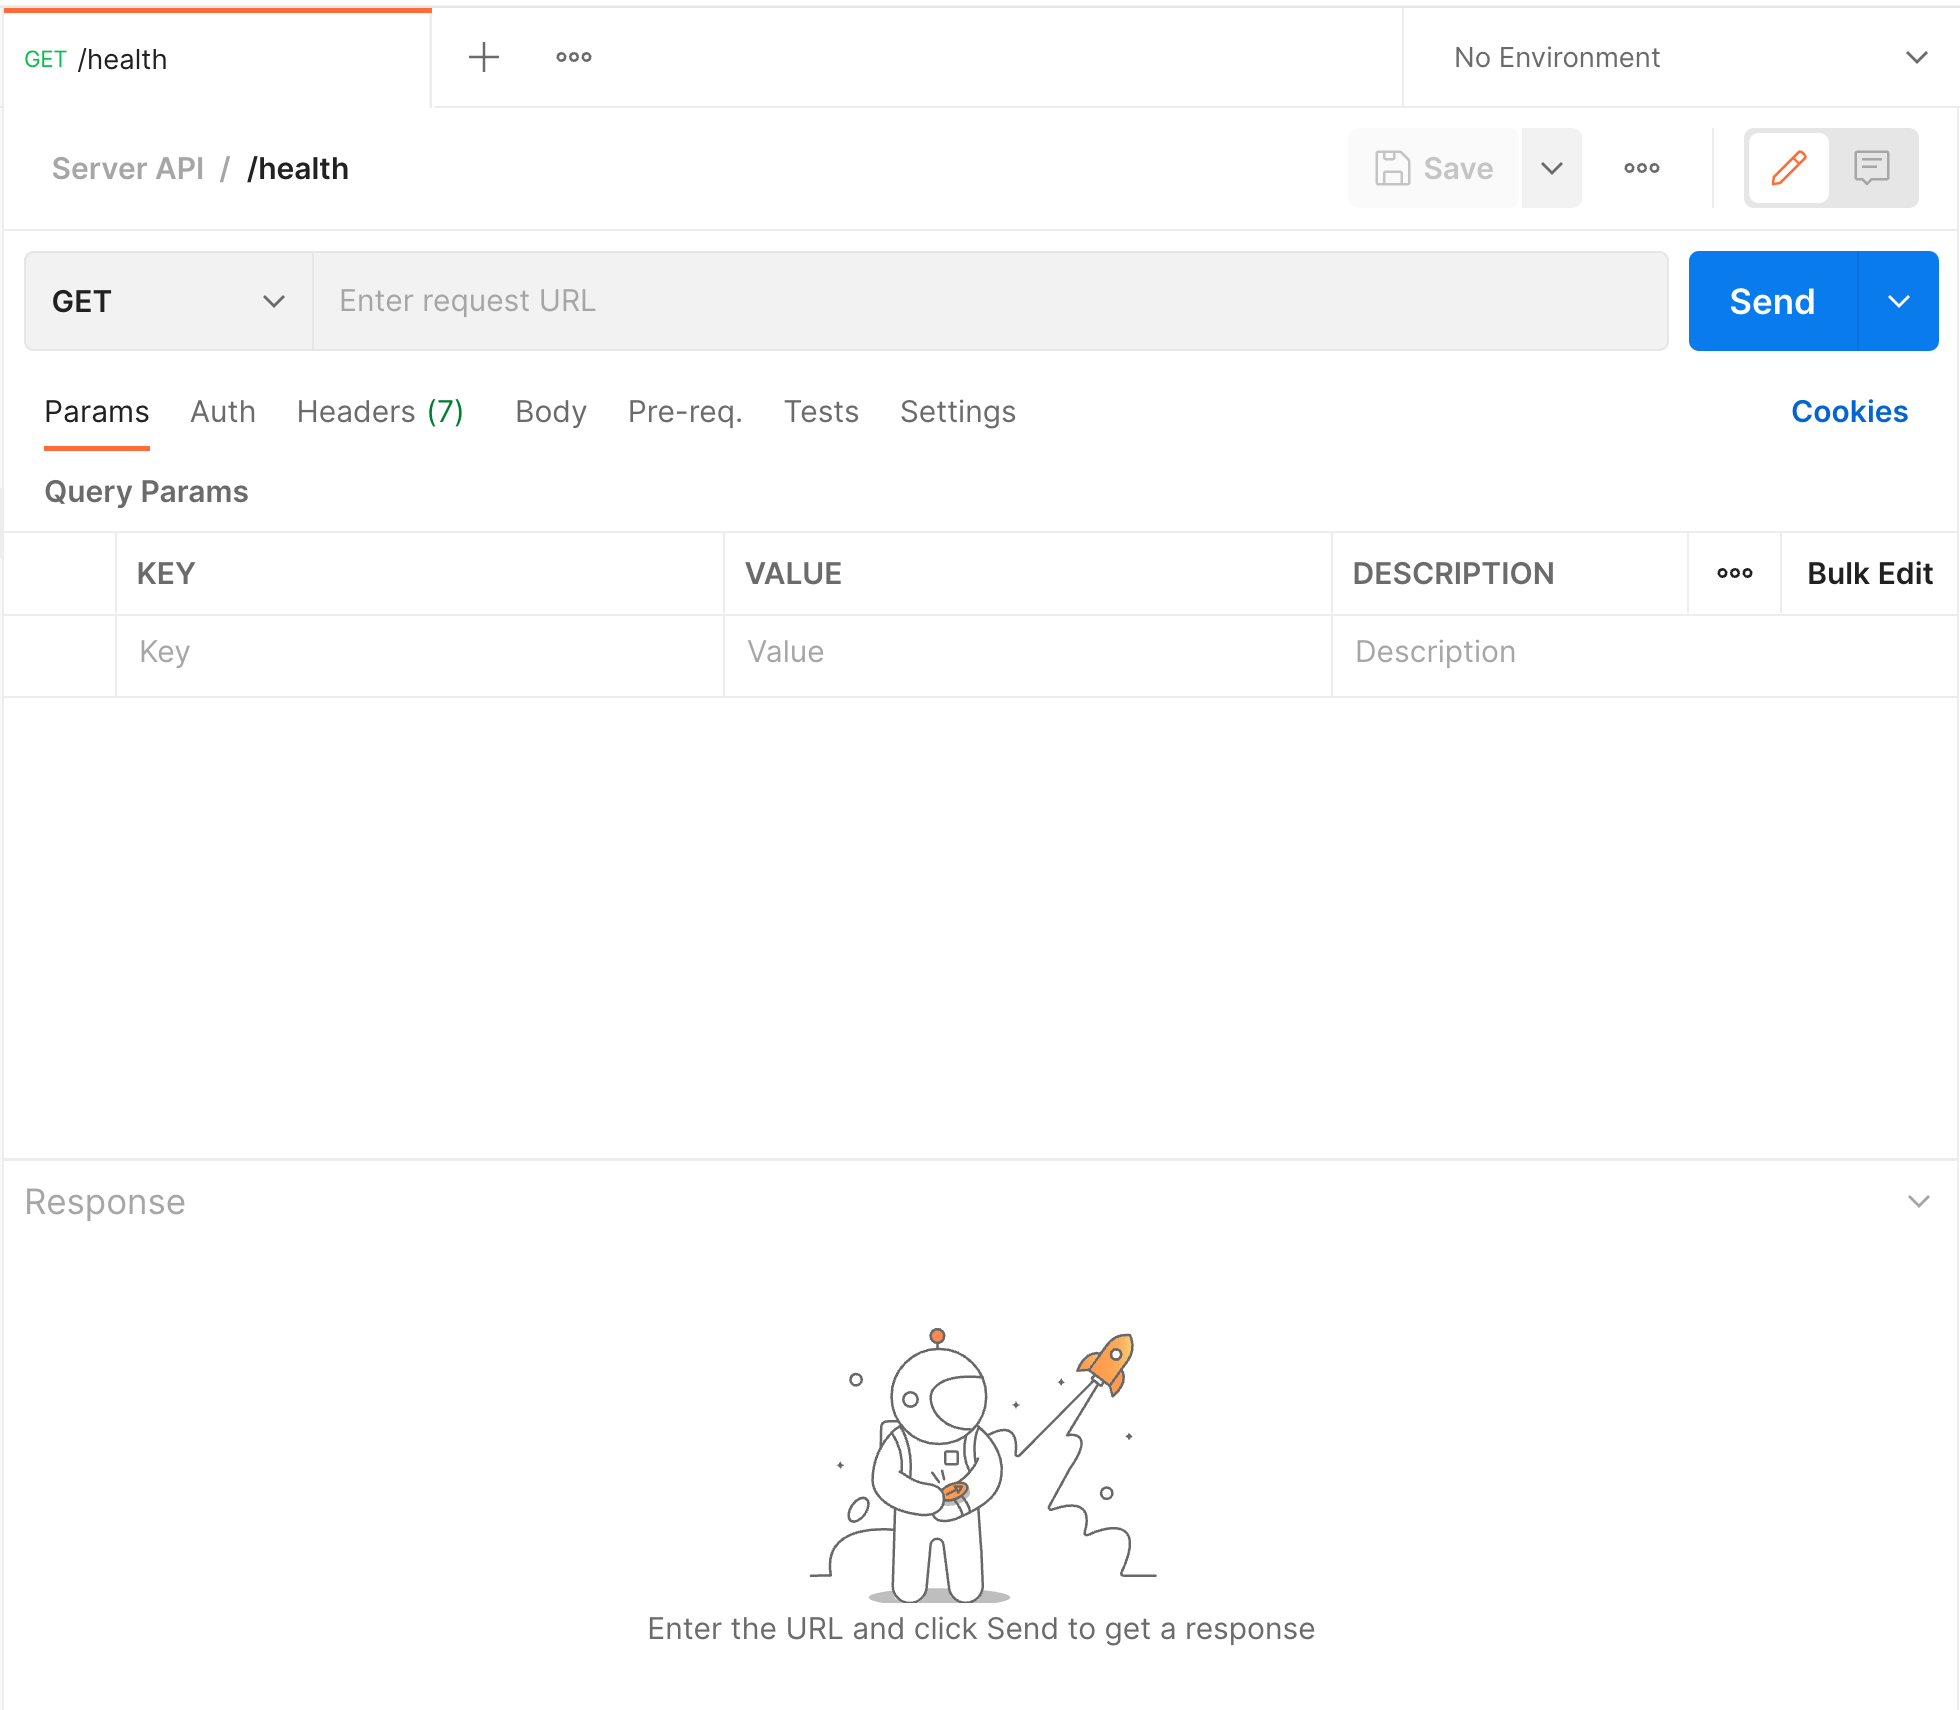
First, create a new collection in Postman. Then, within that collection, create a new health API test. Choose a GET request and select http://testkube-api-server:8088/health as the request URL:
In the Tests tab, copy and paste the following test example (you can learn how to create test scripts here:
pm.test("Status code is 200", function () {
   pm.response.to.have.status(200);
});
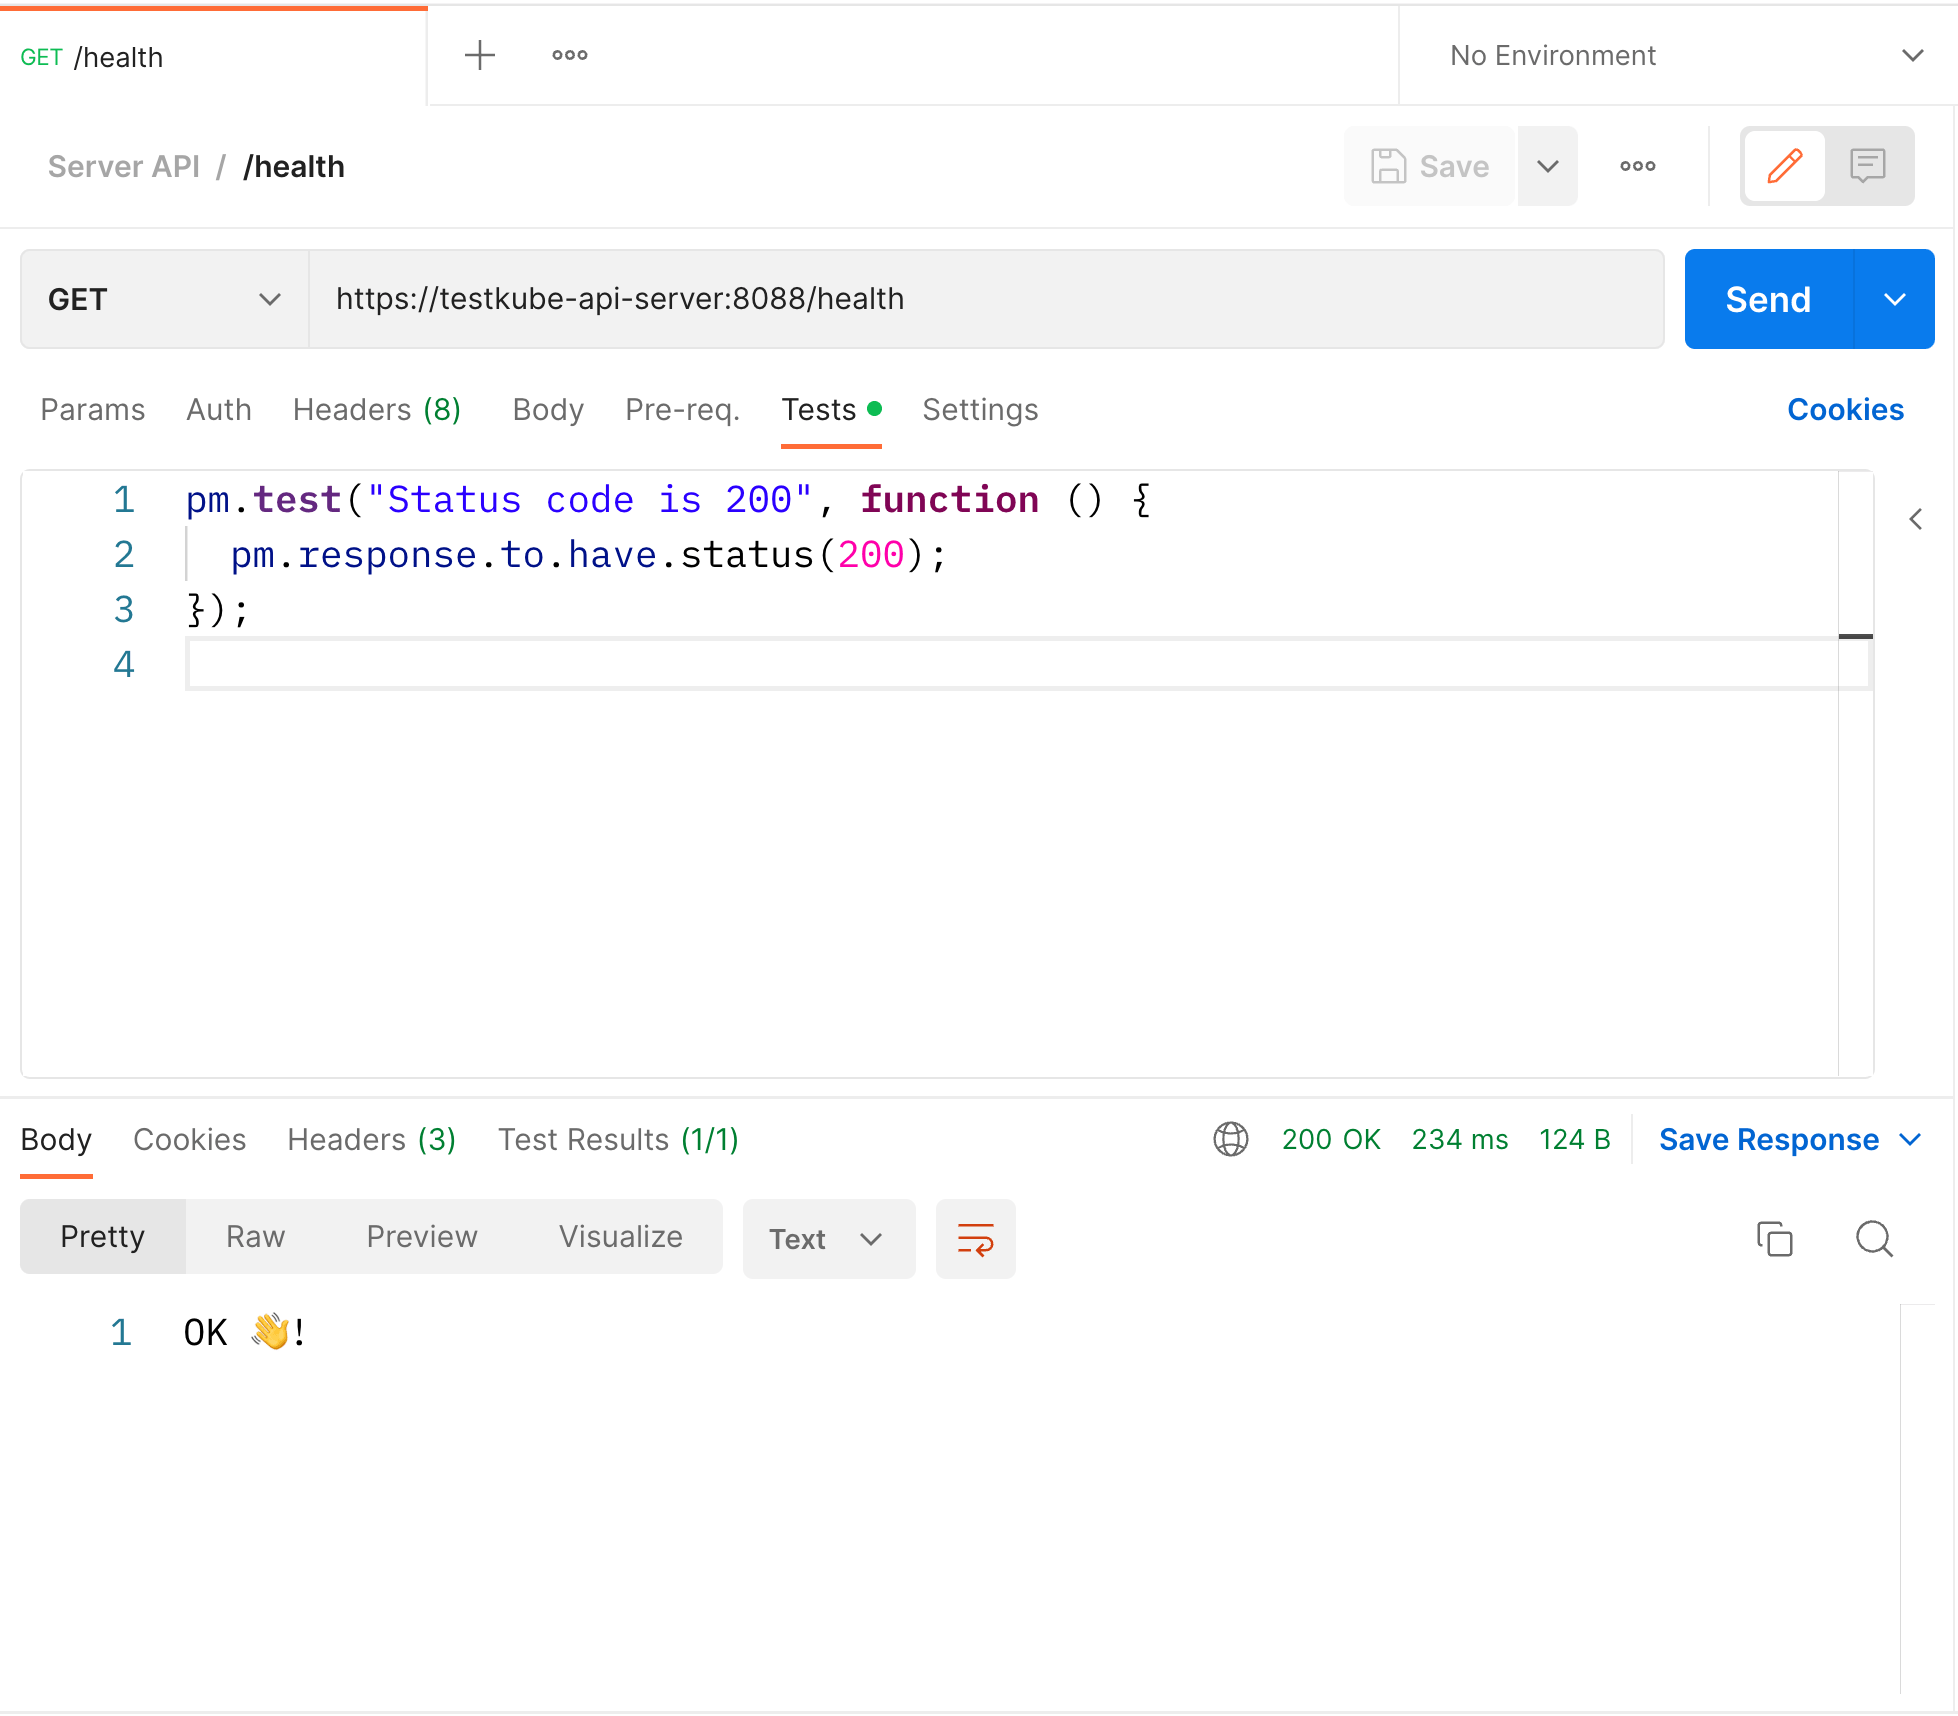
This test will send a GET request to the /health endpoint on the service testkube-api-server, which runs on port 8088. If the cluster responds as expected—with a status 200 response—then the test passes.
Then, right-click on your collection to export it to a JSON file, which allows you to run multiple API tests against your Kubernetes cluster in the same execution.
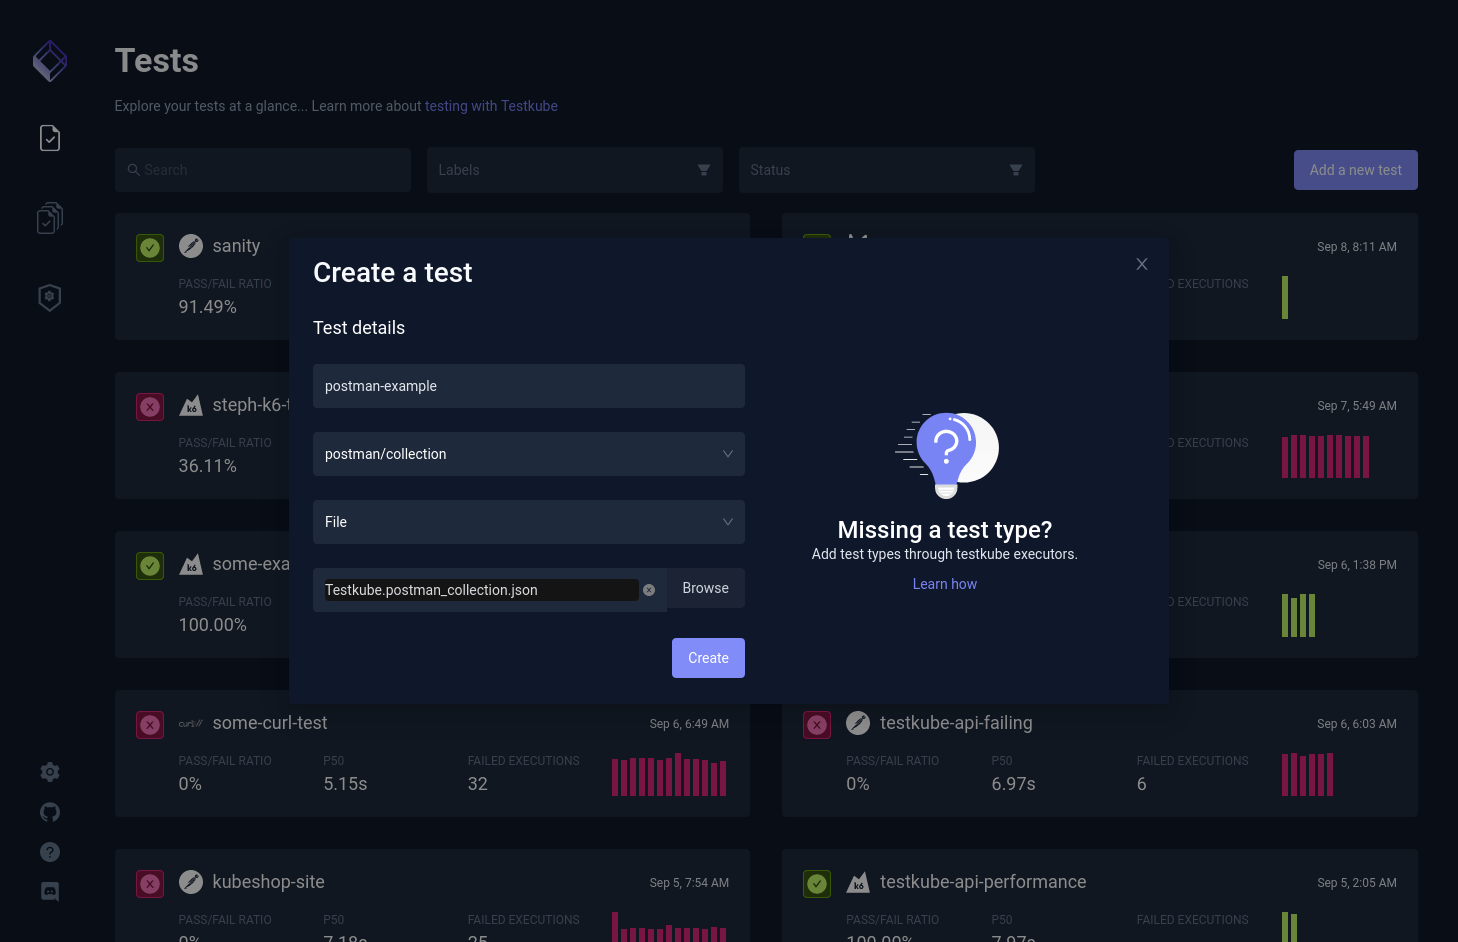
Next, open Testkube’s demo UI and click Add a new test. Name your test and select postman/collection from the Type dropdown list. Then, choose File from the Source dropdown and upload the JSON file you just exported from Postman. Click Create to import your test:
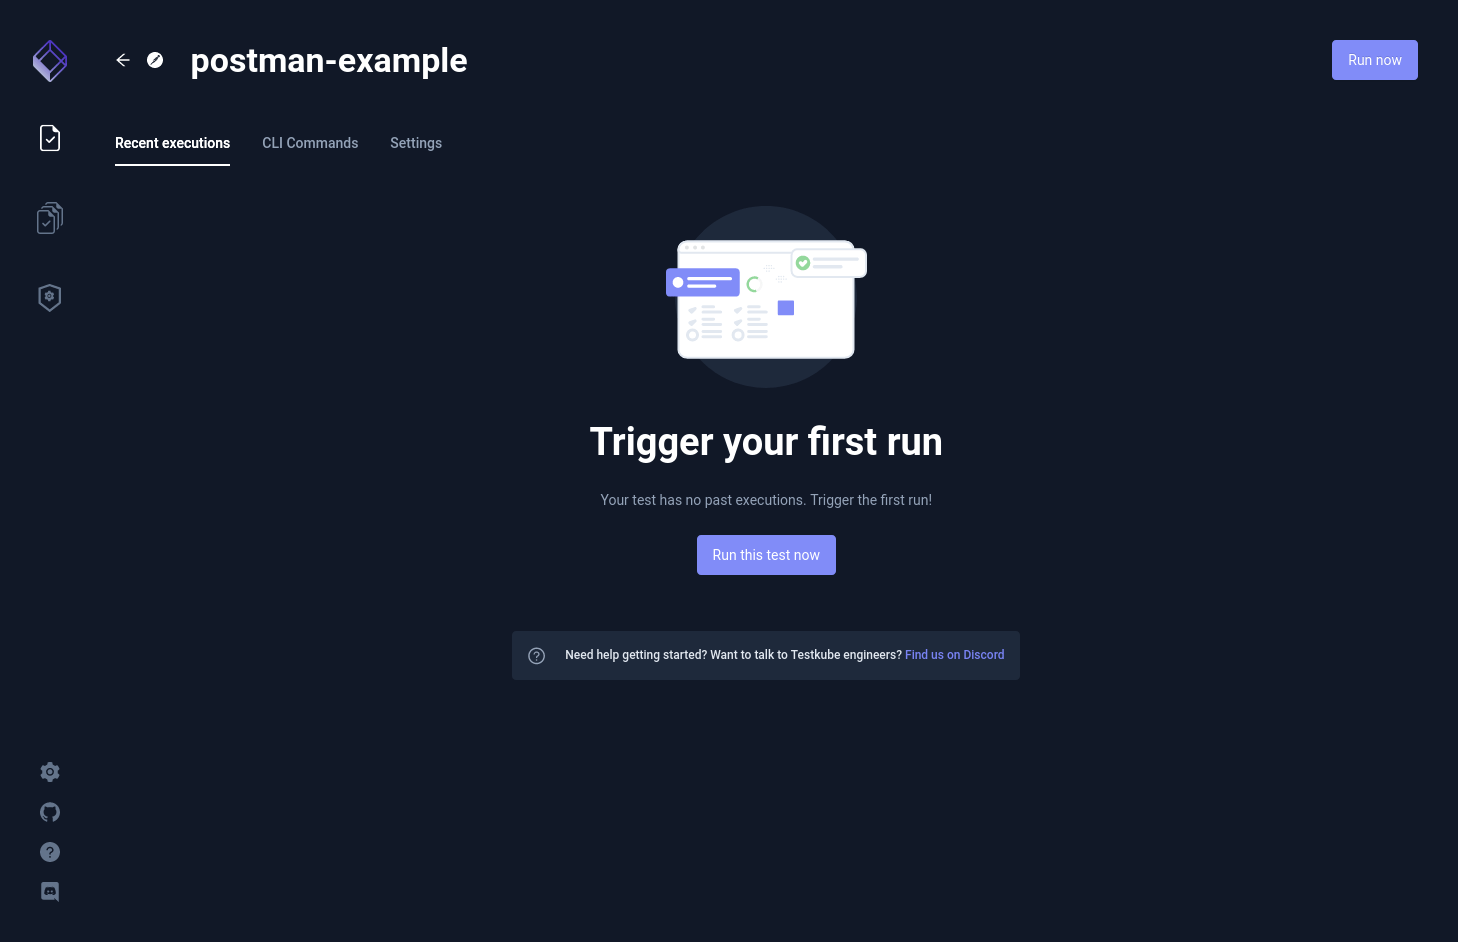
The last step is to click the Settings tab, followed by Variables & Secrets, to define environment variables or add database secrets. Once you have everything set up, click Run this test now to run your API tests against your Kubernetes cluster:
View logs and results in the Testkube UI
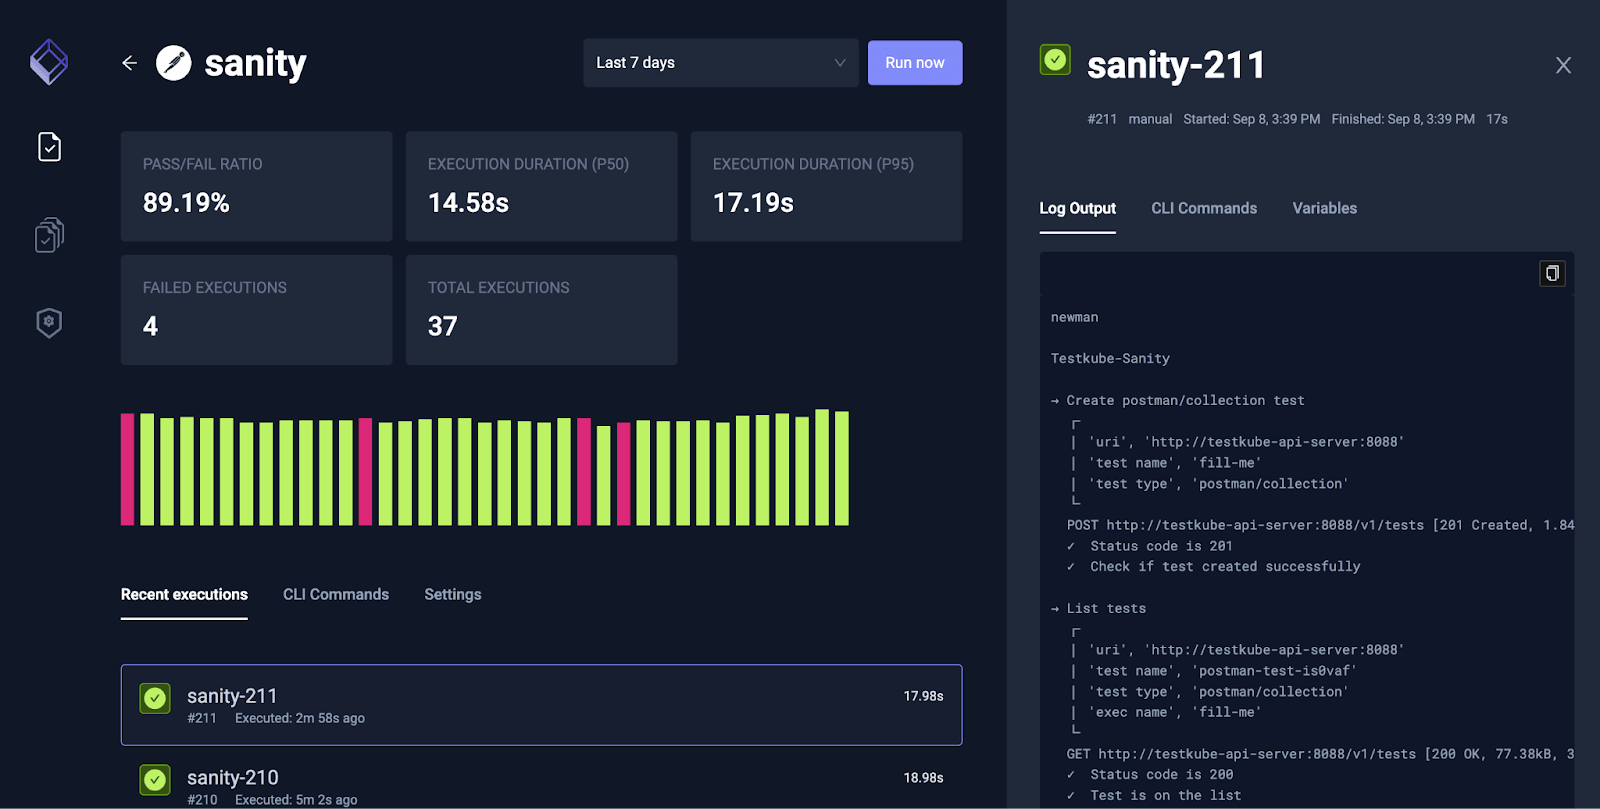
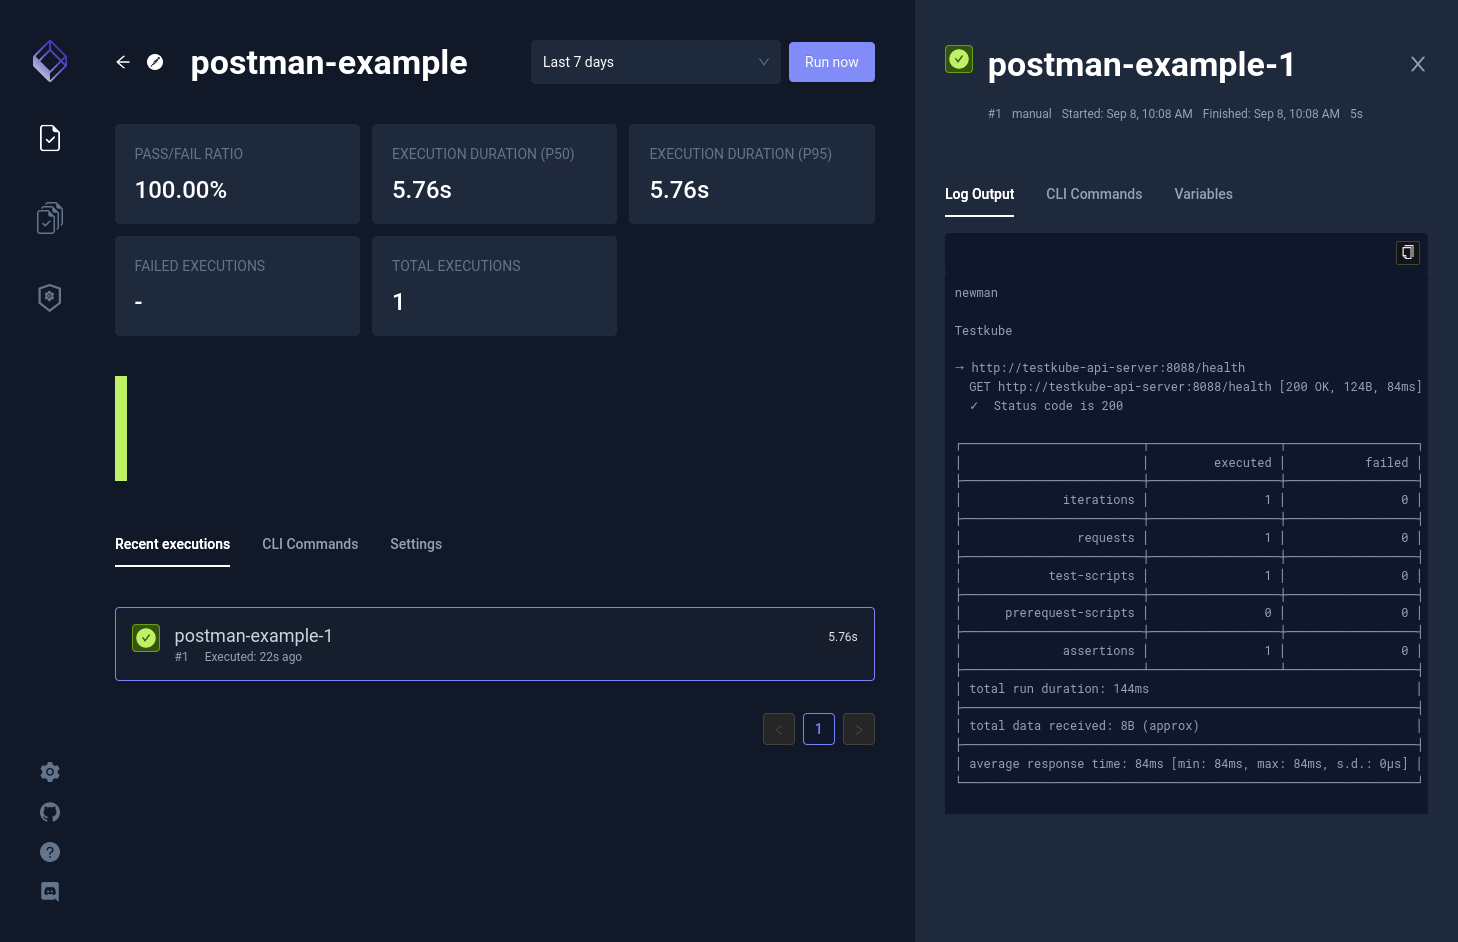
Click on Recent executions to view your test. A green checkbox next to your most recent execution (there will likely only be one at the moment) indicates a PASS, whereas a red X lets you know that your test returned a FAIL.
You can click on the execution to see the log output and various contextual information, such as the variables you passed and the time frame during which your test ran:
At this point, you can tweak your Postman Collection, add more complex API tests, or automate your API testing by running tests with the Testkube CLI and your existing CI/CD pipeline on GitHub Actions.
Get started with Postman and Testkube
Now that you’ve run a Postman API test against Testkube’s demo cluster and gotten familiar with the Testkube UI, you’re ready to install Testkube in your cluster. This will unlock a high level of test automation, all of Testkube’s supported test types, and a results database for a centralized test result management. With a single UI, you’ll be able to quickly build and deploy more comprehensive API tests, discover regressions, speed up the velocity in your deployments, and have confidence that your APIs work as expected.
We are very excited to partner with Postman to make running tests in Kubernetes easier than ever. Check out Testkube’s GitHub repo to follow our journey to become the most complete Kubernetes-native testing framework.


What do you think about this topic? Tell us in a comment below.