Set up a WebSocket server in Node.js
The WebSocket protocol provides a way to exchange data between a client and server over a persistent connection. The data can be passed in both directions with low latency and overhead, and without breaking the connection. This means the server can independently send data to the client without the client having to request it, and vice versa.
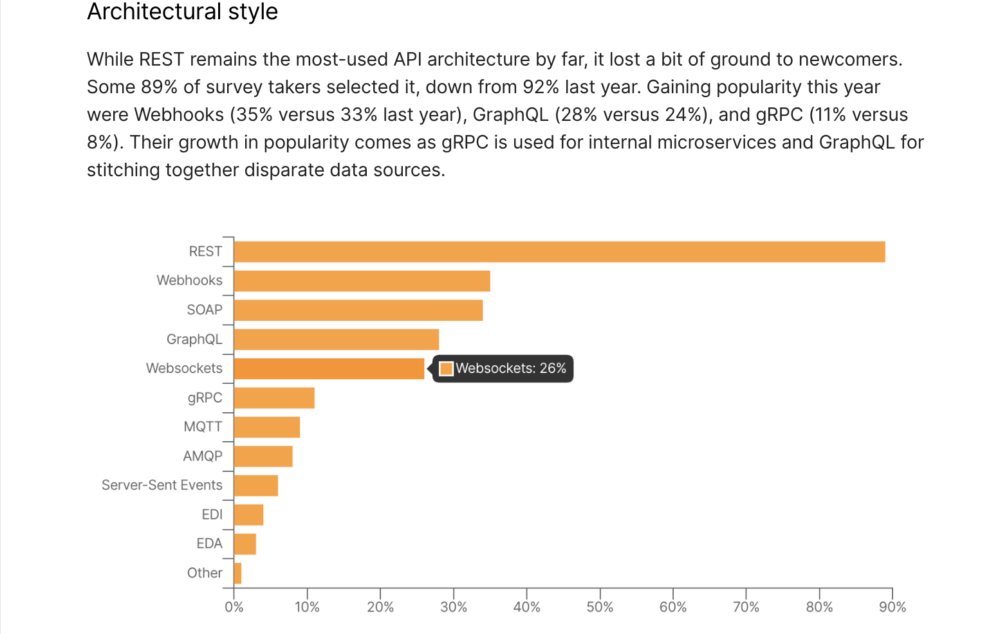
WebSockets are great for building real-time functionality into web applications, such as games and chat apps, or for communicating financial trading data or IoT sensor data. More and more people are exploring WebSocket APIs in Postman. According to Postman’s 2022 State of the API report, WebSockets are used by 26% of respondents.
In this tutorial, let’s create a WebSocket server, and use Postman to send and receive messages across the WebSocket connection.
Pre-requisites
To follow along with this tutorial, you’ll need the following:
Create the Node.js server
In your terminal, make a new directory called websockets with the following command:
mkdir websockets
Then, navigate into the new directory:
cd websockets
Next, install ws, a WebSockets library for Node.js:
npm install ws
Installing the WebSockets library like this also initializes your Node.js project and creates a package where your project files are stored. Open the websockets directory using your preferred text editor, like VSCode. You should see the project files scaffolded as below:

Look inside the package.json file to see the ws dependency. Add the "type": "module" to the package.json so we can load an ES module in the next step. Your package.json should look like the following:
{
  "type": "module",
  "dependencies": {
    "ws": "^8.12.0"
  }
}
In the root directory, create a file called index.js and paste the following code from the ws documentation for a “Simple server.” This code initializes the WebSockets server. Upon establishing a connection between the client and this server (once running), the server will send the message “something” to the client:
import { WebSocketServer } from 'ws';

const wss = new WebSocketServer({ port: 8080 });

wss.on('connection', function connection(ws) {
  ws.on('message', function message(data) {
    console.log('received: %s', data);
  });

  ws.send('something');
});
It’s now time to run our server locally from the command line:
node index.js
Send and receive WebSocket messages
In Postman, select New > WebSocket Request to open a new tab. Enter the WebSocket server URL. A WebSocket URL begins with ws:// or wss:// and our server is running on localhost:8080. Click Connect.
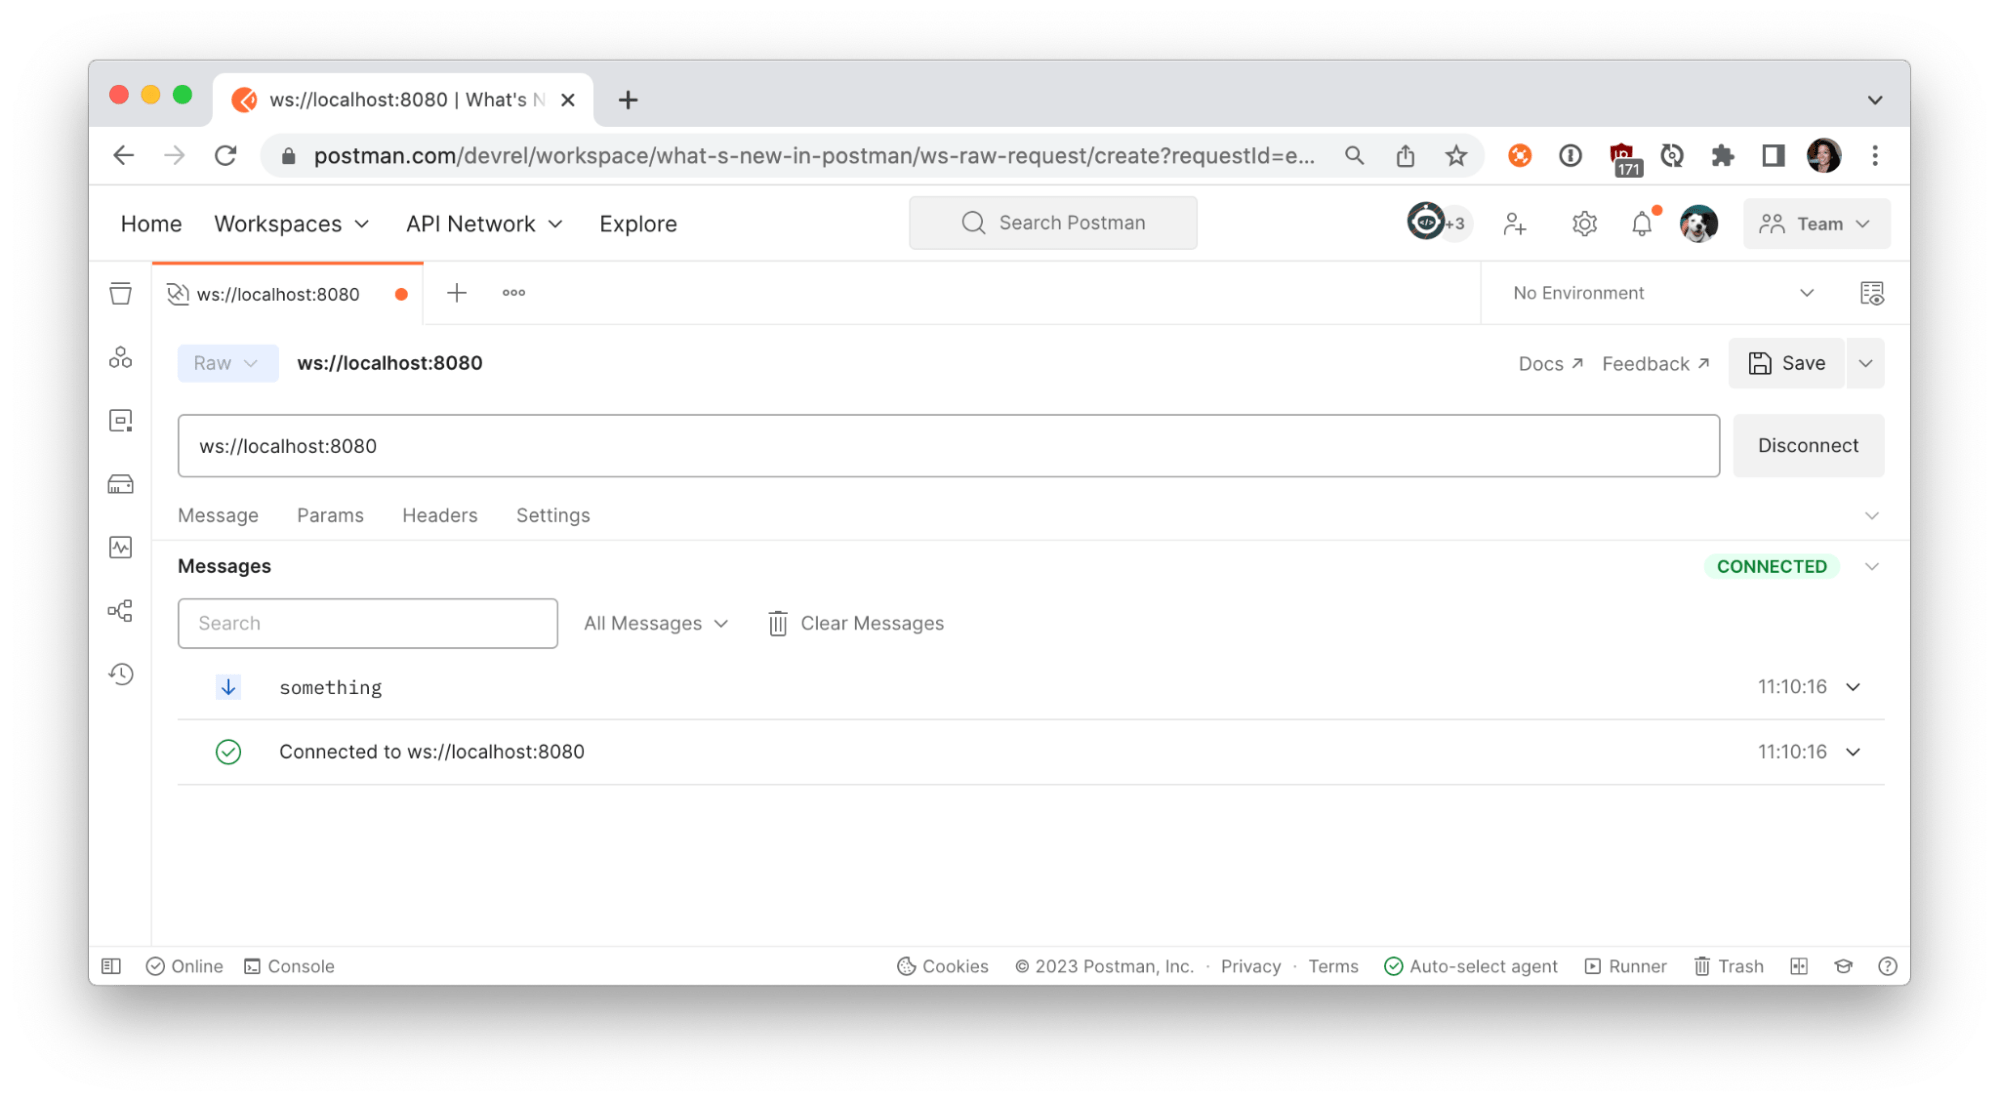
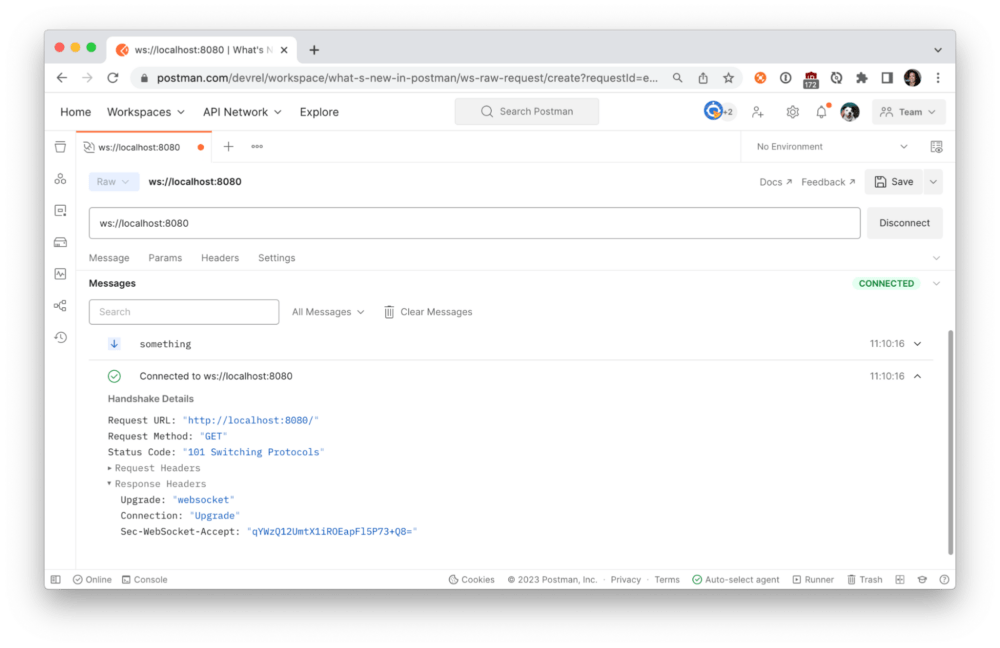
Once Postman establishes the connection to your local server, the Messages pane will display a list of messages for the WebSocket connection, including incoming, outgoing, and network messages. You can further inspect the connection details by clicking on “Connected to ws://localhost:8080”.
The connection we established between the Postman client and local server is bidirectional, which means that in addition to receiving messages, we can also send them. Under the Message tab, write your own message and click Send.
If you have good reflexes, you may have seen your outgoing message in the Messages pane. If not, filter for the message using the controls or search bar in the Messages pane.
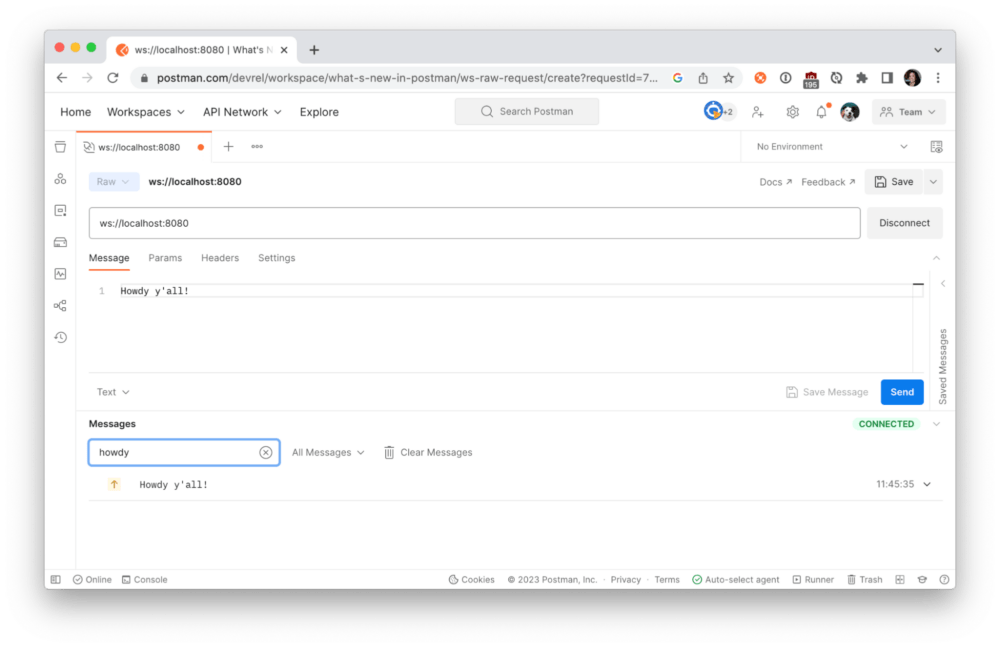
Verify the outgoing message was received by your local server:

Send system information
Let’s update our WebSockets server to send something a little more interesting, like our computer’s information, using the systeminformation node package. Terminate the running server (Ctrl + C) and install the package from the command line:
npm install systeminformation
Next, import the package by adding the following code to the top of index.js:
import si from "systeminformation";
Add the following code immediately after our WebSocket connection sends the string “something”. Every 1,000 milliseconds, we will send a message about the current load on our CPU.
 setInterval(async () => {
    const cpuTemp = JSON.stringify(await si.currentLoad());
    ws.send(cpuTemp);
  }, 1000);
Save your changes, and restart the local server from the command line:
node index.js
Return to Postman and Connect to the local server. This time, we receive information about our CPU every second!

Click on a message to expand the message details and further inspect the data sent from our local server.
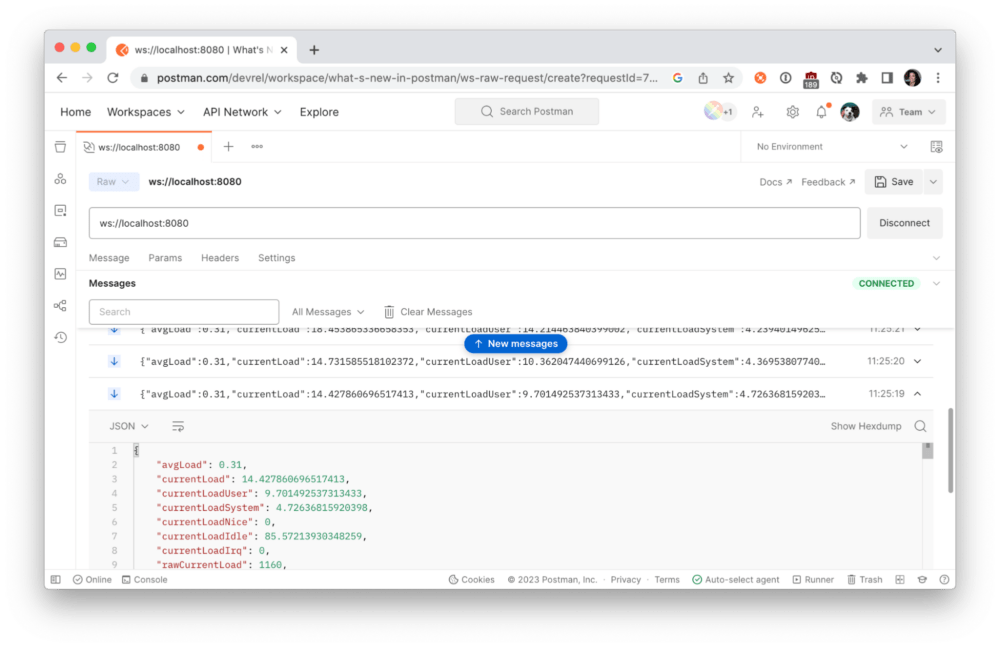
The messages will keep coming until you terminate the connection. Use Postman to Disconnect from the server.
Now that we have a functioning WebSocket server, we can do more things.
- Slow down the messages coming from the local server. Try updating
1000milliseconds to3000milliseconds to see what happens. - Instead of sending all the data, try sending only the average load. You may want to inspect the messages in Postman to parse the data properly.
We can write more code to customize our local application. Upon receiving a message from the client, we can do more than logging the message to the console. We can also retrieve data from other sources and perform calculations before sending our messages to the client.
Additional resources
To follow along with this tutorial, watch the video and reference the documentation at Postman Quickstarts:
Check out these Postman resources to learn more about WebSockets:
- Guide to Postman WebSockets collection
- Using WebSocket requests docs
- WebSocket requests video
In the next post, we will explore how to use our WebSockets server with Internet of Things (IoT) devices and do neat stuff around the home. Let us know in the comments below what kind of projects you want to learn more about, and what you’re doing with WebSockets.
Technical review by Ian Douglas.


Very inspirational and neatly laid-out article – so easy to follow.
I have been shying away from NodeJs and websockets because just couldn’t grasp the purpose. This article has given me a little understanding and a whole lot of wow! to explore some more.
Thank you
I had never used postman for WebSocket but this tutorial just nailed it