
How to Dynamically Create Custom Environments with Code
Every extra step you handle for your developers saves them time and impacts their time to first call (TTFC), the most important metric for public APIs. The Run in Postman button is a powerful way to reduce complexity for your developers. It’s not a new feature, but if you’ve been busy, you might have missed this treasure hiding in plain sight.
Let’s go over a few key things that most people don’t know about this button. And then, I’ll share some code for the most under-utilized feature. Feel free to use that code, claim the credit, and then accept your accolades from the boss.
6 key things to know about the Run in Postman button

1. You can embed a collection in this tiny, unassuming button.
Users who click on the button can instantaneously bring a collection into their own instance of Postman to start sending API calls right away.
2. You can bundle an environment along with the collection.
Include the collection with its associated environment so users can fork both at the same time, instead of separately.
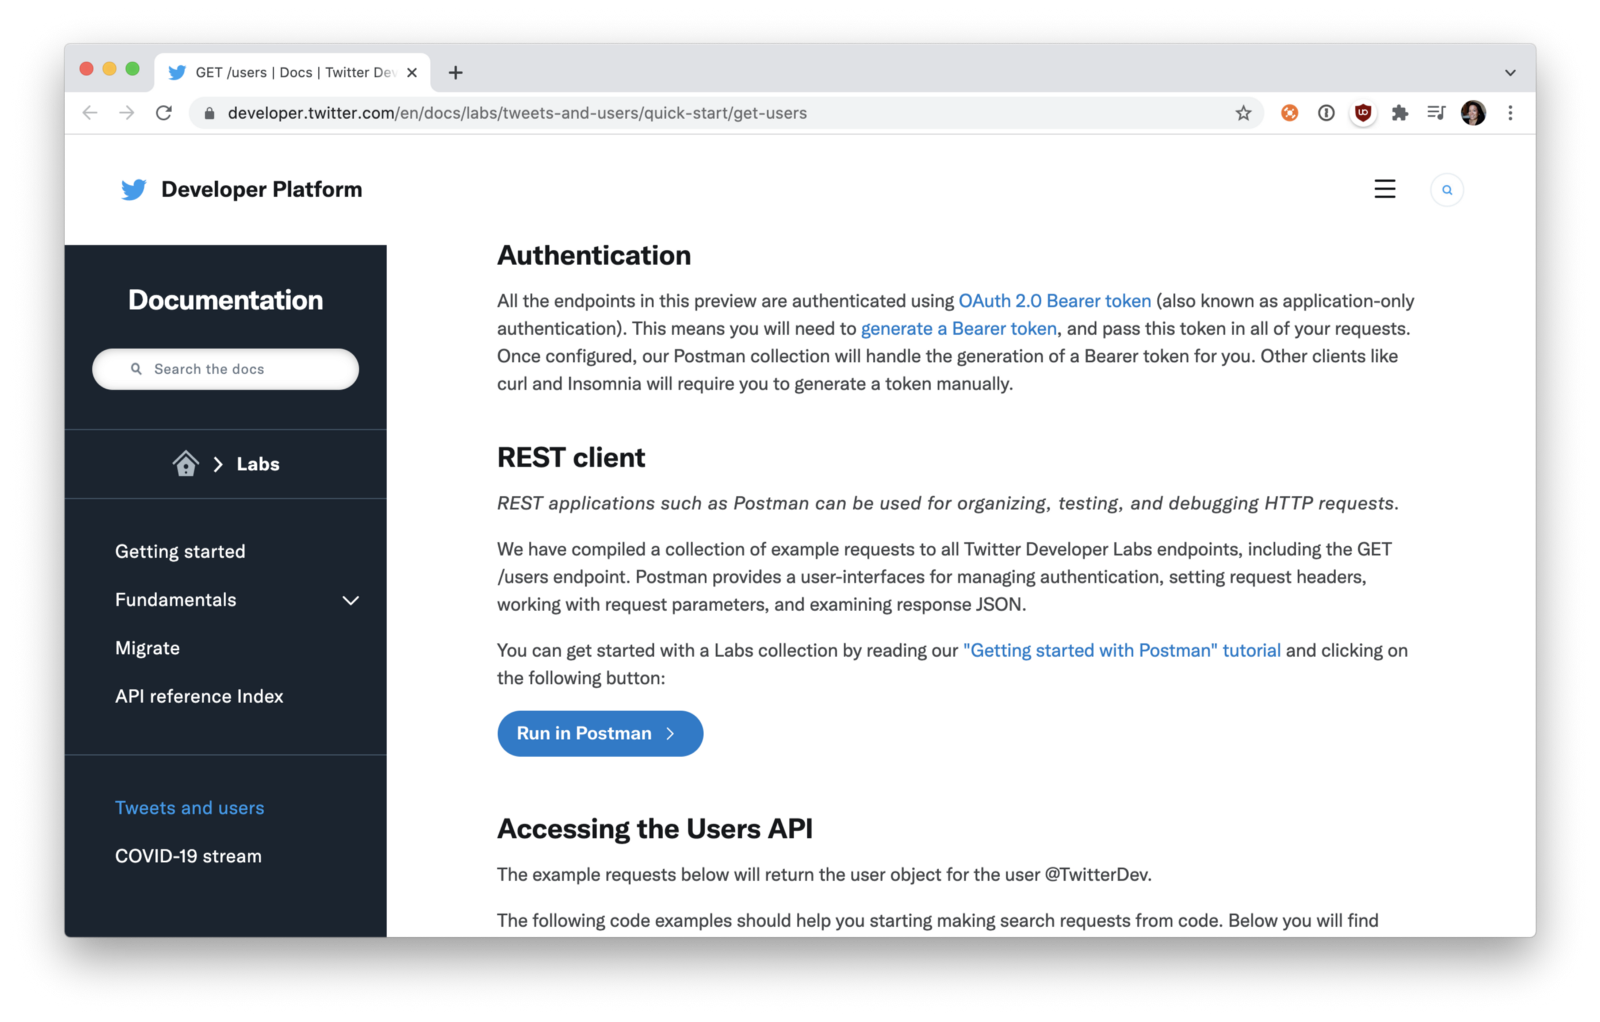
3. You can use the button in your docs.
When you generate the button, choose between a Markdown-friendly or HTML-friendly code snippet to paste in your README or developer docs, for example.
4. You can customize the form factor.
If you’re allergic to orange or hate the border radius, update the button to suit your own brand theme, or choose any other image.
5. It’s a live fork, not a static import.
If you made your button a long time ago, make sure you’re using the live version from a public workspace and not the static version. Users can now fork the collection to their own workspace, establishing a connection with the underlying collection. This means they can pull updates to their own branch in the future or submit pull requests if they’re overachievers.
6. The Run in Postman button has its own API.
The Run in Postman API can dynamically inject information as environment variable values into the embedded Run in Postman button. Plug in dynamically generated data, like access tokens, using your website’s client-side code.
The first five things listed above are very easy to do and require only a few clicks in Postman. But I bet you didn’t know about that last one. To make our own dynamic buttons, we’ll need to dust off the old HTML and JavaScript.
To the code!
Steps to dynamically create Postman environments
Some API publishers generate environments on the fly for their users. For example, an API publisher may already know the users’ access credentials when they are logged into a developer portal. API providers can inject this personalized data into an environment for the user, pair it with the collection, and bundle it all together in a tidy Run in Postman button. Similarly, users can input data that then gets stuffed into the button using client-side JavaScript. Let’s walk through this example.
Step 1. Generate the button
In a Postman public workspace, select the collection that you want to embed. Go to the overflow menu, select Share collection, and tab over to Via Run in Postman.
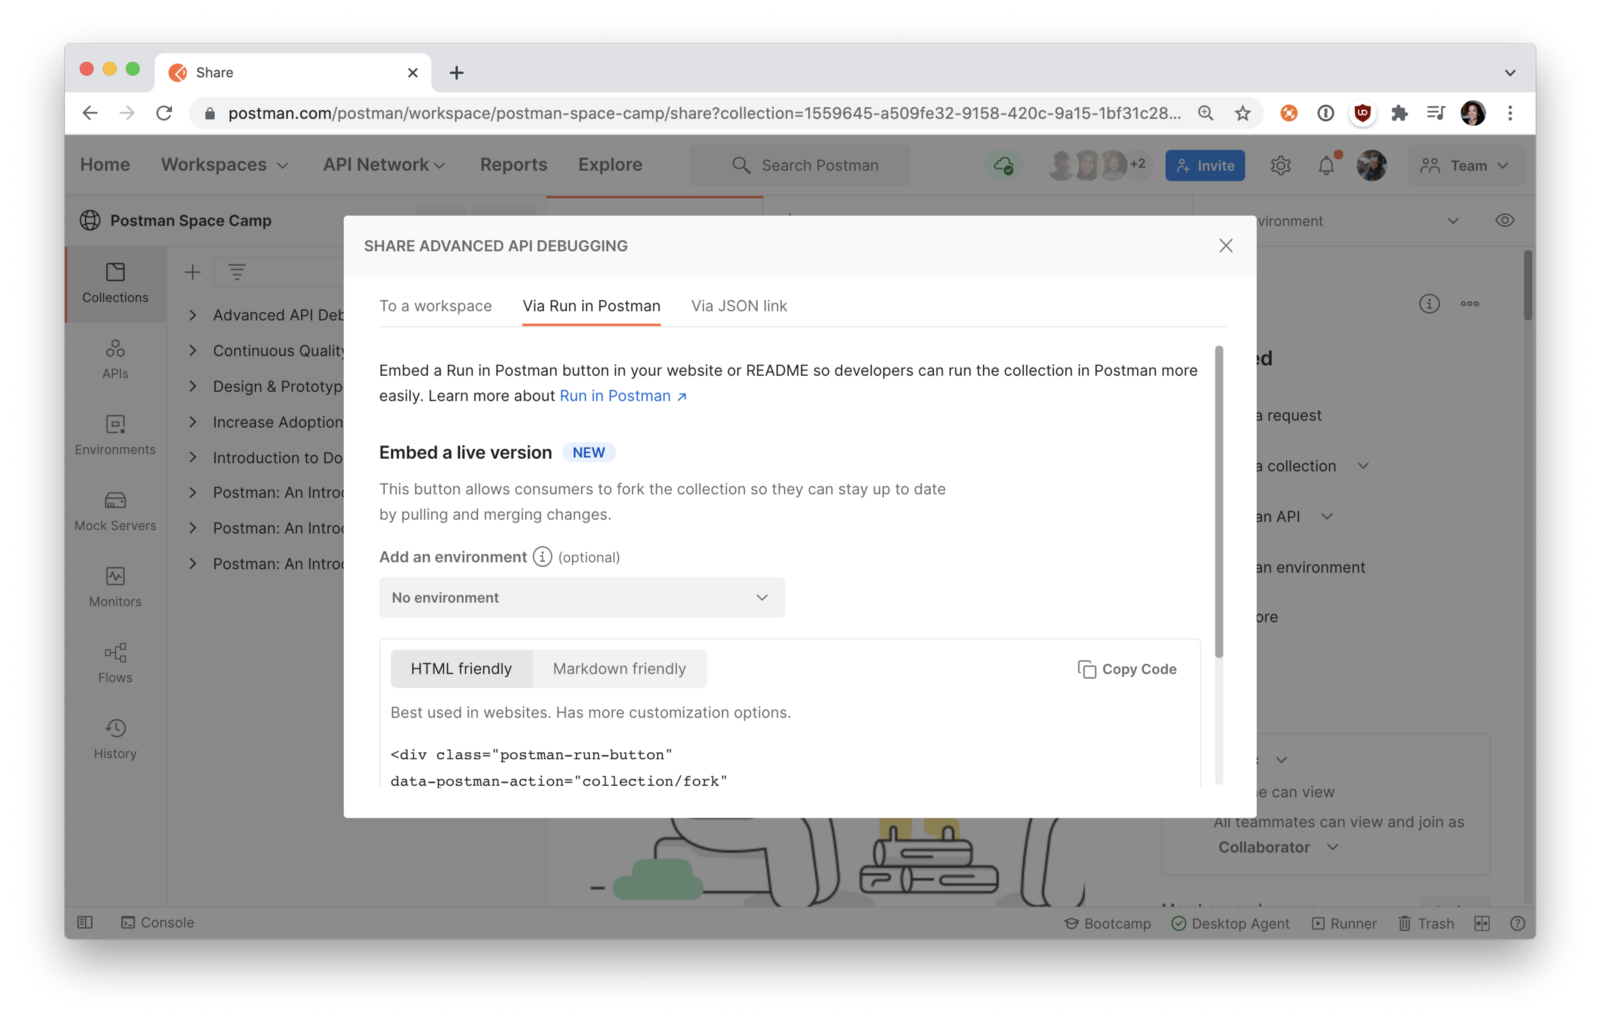
In the modal, you can add an existing environment and update the values dynamically. In this example, let’s create a new environment dynamically with code. Toggle over to the HTML-friendly version of the code snippet. Copy the code snippet to your clipboard. For the next two steps, we’ll need the code in the div element for the HTML and the code in the script element for the JavaScript.
Step 2. The HTML elements
In a file called index.html, we create a div element that contains our Run in Postman button. Use the code provided in the first half of the code snippet from the previous step.
<div class="postman-run-button" data-postman-action="collection/fork"
data-postman-var-1="1559979-8aa8a323-6308-429c-90ca-e85d1d0bb33e"

data-postman-collection-url="entityId=1559979-8aa8a323-6308-429c-90ca-e85d1d0bb33e&entityType=collection&workspaceId=ef3cdedd-f58c-4492-9ed0-4dcf456987b2">
</div>
In the same file, we create a form element that requires users to input text. When the user submits the input form, a function called createEnv() (not yet defined) is invoked to create an environment that includes the data entered by the user.
<form method="post" onsubmit="return createEnv();">
 <label for="secretstring">Passphrase</label>
 <input type="text" id="secret-string" name="secretstring"><br><br>
 <input type="submit" value="Save">
</form>
Step 3. The JavaScript functions
In a separate file called app.js, we define two functions. The first function called createEnv() creates an environment called Passphrase that includes the data submitted by the user in the HTML form. The environment is dynamically created using the Run in Postman API’s _pm() method.
function createEnv() {
 var secretString = document.getElementById('secret-string').value,
   runButtonIndex = 0,
   envData = {
     passphrase: secretString
 };
 _pm('env.create', 'Passphrase', envData, runButtonIndex);
 return false;
}
We also have an anonymous function. For this, we can use the second part of the code snippet provided by Postman in the first step to create the Run in Postman button.
(function (p, o, s, t, m, a, n) {
 !p[s] && (p[s] = function () { (p[t] || (p[t] = [])).push(arguments); });
 !o.getElementById(s + t) && o.getElementsByTagName("head")[0].appendChild((
 (n = o.createElement("script")),
 (n.id = s + t), (n.async = 1), (n.src = m), n
 ));
}(window, document, "_pm", "PostmanRunObject", "https://run.pstmn.io/button.js"));
And that’s it! A user inputs data that is captured by the HTML form, which is then passed along to the Run in Postman API using the _pm() method to dynamically create a new environment that contains the data.
Check out the code sample to try it out on your own.


What do you think about this topic? Tell us in a comment below.