Testing bank payments with the GoCardless collection

This is a guest post written by Sonak Patel, solutions engineer at GoCardless.
Moving money doesn’t have to be a daunting process. At GoCardless, we focus on streamlining bank-to-bank payments by improving on the existing rails of Direct Debit and leading open banking innovations.
Open banking uses APIs to give third-party financial service providers regulated open access to consumer banking, transaction, and other financial data from banks and non-bank financial institutions.
Banking has many legacy components, and combining the old and the new world poses some unique challenges as we look to bring the benefits of open banking to payments. With GoCardless, you can access both of these rails dynamically through one streamlined API.
We’ve designed our Postman Collection to help both technical and non-technical stakeholders test our API. The Billing Request endpoints are where you will start your testing journey for bank payments. Every test scenario is available for free in our sandbox. Let’s take a closer look at what you can do.
Background
Our GoCardless documentation covers the “what,” and Postman unlocks our ability to show the “how.” Sign up for our free sandbox environment, which we’ll be using for the walk-through later in this post. The sandbox environment provides a simple and practical way to evaluate what our platform can do. Documentation is important, but nothing beats being able to interact and play with a sandbox environment to figure out what’s going on.
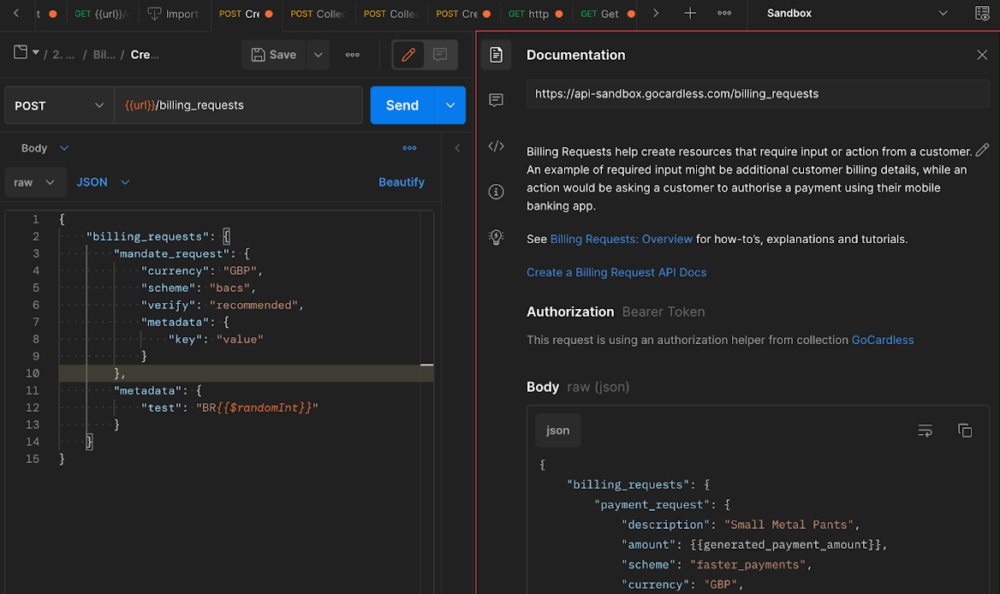
Our GoCardless API collection in Postman is designed to mirror our API documentation for improved referential navigation when bouncing between the two. There’s also built-in documentation that utilizes Postman’s documentation feature, which can be very useful when you’re exploring a new endpoint or parameter:
Collecting payments
Traditional banks operate in a risk-averse monolithic manner, relying on tried and trusted methods rather than innovation. Although they have improved over time, these advancements have been entirely at the will (and pace) of the banks and the banking rails (or schemes) they operate on. Disruptors such as neo-banks have demonstrated that there are more modern approaches to banking that leverage today’s technology to bring new products and features to market.
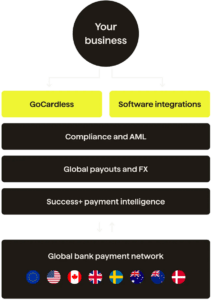
In banking, each scheme has varying requirements, capabilities, and processing times when pulling funds—not to mention different compliance rules that must be followed to protect customers. GoCardless builds on these existing rails and unifies them in a way that allows you to collect from international schemes, giving you global payments through one common banking interface:
A common thread throughout these schemes is the notion of a customer mandate, which is an authorization explicitly provided by the customer during checkout to allow a merchant to automatically pull funds from their bank via Direct Debit. The merchant typically has the ability to pull funds—with varying advanced notice provided to the customer—until the customer closes the bank account or ends the mandated agreement.
Banking rails
Older, traditional banking rails are still best suited for recurring advanced payments that can run in the background without the customer present. But for upfront payments that are time-sensitive, we leverage newer open banking protocols to allow customers to push funds to you instantly. This can be used to take a down payment or a sign-up fee that unlocks access to a service.
Revitalizing an age-old industry with a modern approach is both beautiful and complex. When you set up any mandate via GoCardless, we kickstart the e-mandate creation process and return a token back for you to bill against, which alleviates some of the complexity. This particular flow can utilize either the old banking rails or the newer open banking protocols, which enables you to unlock all banking possibilities for billing a user, including new payment methods that may be introduced in the future.
Technical walk-through
We’ve designed the Billing Request API to enable developers to build future-proof implementations that can collect all types of GoCardless payments. It offers built-in flexibility to use default patterns or add customization to the payments flow.
Here are some example scenarios our Billing Requests can address:
- An existing customer subscribes to a new mobile plan, requiring a mandate for monthly payments, as well as an upfront payment.
- A new customer sets up a mandate with their insurance company, but no payments or deposits are due yet.
- A link allows a one-off donation to be made to a charity.
To create a Billing Request Flow, which is the end-to-end implementation of a Billing Request, you first need to have a Billing Request ID. Think of the Billing Request ID as a temporary container for all your customer and payment details. This container holds the customer’s details and bank account information before it evolves into a BRF, producing an authorization URL. The steps are:
- Create a Billing Request (BR).
- Set up a Billing Request Flow (BRF).
- Redirect the user to the auth URL (if required).*
- Customer authenticates and confirms their payment.
- See the success or failure.
*Note: For certain payments and verification, you may require the customer to be present. If you do not require the customer to be present, you can create a redirect-less payment in an API-only fashion and utilize your own checkout flow to collect all the necessary information.
Step-by-step instructions
Let’s walk through the first example above: creating a mandate to enable us to pull the recurring monthly fee, as well as an instant bank payment for the one-off cost at sign-up. We can do this all in one flow!
Prerequisites
- Sign up for a free sandbox account.
- Run our collection.
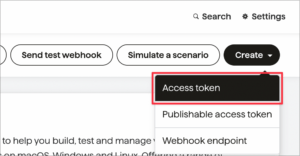
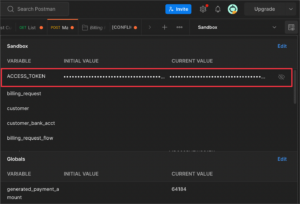
- Create an access token via the GoCardless Dashboard (Developers > Create > Access Token):
- Add your GoCardless access key as a Postman environment variable:
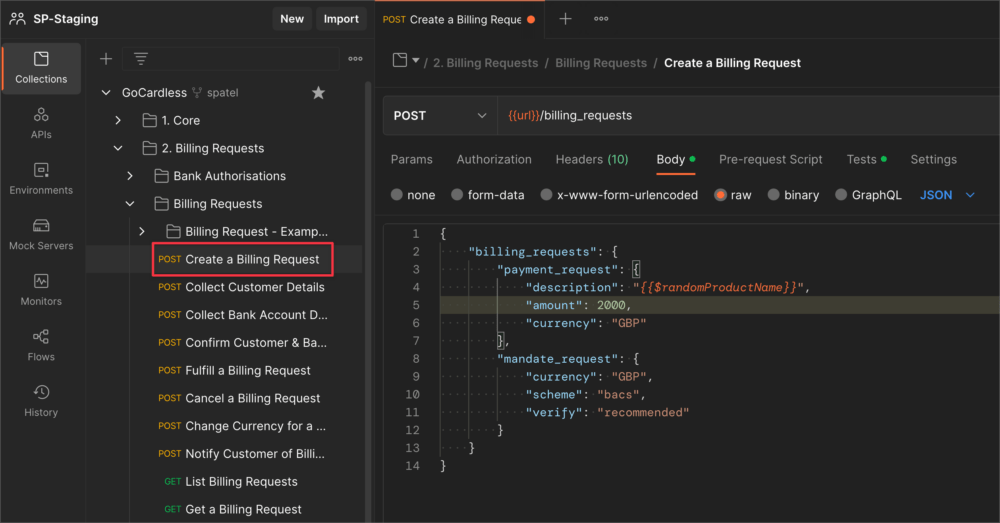
Step 1: Create the Billing Request
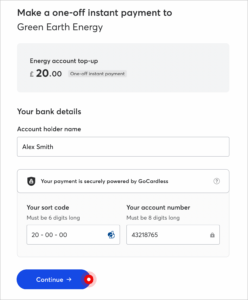
Creating a Billing Request sets up a container in which you indicate the type of payment you wish to perform, as well as the currency to be used. We’ll create a one-off upfront payment of £20 and a mandate to collect future payments. The amount field requires an integer in the smallest denomination of the currency. That would be 2000 pence in the UK, which is £20:
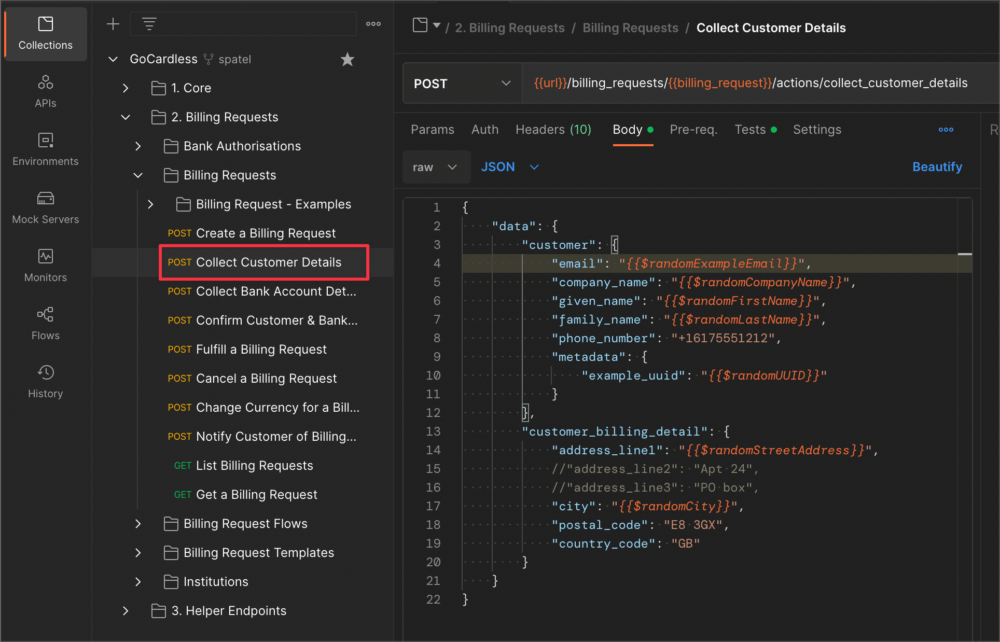
Within this Billing Request, we can also pre-populate any customer details that you already have on file by calling the /billing_requests/{{billing_request}}/actions/collect_customer_details endpoint. Pre-populating this information reduces the amount of necessary input from the customer during the authorization flow. In some cases, the customer doesn’t need to input any information at all:
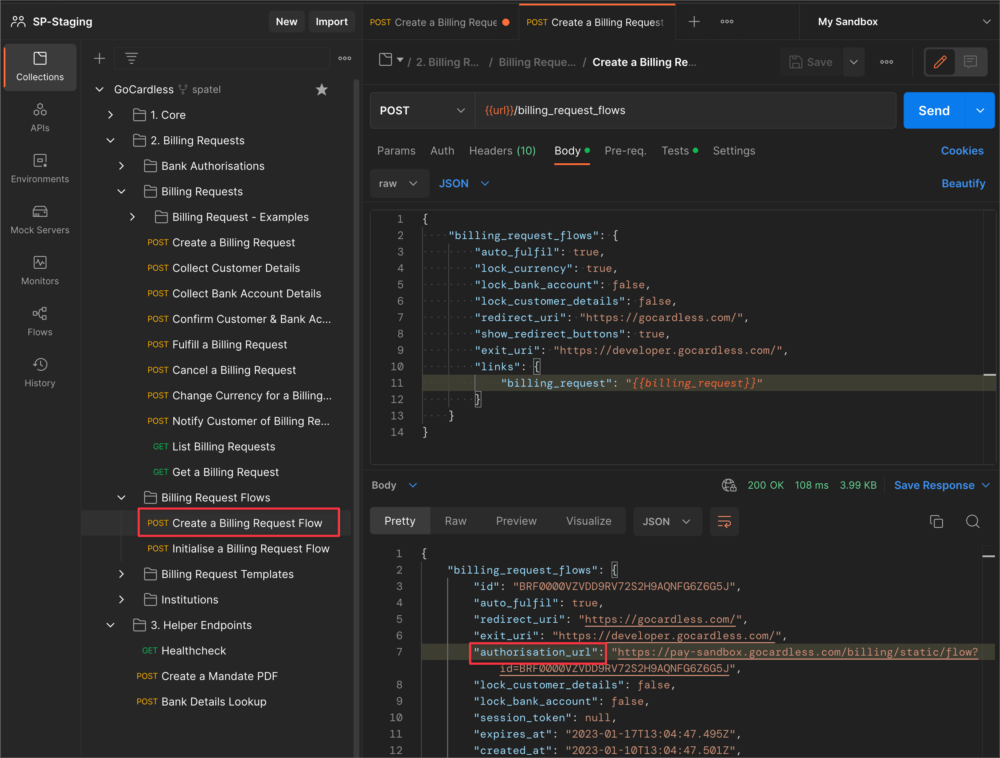
Step 2: Set up a Billing Request Flow
Linking a Billing Request to a Billing Request Flow will return an auth URL, where you will redirect your user to provide any missing details on a custom branded GoCardless page. The fully white-labeled path is outlined here.
If you do not have any existing data or form capture for DD (Direct Debit) information in your flow, you can create a Billing Request Flow without populating the Billing Request. In this scenario, GoCardless will collect all information from the customer on your behalf.
Step 3: Redirect the user to the auth URL
Sending the user to this URL prompts them to provide any missing information. We will only request details from the user that you didn’t collect ahead of time or that are required by the scheme. This dynamic form capture helps minimize the amount of information the user must provide. For instance, if you already have the customer’s personal details, we will only collect their banking details:
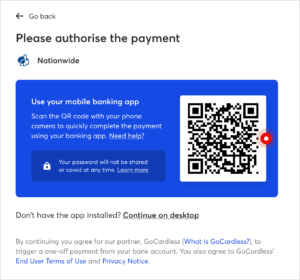
Since we’re requesting upfront payment, the user will be redirected to their banking app for authentication:
Step 4: Successful conversion
Upon completion, you’ll get a callback indicating the resolution, with webhooks tracking every stage of the user’s progress along the way:

Stay up-to-date with the rest of our webhooks that are sent throughout the payment collection process.
Get started with GoCardless and Postman
The GoCardless collection has evolved to accommodate a variety of situations. Postman’s flexibility, coupled with our extensive public documentation, unlocks the ability to learn, play, and experiment with GoCardless’s payment capabilities. Sign up, explore, and make your first payment in minutes.
Postman mastery is a key skill in today’s API-driven ecosystems, and many non-technical folks are seeking to expand their exposure and understanding. This trend has given us new ways to look at our API and how automation can unlock additional value. Expect to see more updates to our collection as we continue to explore these opportunities.

What do you think about this topic? Tell us in a comment below.