Build eSignature workflows with Postman and Signeasy

This is a guest post written by Karthikeyan KC, product manager at Signeasy.
For a business that’s soaring on today’s digital highway to stay ahead, the workflows and the software components that enable it must continuously evolve to keep up with the speed of technology and innovation.
The demand for paperless transactions has nudged companies to digitize and streamline their core workflows, leading to increased reliability, cost and resource savings, and efficiency.
Contract workflows are core to any business in the world. In fact, somewhere in the world, someone is eSigning a contract at this very moment, and Signeasy is making it easy, fast, and secure for them behind the scenes.
Building and maintaining an in-house contract workflow platform with a compliant eSignature component is a momentous challenge and a serious responsibility. It involves dedicated time and resources for development, maintenance, and compliance management. But by automating your business with a battle-tested API eSignature solution like Signeasy, you get the following benefits out of the box in just a few days:
- Seamless eSigning experience: An embeddable and flexible experience right within your application while we take care of continuous user experience research, development, and innovation.
- Compliance: SOC Type 2, HIPAA, and GDPR for safe, secure, and legally valid transactions with signature certificates.
- Reduced cost of ownership yet reliable service: A team of dedicated Signeasy professionals who maintain, optimize, and support the infrastructure, saving you resources and time, which you can spend on your core business.
Global businesses like Rappi, Zenequity, and Truepill have chosen Signeasy APIs to be at the heart of their core workflows, which has allowed them to bring down their signature turnaround times from weeks to hours.
With Postman, Signeasy is enabling developers across the globe to quickly explore, test, and integrate an eSignature solution into their applications in days without any hassle.
So, are you ready to automate your business with the right technology and tools to go paperless? Here is an easy guide on how to digitize your signature workflows.
Get started with the Signeasy eSignature API
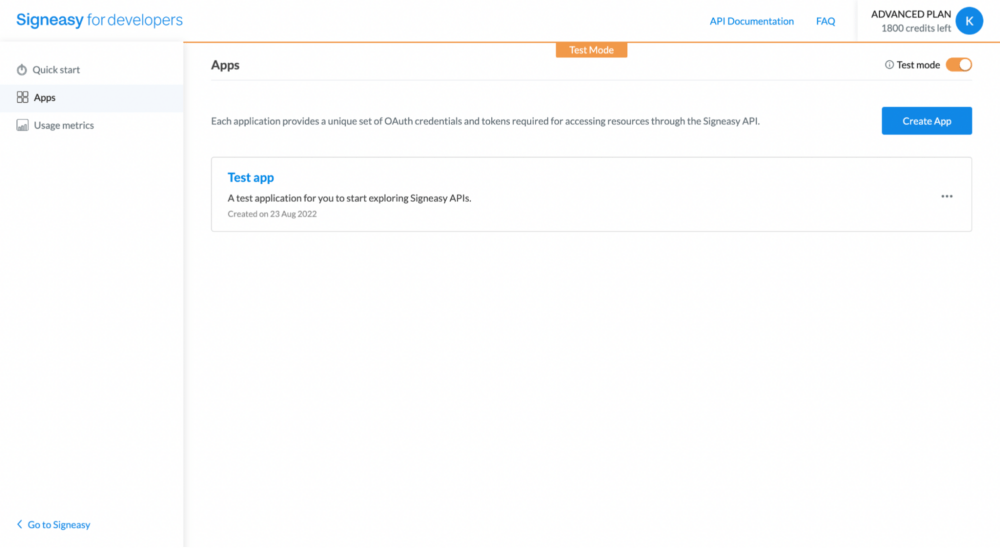
Step 1: Create a free Signeasy developer account
Visit Signeasy for developers and create your free developer account. Upon verifying your email, you’ll be onboarded to a free plan where you can explore the APIs in the sandbox environment:
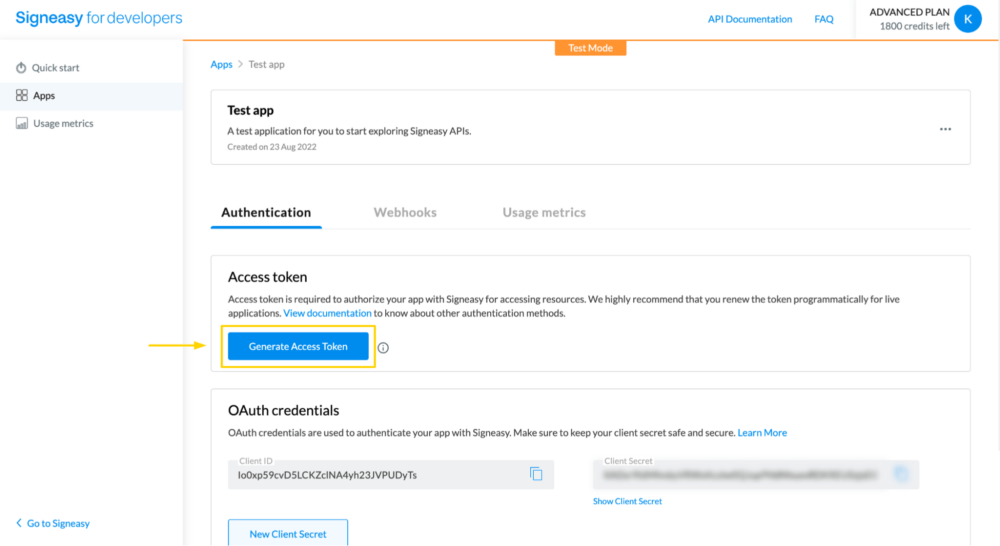
Step 2: Generate an access token
Navigate to the Test App that has already been created for you, click on Generate Access Token, and copy the access token:
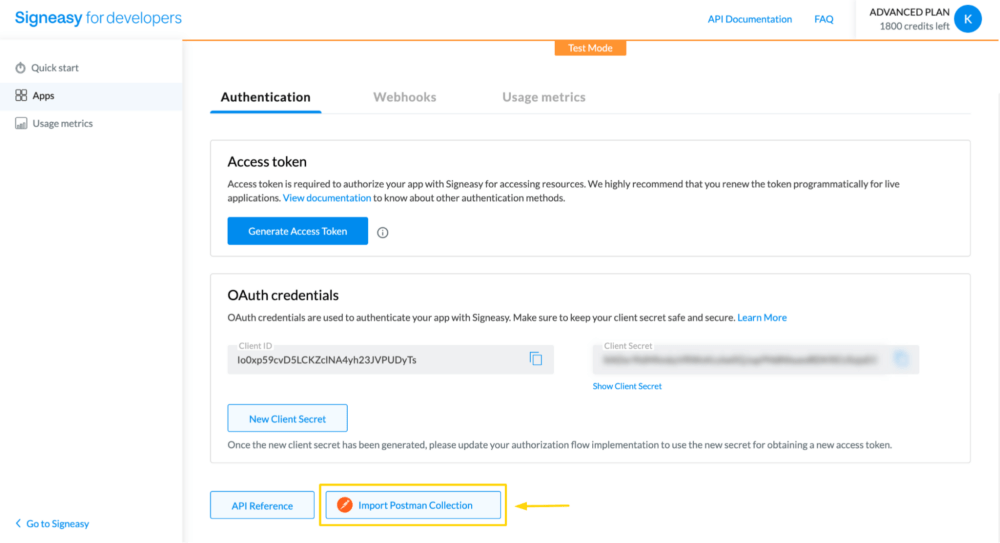
Step 3: Import the Postman Collection
Scroll down and click on the Import Postman Collection button to import the Signeasy eSignature API v3.0 collection into your workspace:
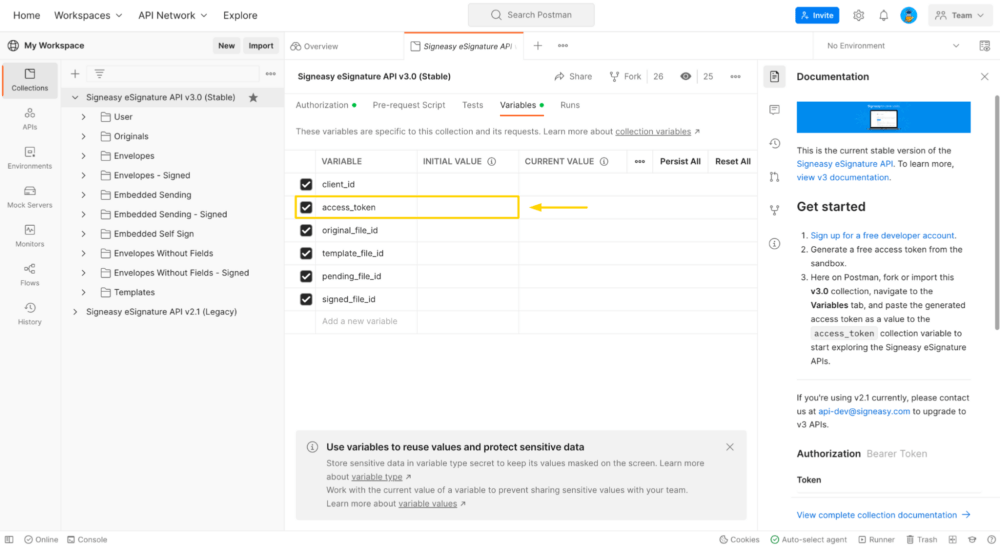
Step 4: Paste the access token
In Postman, navigate to the Variables tab for the imported collection. Then, paste the copied access token as a value for the access_token collection variable:
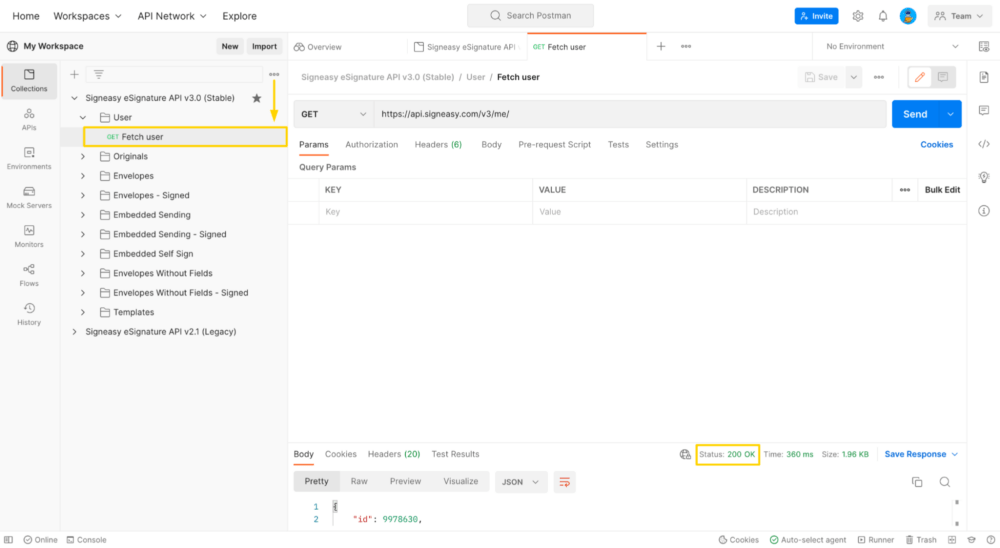
Step 5: Your first API call
In the collection, navigate to the User folder and make a request to the /me endpoint. And if all works well, you are all set:
Send your first Envelope via the API
Now let’s explore one of the core workflows involved in an eSignature transaction—sending out a signature request to a signer’s email using APIs.
In the real world, we use an Envelope, which is a collection of documents for any paperwork transaction. Similarly, when we request a signature from someone with the Signeasy API, we’ll be sending a digital Envelope, too. This supports two types of documents: an original, a template, or a combination of both.
For this example, we’ll be creating an Envelope with an original document and initiating a signature request to one recipient (yourself but with a different email).
Step 1: Fetch the original document to request for signature
Let’s start with obtaining a document to use in this signature request. Your account is already provisioned with an original document that you can use for testing. Navigate to the Originals folder in your Postman collection and make a GET request to the Fetch all originals endpoint:
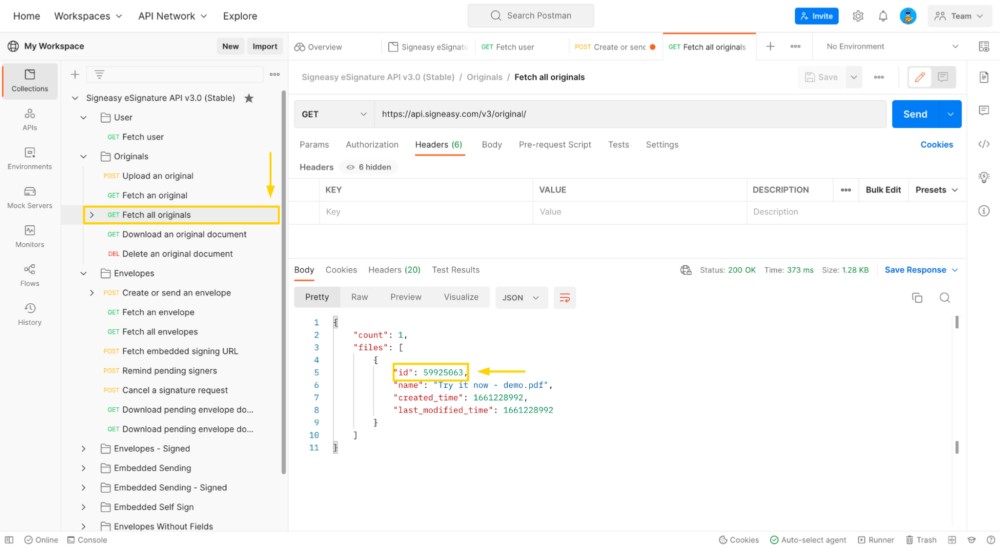
Copy the ID of the original document from the response payload. You’ll be using this ID in the next step.
Step 2: Create and send the Envelope
Now, let’s prepare the payload to create the Envelope signature request. Navigate to the Create or send an envelope endpoint within the Envelopes folder in your collection, and then paste the following payload into the body field:
Request payload
{
  "is_ordered": true,
  "embedded_signing": false,
  "message": "This is a test request",
  "sources": [
    {
      "source_id": 1,
      "type": "original",
      "id": <paste your original ID as int>,
      "name": "Try it now - demo.pdf"
    }
  ],
  "recipients": [
    {
      "email": "<[email protected]>",
      "first_name": "John",
      "recipient_id": 1
    }
  ],
  "fields_payload": [
    {
      "recipient_id": 1,
      "source_id": 1,
      "type": "signature",
      "required": true,
      "page_number": 1,
      "position": {
        "x": 60,
        "y": 520,
        "height": 50,
        "width": 250,
        "mode": "fixed"
      },
      "additional_info": {}
    }
  ]
}
In the payload you pasted:
- Replace the “id” property’s value with the one you copied in step 1.
- Replace the “email” property of the “recipients” object with an alternate email address that you have access to.
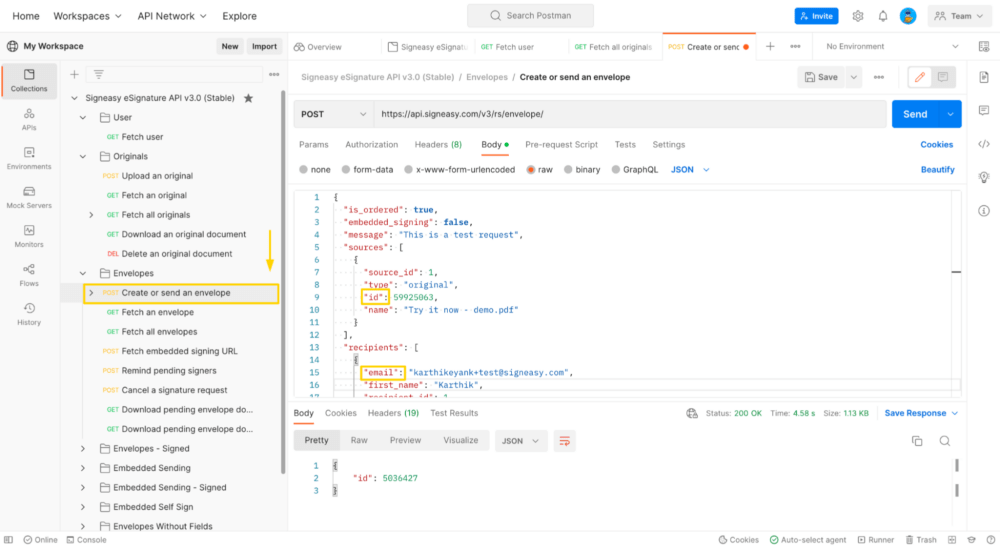
Now, initiate the request.
Response
{
    "id": 5036427
}
If you’ve got a 200 OK response, you should receive an email at your alternate email address. Go ahead and sign the document to complete the signature request. Once you finish signing, you’ll receive the completed document, along with a signature audit trail, on the same email.
Pretty simple, right?
Now that you have a good idea about the workflows you can perform with the API, explore the collection and see if you can fetch the completed document—along with the audit trail—using the Download signed envelope and certificate endpoint.
What can you build with the Signeasy eSignature API?
You can build and automate efficient, cost-effective eSignature workflows across departments—from signing employee agreements to closing sales deals, approving invoices, and managing ESOPs. And with callbacks that are triggered at every stage of the eSignature lifecycle, you can also extend your internal workflows with event-based triggers.
Check out the Signeasy API and explore our documentation to learn about advanced features like merge field automation, embedded sending, bulk signing, and more.
If you have any questions, please contact us at [email protected]. We’d be happy to hop on a call to help you get started and go live.


What do you think about this topic? Tell us in a comment below.