Automate API versioning with the Postman API and GitHub actions
Postman helps your organization design, document, develop, test, and monitor your APIs. With versions, you can create and iterate on your APIs. Then, when you’re ready, you can publish your API so users can view your API’s documentation and code. However, keeping your API’s documentation up-to-date with the code usually takes time and effort. The Postman API simplifies this process by providing a new way for users to manage their Postman resources, including APIs. It’s an API to manage your APIs!
In this tutorial, we’ll show you how to use the Postman API to synchronize and publish your API’s versions.
Manage your API versions with the Postman API
When you publish a new version of an API in Postman, it becomes available to your API’s consumers. All the resources that make up the API at that point are bundled in the new, immutable version.
We recommend Semantic Versioning to manage your version numbers. With Semantic Version names, consumers will know in advance which kind of changes they can expect in a new version, such as bug patches, minor changes, or breaking changes.
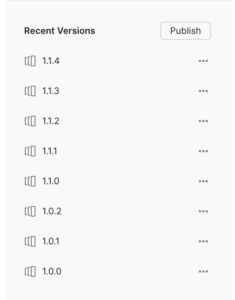
You can use Postman to manually publish a new version, but you can also automate the process with the Postman API. Use the following Postman API endpoints to update your API’s contents and publish new versions:
- Get an API: Get information about your API. With the
include=schemasquery string parameter, this endpoint returns the schema ID you’ll need to update a file and create new API versions. - Create or update a schema file: Create or modify the contents of your API’s index.json root file. This is a PUT request that receives the stringified JSON content of the file passed in the request body.
- Create a version: Create a new, immutable API version. This endpoint receives the version’s name, release notes, and the API’s schema to create a new version.
Create an API version with the Postman API
To create a new version of your API with the Postman API, you’ll need to:
- Get the new version of the API’s OpenAPI definition.
- Use the Create or update a schema file endpoint to update the file. You can update several files if your API uses a multi-file definition format.
- After you make your changes, you can publish a new version using the Create a version endpoint. In the request body, specify the version’s name (i.e., the Semantic Versioning number) and any release notes. This request returns the new version information, including the version’s ID.
You can execute these requests in many ways:
- Use your preferred programming language (such as Axios with Node.js or Requests with Python).
- Create and manually run a Postman Collection.
- Create a collection and run it with the Postman CLI.
At Postman, we created a GitHub action that further simplifies this process and allows you to run the version creation from your GitHub repository.
Publish a new version of your API via GitHub actions
Before getting started, you’ll need the following:
- A GitHub repository that contains your OpenAPI definition.
- A valid Postman API key.
- A method for keeping your API definition updated and in sync with your code, such as manually maintaining it (this is outside the scope of this tutorial).
- A JSON-format API definition in your Postman workspace.
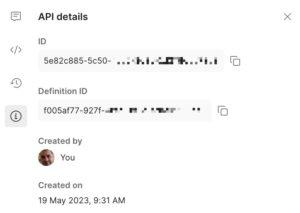
- The API’s ID. To get it, find your API, select the information icon, and copy the ID:
Use the GitHub action
The GitHub action code is available in the push-openapi-to-postman repository. The following is an example of this action’s manual trigger called Sync OpenAPI with Postman:
name: Sync OpenAPI with Postman
on:
  workflow_dispatch:
    inputs:
      versionName:
        description: 'The new version name'
        required: true
        default: '1.0.0'
      releaseNotes:
        description: 'The new version release notes'
        required: false
        default: ''
jobs:
  sync-with-postman-api:
    runs-on: ubuntu-latest
    steps:
      - name: Checkout code
        uses: actions/checkout@v3
      - name: Push OpenAPI to Postman
        id: pushApi
        uses: postmanlabs/push-openapi-to-postman@v1
        with:
          path-to-definition: ./api-definition.json
          postman-api-key: ${{ secrets.POSTMAN_API_KEY }}
          api-id: ${{ vars.API_ID }}
          api-path-to-file-name: index.json
          version-name: ${{ github.event.inputs.versionName }}
          release-notes: ${{ github.event.inputs.releaseNotes }}
In this example, the action prompts the user for the following github.event.inputs parameters:
versionName: The version number or name you’ll see in your API’s list of versions. As we mentioned above, it is good practice to use Semantic Versioning for your API’s versions.releaseNotes: Additional information that tells users about the version’s changes, such as what has been changed, removed, or added in this version.
When creating this GitHub action, you need to make sure that:
- The API definition is in JSON format.
- The
path-to-definitionpoints to the definition file in your GitHub repository. - The file name you’re updating in your definition matches the value in the
api-path-to-file-nameinput. By default, Postman uses the index file name when you create an API with the API Builder.
Now that we have what we need, let’s configure and run the GitHub action.
Step 1: Configure your GitHub repository
Make the following configuration changes to your GitHub repository:
Create the workflow
You’ll need to first create the workflow itself. We suggest giving this file a meaningful name that makes it easy to see what the workflow does. For this tutorial, we’ll use the sync-with-postman.yml file name.
In your GitHub repository, create the sync-with-postman.yml file in the .github/workflows folder. If the .github/workflows folder does not exist, you’ll need to create and add the file to it.
You can also create the workflow in the GitHub Actions tab. Select New workflow, followed by Configure in Simple workflow. Update the file name and the GitHub action code.
Set up environment variables
In the GitHub repository’s Settings > Secrets and variables > Actions tab:
- In Variables, create the
API_IDrepository variable. This contains the ID of the API that we want to keep up-to-date. - In Secrets, create a
POSTMAN_API_KEYrepository secret, which contains a valid Postman API key.
When you’re finished, commit these changes to your repository.
Step 2: Execute the GitHub action
Select the Actions tab in your GitHub repository:
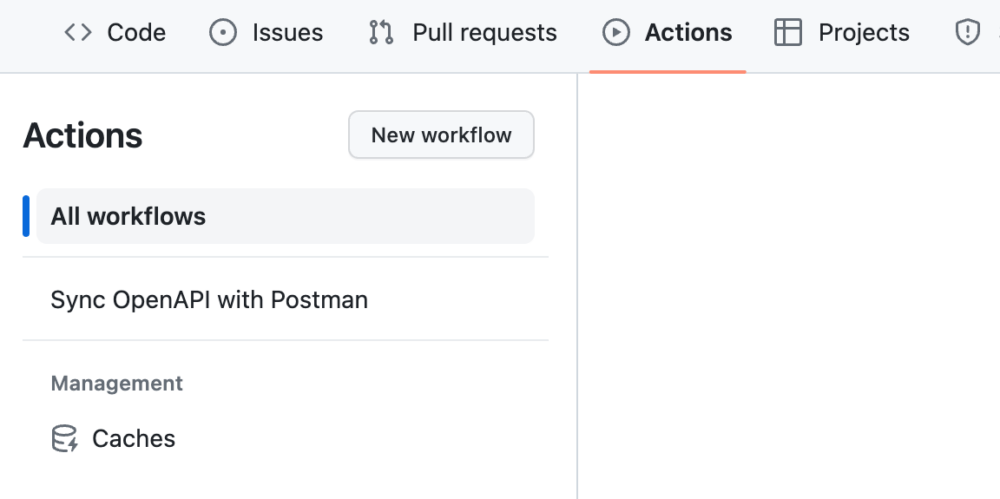
Next, select the Sync OpenAPI with Postman action you created:

Then, select the Run workflow menu. You will be prompted with a form that contains the input parameters the action needs to complete. Provide a version name and, optionally, the release notes for the version:
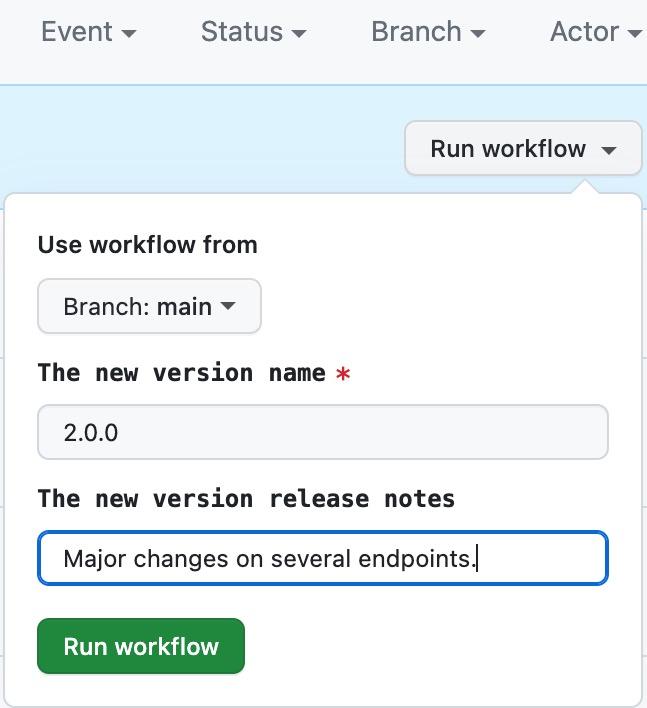
When finished, select Run workflow. The action will be scheduled and immediately run. You can also follow the workflow’s execution. If an error occurs, you can view the logs for information:
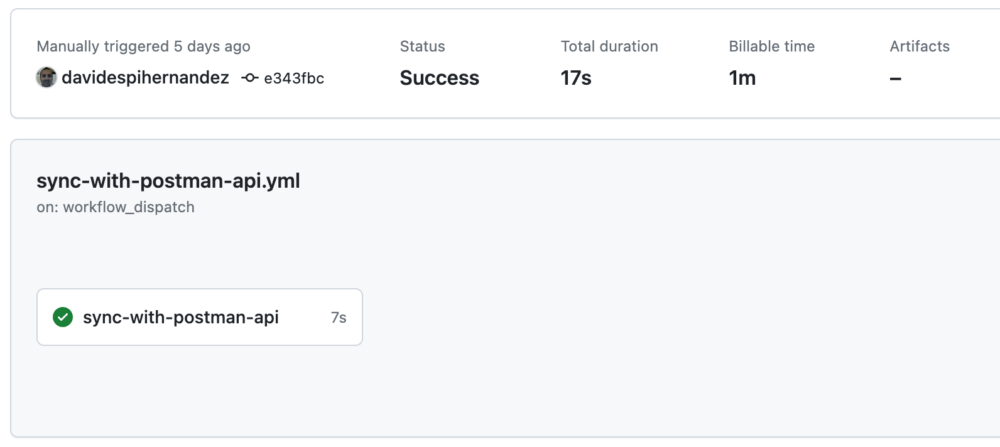
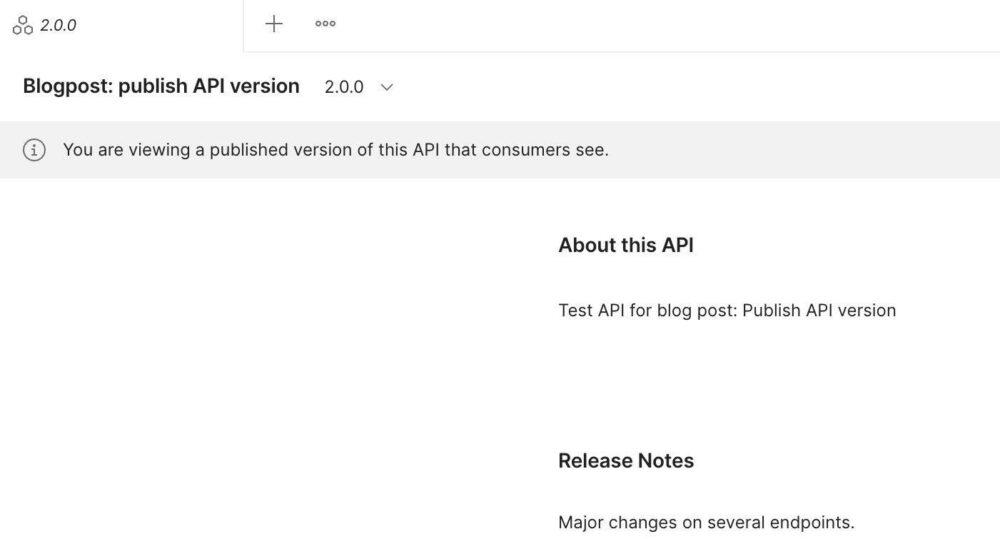
When the action completes, you can check your API in Postman for the definition and the new version:
Next steps
To simplify this tutorial, we designed this GitHub action to be manually run so users can set the version number and release notes in the Run workflow form. However, it’s possible to automate this workflow execution by calculating these input values without human intervention. For example:
- Get the version from the definition’s
info.versionfield. You can also compare it with the last published version of your API in your Postman workspace and only expose it if the version has changed. - Determine the release notes based on the last commits or the last release in your repository. GitHub provides an API that lets you get the last release of a repository.
You can modify your workflow to include these additional steps, where the version number and the release notes are automatically calculated and passed to the GitHub action. With this method, you can automate the process and automatically synchronize new releases (or do so at any time).
Get started with the Postman API
This is just one of the ways you can use the power of the Postman API to help you automate your software development process. Explore our Postman API documentation and let us know if you discover any other great ways to automate your workflows with the Postman API!

What do you think about this topic? Tell us in a comment below.