Using Self-Signed SSL Certificates with Postman
2020 Update: If you want to dig deeper into self-signed SSL certificates, check out our related post called Troubleshooting Self-Signed SSL Certificate Issues and More in Postman.
This post is applicable to the Postman Chrome app only. If you’re using the Mac app, head to our documentation for details on ignoring SSL errors.
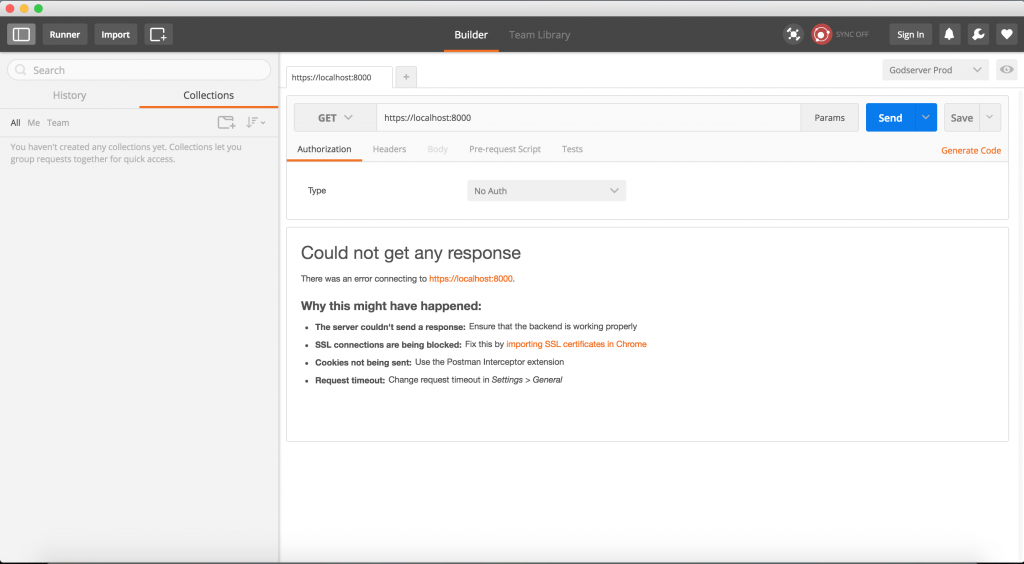
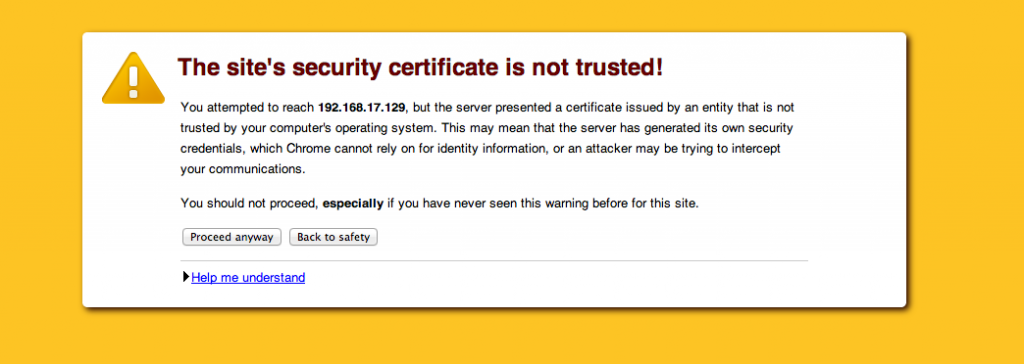
Self-signed certificates are often used in testing and development environments to provide a layer of security for an API As they are not verified by a trusted authority, accessing an API endpoint with something like https://<ip> through the Postman Chrome App, would throw up an error like this:
With the legacy app, you could go to the root URL in Chrome and allow the browser to access URLs with self-signed certificates. But this doesn’t work with the new packaged app. If you try to hit a URL with a self-signed SSL certificate, you would get a 500 error as Chrome would decline the certificate:
Turns out that there is a better solution to solve this a problem, and it also avoids adding an exception to Chrome every time you start the browser. This is how you do it:
- Go to the root URL in your browser. For ex. https://localhost
- Click on the lock icon on the top left in the URL bar.
- Open the Connection tab in the dropdown that comes up
- Click on certificate information
The dialog that comes up now depends on the operating system you are on. Chrome uses the underlying OS layer to handle SSL certificates.
Mac OS X
- In the dialog that comes up, click ‘View Certificate’, and drag the certificate icon to your desktop to create a *.cer file
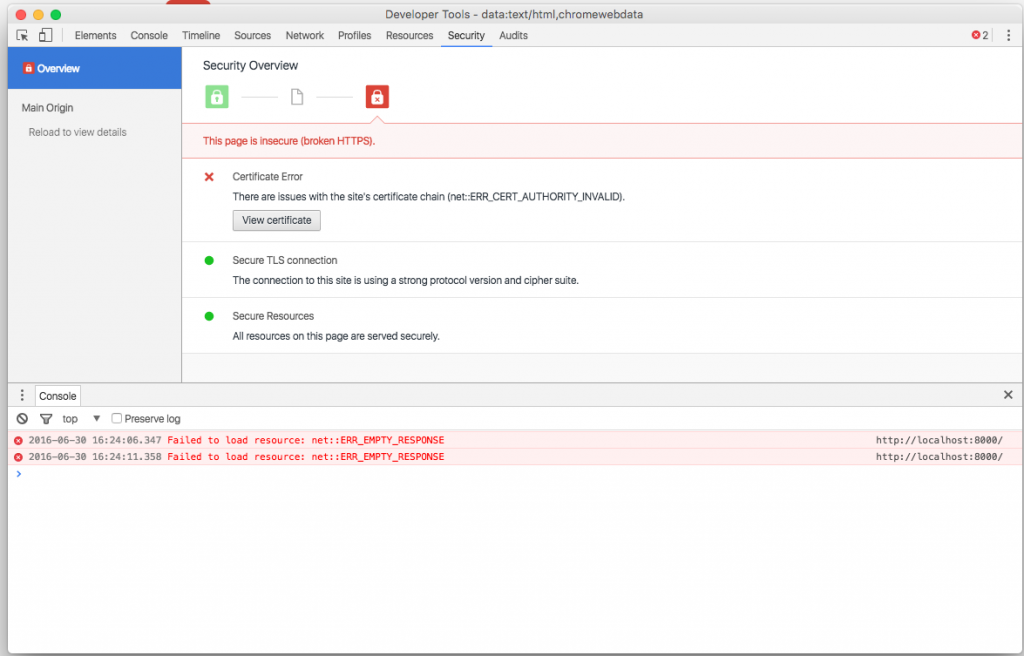
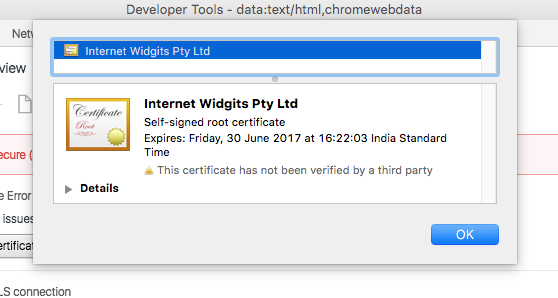
- Double click on the file to open the OS X Keychain Access tool.
- Add the certificate to the System keychain and select “Always trust”

- Once the certificate is added, double click it to open more details
- Expand the Trust item
- Select “Always trust”
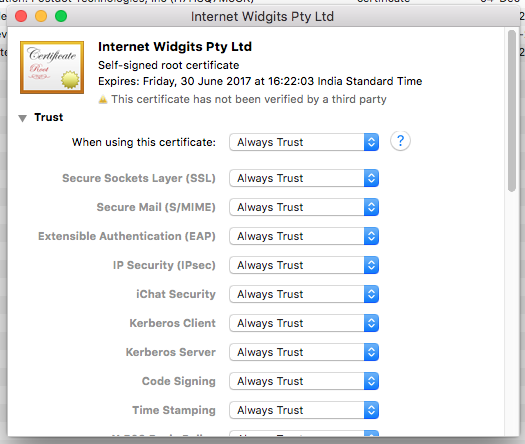
- Close Keychain Access and restart Chrome
Windows
- In the certificates window, go to the Details tab
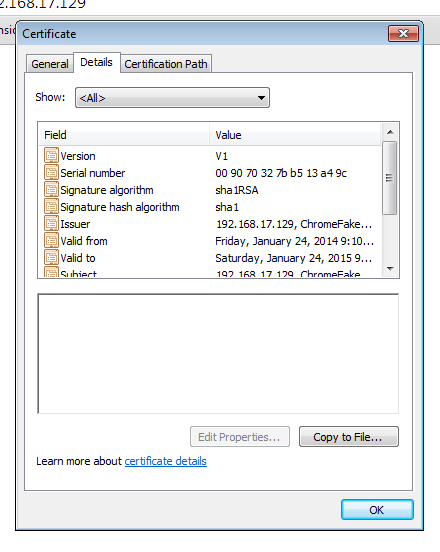
2. Select Copy to File
3. Save the certificate file on your disk. Close the certificate window.
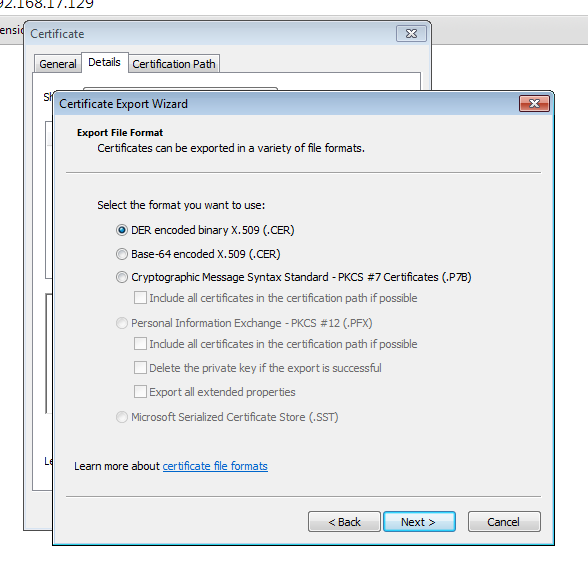
4. Go to Chrome > Settings, search for SSL (chrome://settings/search#ssl) and click on Manage certificates

5. Go to the Trusted Root Certification Authorities tab and click on import
6. Select the file you saved on your disk in step 3.
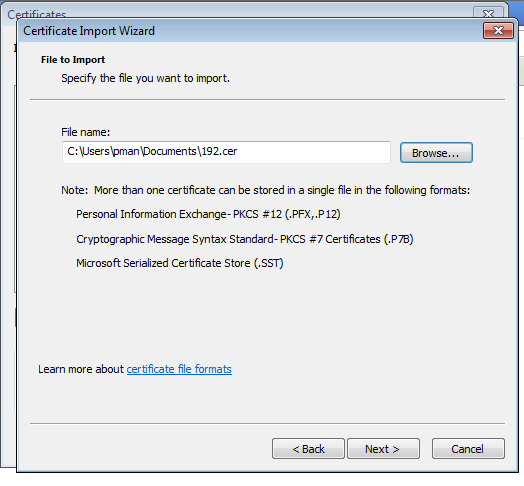
7. Close this window and restart Chrome.
Linux
- Go to the Details tab
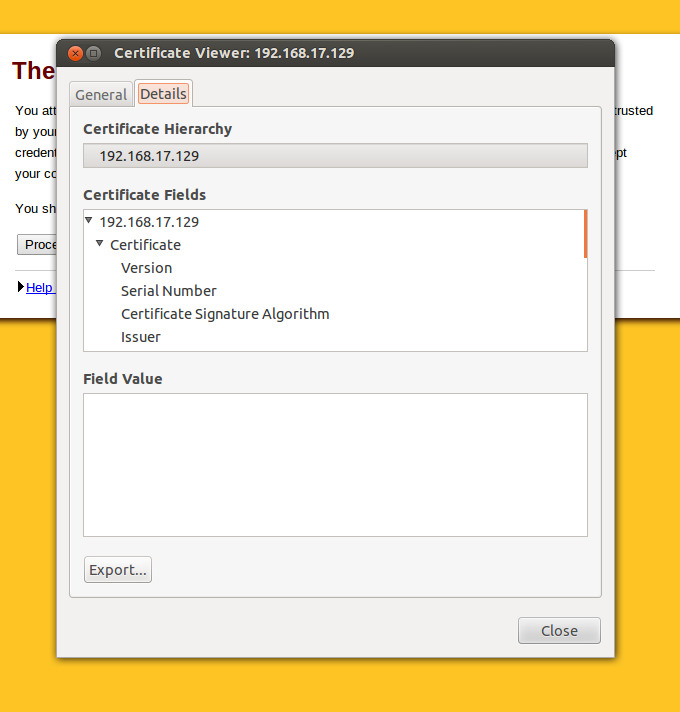
2. Select Export and save the file on your disk

3. Go to Chrome > Settings, search for SSL (chrome://settings/search#ssl) and click on Manage certificates
4. Go into the Authorities tab
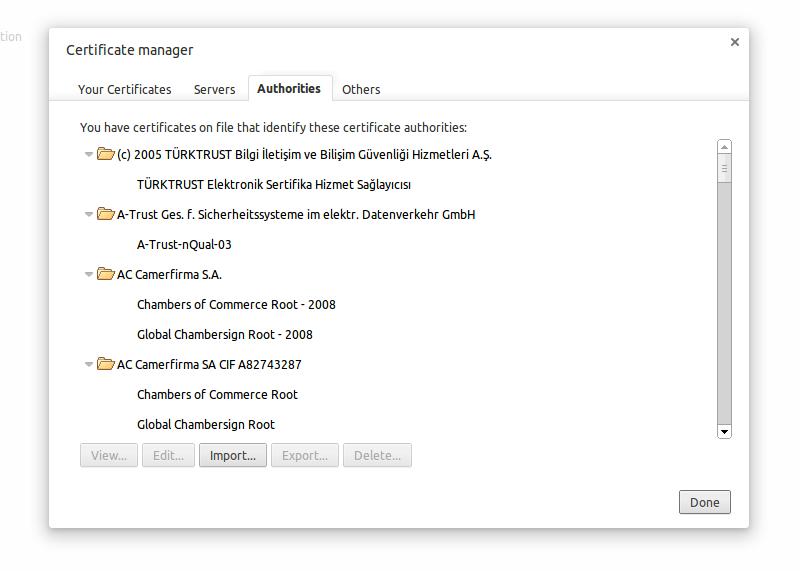
5. Import the certificate
6. Restart Chrome
You should be able to fire requests to the endpoints validated by this certificate. The SSL warning will not show up in Chrome even if you restart the browser. Do make sure that you have verified the IP where the certificate comes from. This should only be done for verified IP addresses. This method also works for certificates for localhost. Make sure that the common name of the certificate while generating the certificate is localhost.
Let me know in the comments if you face any problems with this.

It worked for me on Windows. Thanks for the detailed flow!
but from where i got certificate window.please help me to find .reply as soon as possible
didn’t work for me on Mac 🙁
I have tested it on OS X. Seems to be working perfectly. Make sure you are going through all the steps and you are adding the certificate to the trusted root authority.
I’ve tried on OSX and in Win7. I don’t have the locked lock when I try to https to localhost. I think I must have missed something in your writeup or explanation.
Here’s a nifty idea that I’ve only tested on Windows so far.
1. Go to Settings and add another user: jerome.postman for me.
2. Use the desktop icon that I forgot to tell you to choose previously.
3. Go to the properties of that icon and add to the Target:
“–ignore-certificate-errors”
4. I’ve only done this on that particular Chrome user so the rest of my shortcuts should be fine.
Win7+Chrome worked perfectly the first time.
What exactly is a root url of a browser? https://localhost doesn’t load and I cant see a lock there?
Sorry, I am new here!
Thanks!
What exactly is a root url of a browser? https://localhost doesn’t load and I cant see a lock there?
Sorry, I am new here!
I am trying to access service with pfx file. In soap ui it works but it does not work with postman. Followed mentioned steps of adding pfx to trusted root and tried creation of user with ignore certification error. None of it works. Can you please let me know what maybe wrong
Can you post this issue on Github: https://github.com/postmanlabs/postman-app-support/issues/?
I am using Xubuntu 14.04 and i tried to export the certificate as you have mentioned in the above steps and imported the same in the Google Chrome browser(Version 34.0.1847.132). After the browser restart the Postman app in browser works fine but the packaged app throws 401 error. What could be the issue ?
On Linux, using Chrome UI to import didn’t work for me, but CLI certutil as documented here https://code.google.com/p/chromium/wiki/LinuxCertManagement did the trick.
hi Michael, can you share the trick..?
it’s seems the url you shared has been changed.
Praditha, I haven’t used this in a while so I don’t remember, but I’ve just found that the content of the Chromium Wiki appears to now be in source control, and I believe the equivalent to the linked page is now on: https://cs.chromium.org/chromium/src/docs/linux_cert_management.md?type=cs&q=linux_cert_management.md&sq=package:chromium&l=1 – hope that helps.
This solution doesn’t work.
What about the case when Postman makes a direct connection for Access Token Request. See RFC-6749: http://tools.ietf.org/html/rfc6749#section-4.1.3
In this case if the SSL certificate of OAuth2.0 Provider server is self-signed, then it fails with Error: A website error has occurred. The website administrator has been notified of the issue. Sorry for the temporary inconvenience.
Essentially this URL: https://www.postman.com/oauth2/callback?code=09D7F681C0827BC663D90148DE4EFE8F82F412C2&state=
I believe that the Chrome Postman extension should have an option to specify a workaround so that http://www.getpostman.com knows that the target server is a self-signed certificate.
Worked before. Not working now… Anything changed recently?
Worked before. Now, with chrome v 37 they changed the SSL checking. The CN now HAS TO match the site you visit and there seems to be no option to disable that enduser bs. In my case I got a cert that has no URL CN given, which makes it impossible to postman to work with it. Can’t belive google has not build in an dev option to disable ssl checking for certain sites and / or options to disable some SSL-check options (like CN checking).
BTW maybe interesting for this article: with chrome v 38 there is an experimental flag to “remember” (for some time) the “trust this site anyway” option. However, in my case this dosn’t help: CN will be checked anyway.
What exactly is the root url of a browser?
Sorry, I am new to networking!
@abhinavasthana:disqus meant the root url of the website’s api you are consuming.
So, the example uses their local machine (https://localhost). However, you might be trying to use https://your-website.com/api/endpoint, so you would instead navigate your browser to https://your-website.com/.
This solution is not working…..I followed the following steps but still,I am not able to do the POST request.
Thank you. This resolved the browser cert issues on my Macbook Pro OS X Yosemite 10.4.4.
is there a way by which we can disable the ssl authentication ,
Seems like solution is not working on my MAC .
I am using OS X yosemite 10.10.5
Localhost only solution:
Visit: chrome://flags/
Search for (Ctrl+F, Cmd+F): Allow invalid certificates for resources loaded from localhost
Enable it.
This works well, thank you
not working. worked the first time. But on subsequent tests, i get the same error ‘Could not get any response’
The above mentioned method do not work on linux systems. As Michael Vorburger mentioned in the comment below, need to use a CLI tool as mentioned here: https://chromium.googlesource.com/chromium/src/+/master/docs/linux_cert_management.md.
The command that needs to be executed for self-signed certificates after exporting is
certutil -d sql:$HOME/.pki/nssdb -A -t “P,,” -n -i
I don’t use Postman, but I had a similar issue with Power Query. This was crazy helpful!
Thanks a lot for putting it together.
Decent post! Of course SSL Certificate is a must to provide a beefed up website security for a safe shopping environment & to keep hackers away!
Nice post! This blog provides rightful information on using self-signed SSL certificates with Postman!
Last step fails on Linux for me… Chrome says there’s no issuer certificate in the file.
Working for windows, thanks.
Thanks work for me in Windows 10
i do as said above,but it shows that certification exceed date…how should i do.
how can i change the selected certificate among the list of configured certificates while sending the request.
How do I convert this curl command to postman ?
curl -k -u user:user https://localhost:8089/services/
It’s not working for windows now. I have windows 10 installed and latest Version 84.0.4147.125 (Official Build) (64-bit) for Chrome.
please help asap.
The docs seem to skip a step between installing OpenSSL and then jumps straight to using certificates. I’ve combed the docs for how to generate the certificates, and come up with nothing.
Nothing works on Mac I followed the steps exactly and tried suggestions in the comments like enabling the chrome flag. I’ve moved back to the deprecated Postman Chrome Extension and it just works. Why take something simple and complicate it for local development??